20 Cute Fake Nail Ideas for Fall: Trendy Designs and Colors for 2024
Fall is a season of transformation and what better way to embrace the change than by updating your nail game? From vibrant hues to intricate designs, cute fake nails can make a bold statement. Are you ready to explore the best acrylics, short styles, and trendy colors? Let’s dive into some inspo that will have your nails looking fabulous this fall!
Pink Shimmer Elegance
Pink Shimmer Elegance is all about sophistication with a touch of sparkle. This design features a soft pink base with a delicate shimmer, perfect for any occasion.
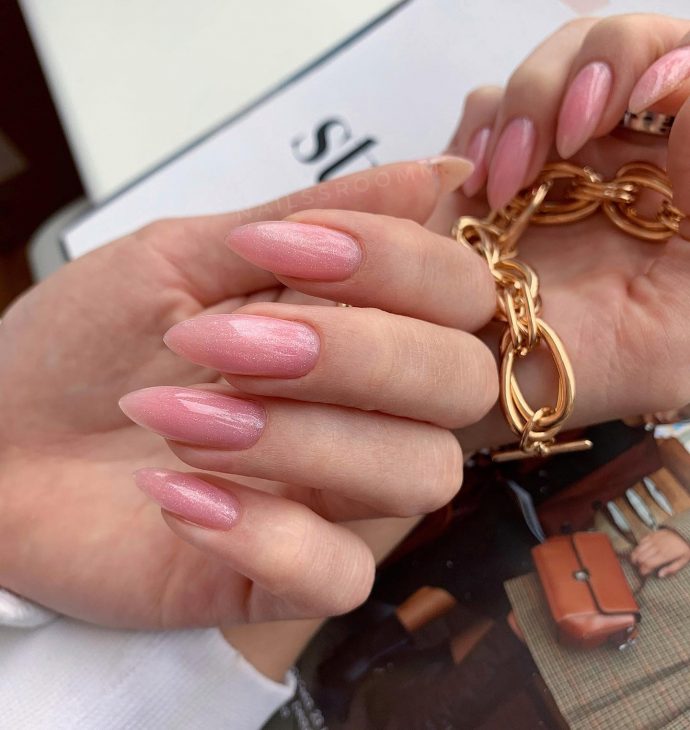
The shimmer in this pink nail design adds a subtle yet glamorous touch. It’s versatile and works well for both casual outings and formal events. The almond shape enhances the elegance, making your fingers look slender and refined.
- Consumables:
- Pink shimmer nail polish (e.g., OPI Infinite Shine in “You’re Blushing Again”)
- Base coat (e.g., Essie First Base)
- Top coat (e.g., Seche Vite Dry Fast Top Coat)
- Nail file and buffer
- Cuticle oil (e.g., CND SolarOil)
- DIY Instructions:
- Start with clean, filed nails and apply a base coat.
- Apply two coats of the pink shimmer nail polish, allowing each layer to dry thoroughly.
- Finish with a top coat for added shine and protection.
- Maintain with cuticle oil to keep your nails healthy and shiny.
Olive and Leafy Chic
Olive and Leafy Chic brings nature to your fingertips with its earthy tones and delicate leaf design.
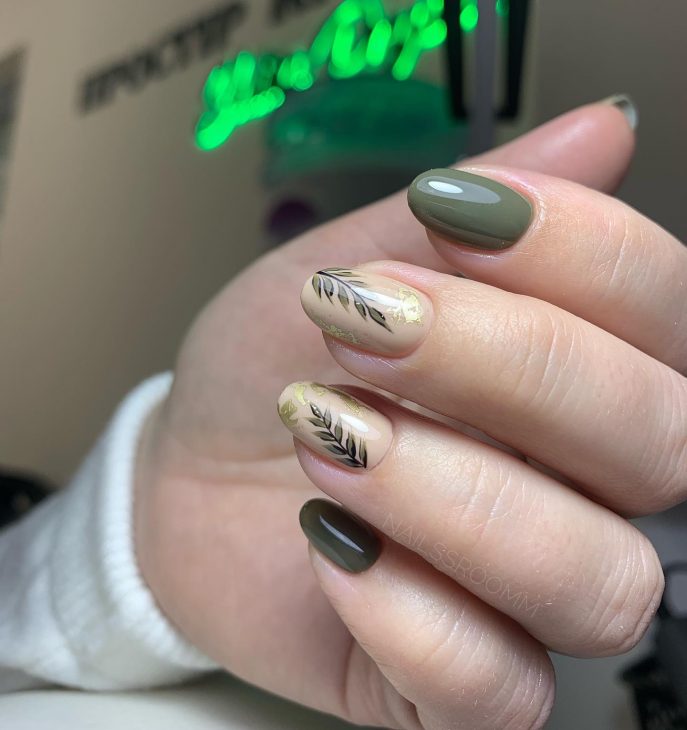
This design is perfect for those who love a natural look with a creative twist. The combination of olive green and nude tones, accented with intricate leaf patterns, creates a harmonious and stylish look.
- Consumables:
- Olive green nail polish (e.g., Essie Expressie in “Taxi Hopping”)
- Nude nail polish (e.g., Sally Hansen Miracle Gel in “Birthday Suit”)
- Nail art brushes or stamping kit
- Black nail art pen (e.g., Sally Hansen I Heart Nail Art Pen)
- Gold foil flakes (optional)
- DIY Instructions:
- Apply a base coat and let it dry.
- Paint the nails with the olive green and nude polishes as shown.
- Use the nail art pen or brushes to draw the leaf patterns on the nude nails.
- Add gold foil flakes for extra glam if desired.
- Seal everything with a top coat.
Classic Red Drama
Classic Red Drama is a timeless choice that never goes out of style. The bold red color exudes confidence and elegance.
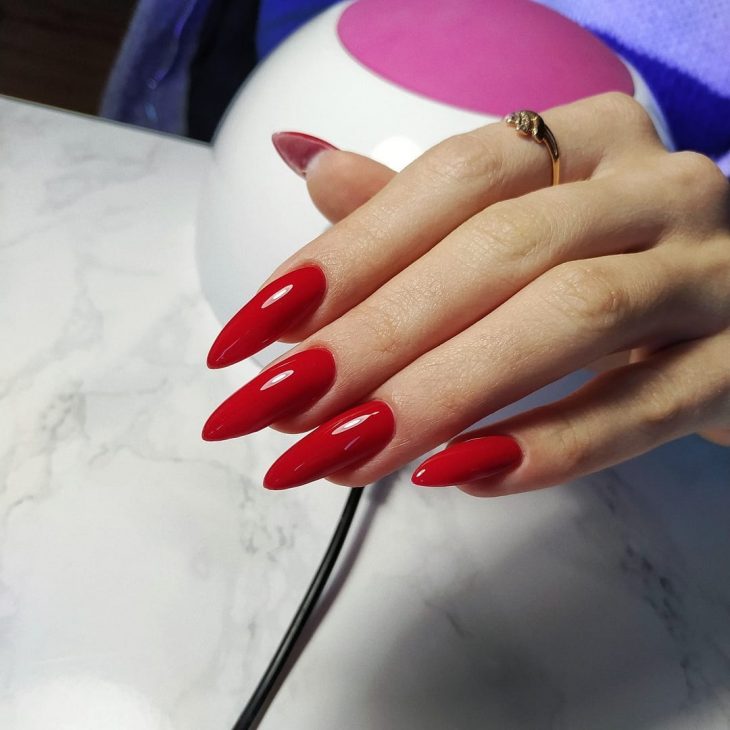
Red nails are a classic for a reason. This vibrant shade is perfect for fall, adding a pop of color that stands out against the season’s muted tones. The stiletto shape adds an edgy vibe to this timeless color.
- Consumables:
- Red nail polish (e.g., Revlon Red)
- Base coat (e.g., Orly Bonder)
- Top coat (e.g., Essie Gel Couture Top Coat)
- Nail file and buffer
- Cuticle oil
- DIY Instructions:
- Prep your nails with a base coat.
- Apply two coats of red nail polish, letting each coat dry completely.
- Apply a top coat to protect the polish and add shine.
- Use cuticle oil regularly to maintain your manicure.
Pastel Paradise
Pastel Paradise combines a mix of pastel colors for a fun and playful look, perfect for the transition from summer to fall.
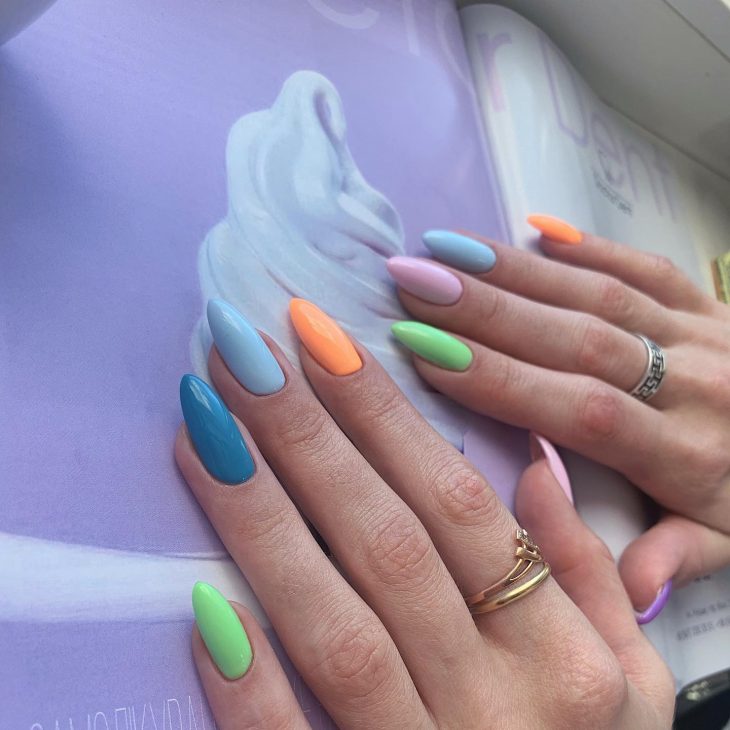
Pastels aren’t just for spring! This design uses soft, eye-catching colors that can brighten up any fall outfit. The mix of shades adds a playful and youthful touch to your nails.
- Consumables:
- Various pastel nail polishes (e.g., Essie’s “Mint Candy Apple”, “Bikini So Teeny”, “Peach Side Babe”)
- Base coat
- Top coat
- Nail file and buffer
- Cuticle oil
- DIY Instructions:
- Apply a base coat to your nails.
- Paint each nail a different pastel color.
- Let the colors dry and then apply a top coat.
- Keep your nails hydrated with cuticle oil.
Bronze Beauty
Bronze Beauty brings warmth to your nails with a stunning metallic bronze shade that’s perfect for fall.
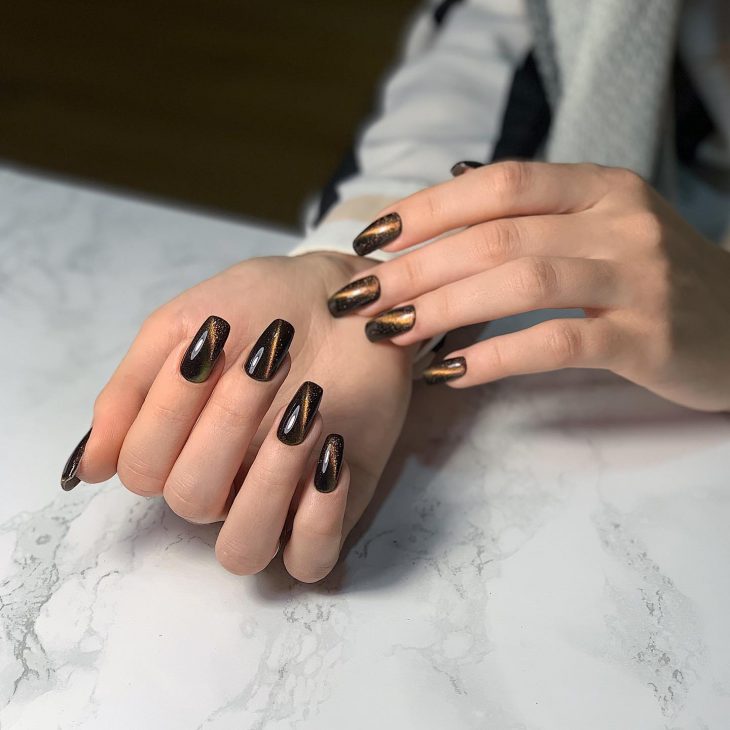
The bronze metallic finish is ideal for autumn. It reflects the season’s warm hues and adds a touch of luxury to your nails. This look is sophisticated and easy to pair with any fall wardrobe.
- Consumables:
- Bronze metallic nail polish (e.g., OPI “Brisbane Bronze”)
- Base coat
- Top coat
- Nail file and buffer
- Cuticle oil
- DIY Instructions:
- Start with a base coat.
- Apply two coats of the bronze metallic polish.
- Use a top coat to seal the color and add shine.
- Regularly use cuticle oil to maintain the health of your nails.
Vibrant Leaf Art
Vibrant Leaf Art features a striking combination of teal, yellow, and nude, accented with delicate leaf designs and gold foil.
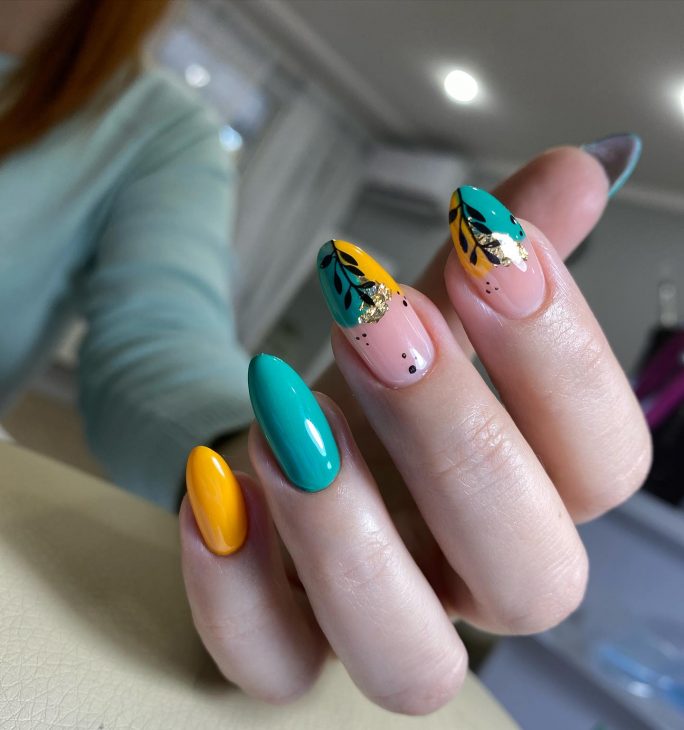
This design is a perfect representation of fall with its rich, vibrant colors and nature-inspired accents. The use of gold foil adds a touch of luxury, making it a standout look for any occasion. The almond shape is flattering and elongates the fingers beautifully.
- Consumables:
- Teal nail polish (e.g., Essie “Turquoise & Caicos”)
- Yellow nail polish (e.g., OPI “Sun, Sea, and Sand in My Pants”)
- Nude nail polish (e.g., Zoya “Barrett”)
- Gold foil flakes
- Nail art brushes or stamping kit
- Black nail art pen
- DIY Instructions:
- Start with a base coat to protect your nails.
- Paint the nails with teal, yellow, and nude polishes as shown.
- Use a black nail art pen to draw the leaf patterns on the nude nails.
- Apply gold foil flakes to add extra shine and dimension.
- Seal everything with a top coat to ensure longevity.
Elegant French with a Twist
Elegant French with a Twist combines the classic French manicure with a modern touch of nail art on the ring finger.
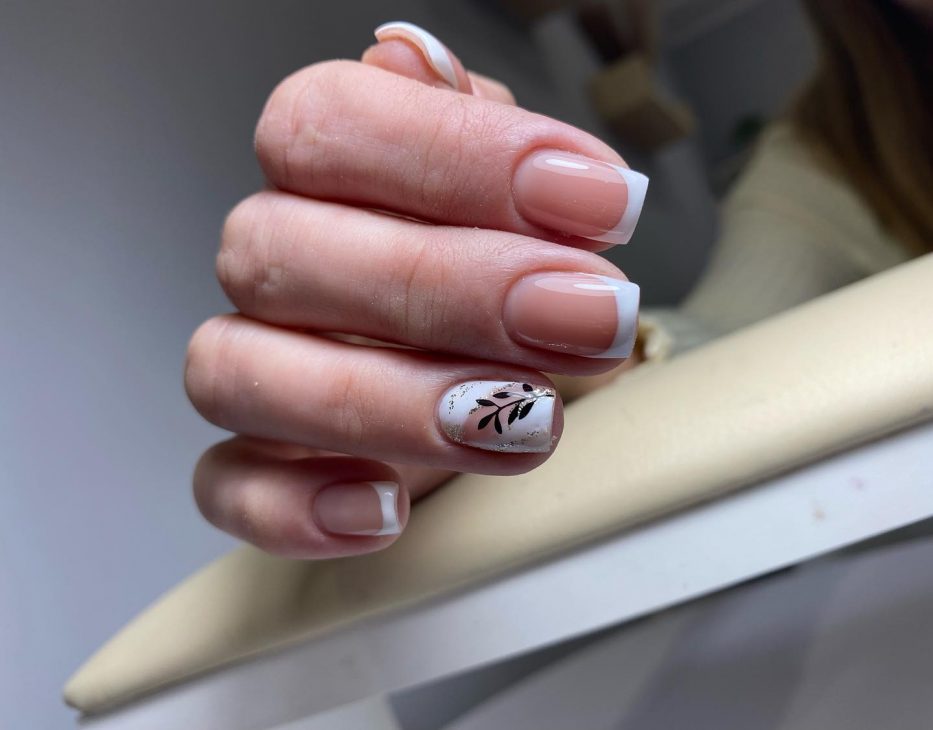
This design offers a sophisticated look with a hint of creativity. The traditional French tips are complemented by a subtle leaf design, making it perfect for both everyday wear and special occasions. The square shape adds a contemporary feel.
- Consumables:
- White nail polish for French tips (e.g., Essie “Blanc”)
- Nude base polish (e.g., OPI “Bubble Bath”)
- Black nail art pen
- Base coat
- Top coat
- DIY Instructions:
- Apply a base coat to clean, filed nails.
- Paint the tips white to create the French manicure look.
- Use a nude base polish on the rest of the nail.
- Add a leaf design on the ring finger with a black nail art pen.
- Finish with a top coat for a glossy finish.
Soft Glitter Glow
Soft Glitter Glow features a delicate, light pink base with a subtle glitter overlay, perfect for a touch of understated glamour.
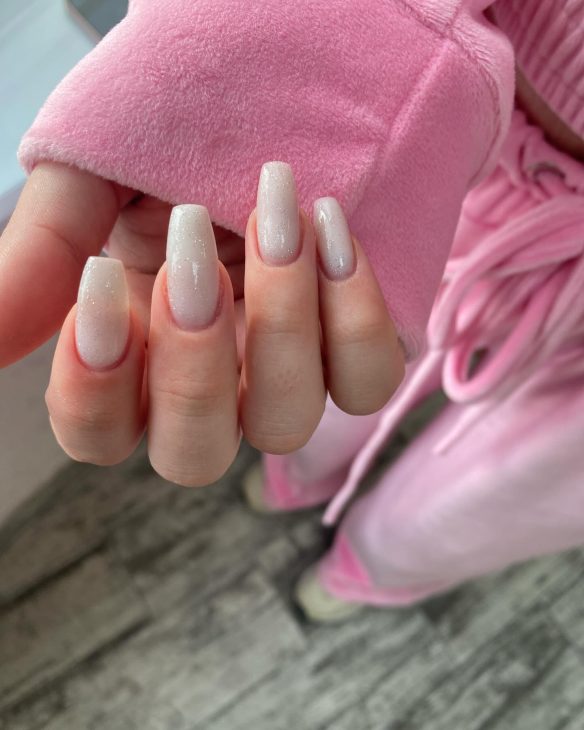
This soft pink glitter design is ideal for those who prefer a more subdued look. The glitter adds just the right amount of sparkle without being overpowering. The square shape is classic and versatile, suitable for any event.
- Consumables:
- Light pink nail polish (e.g., Essie “Ballet Slippers”)
- Glitter top coat (e.g., China Glaze “Fairy Dust”)
- Base coat
- Top coat
- DIY Instructions:
- Begin with a base coat.
- Apply two coats of light pink nail polish.
- Once dry, add a layer of glitter top coat for a subtle shimmer.
- Seal the look with a top coat to protect the glitter.
Maroon and Marble Mix
Maroon and Marble Mix blends deep maroon with a marble accent nail, creating a sophisticated and trendy design.
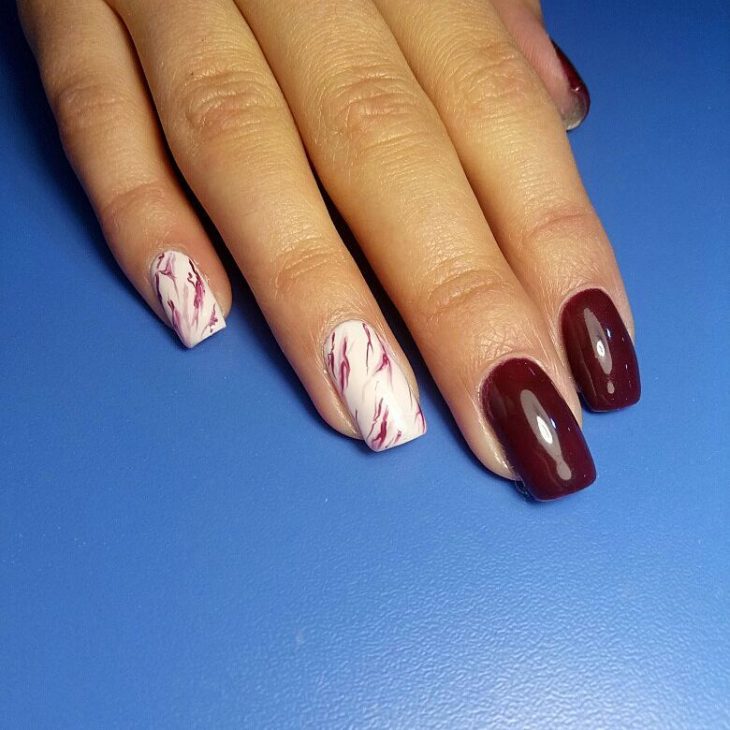
The maroon shade is perfect for fall, exuding warmth and elegance. The marble accent adds a modern twist, making the design unique and eye-catching. This combination is great for both formal and casual settings.
- Consumables:
- Maroon nail polish (e.g., OPI “Malaga Wine”)
- White nail polish for marble effect (e.g., Essie “Blanc”)
- Thin nail art brush or toothpick
- Base coat
- Top coat
- DIY Instructions:
- Apply a base coat.
- Paint most nails with maroon polish, leaving one for the marble effect.
- For the marble nail, start with a white base and use a thin brush to add maroon veining.
- Seal with a top coat to ensure the design lasts.
Minimalist Black Hearts
Minimalist Black Hearts features a soft pink base with tiny black heart and leaf accents, creating a simple yet charming look.
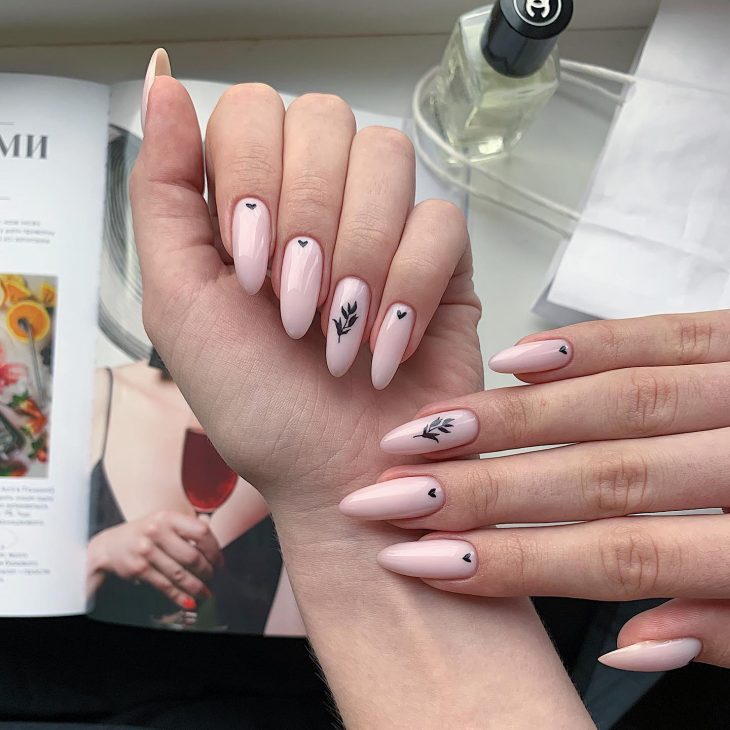
This minimalist design is perfect for those who love a subtle and sweet look. The small black hearts and leaves on a soft pink base are cute and versatile, making it ideal for everyday wear. The almond shape adds elegance to the simplicity.
- Consumables:
- Soft pink nail polish (e.g., OPI “Bubble Bath”)
- Black nail art pen
- Base coat
- Top coat
- DIY Instructions:
- Start with a base coat.
- Apply two coats of soft pink nail polish.
- Use a black nail art pen to draw tiny hearts and leaves on selected nails.
- Finish with a top coat to protect the design.
White and Yellow Leaf Accent
White and Yellow Leaf Accent brings a clean and fresh look with a delicate leaf design on one nail.
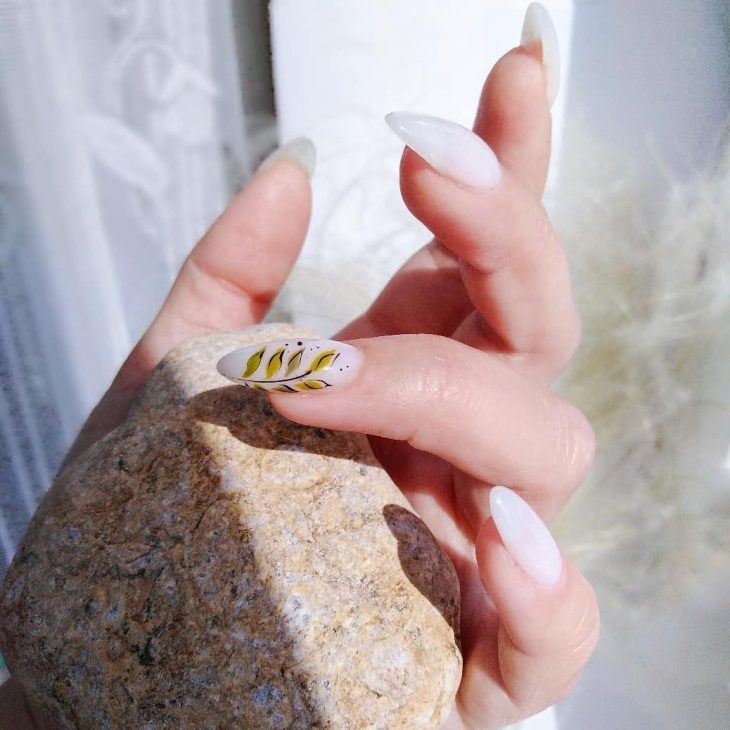
This design is perfect for those who love minimalist styles with a touch of nature. The white base makes the yellow leaf pop, creating a striking yet subtle look. The stiletto shape adds a modern twist to this classic design.
- Consumables:
- White nail polish (e.g., Essie “Blanc”)
- Yellow nail polish for the leaf design (e.g., OPI “Sun, Sea, and Sand in My Pants”)
- Nail art brush or pen
- Base coat
- Top coat
- DIY Instructions:
- Apply a base coat to your nails.
- Paint your nails with white polish and let them dry completely.
- Use a nail art brush to draw the yellow leaf design on the accent nail.
- Finish with a top coat to seal and protect the design.
Elegant Gold Foil Touch
Elegant Gold Foil Touch combines a soft nude base with glamorous gold foil accents, creating a chic and sophisticated look.
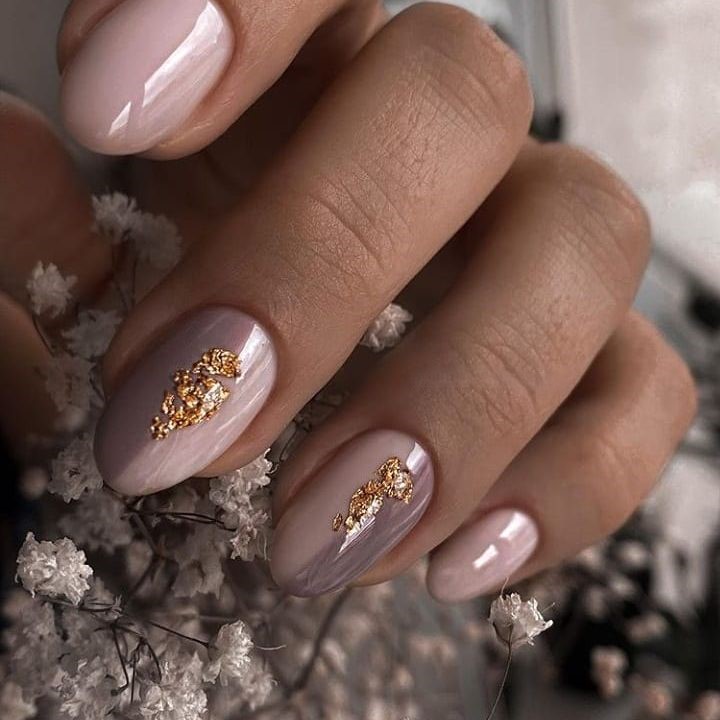
This design is ideal for those who want to add a touch of luxury to their nails. The gold foil against the nude base creates a beautiful contrast that’s both elegant and eye-catching. The oval shape enhances the overall sophistication of the look.
- Consumables:
- Nude nail polish (e.g., OPI “Samoan Sand”)
- Gold foil flakes
- Base coat
- Top coat
- DIY Instructions:
- Start with a base coat.
- Apply two coats of nude polish and let it dry.
- Carefully place gold foil flakes on the accent nails using a tweezer.
- Seal the design with a top coat to ensure the foil stays in place.
Purple and Floral Fusion
Purple and Floral Fusion features a mix of solid purple nails and white nails with delicate floral designs, creating a playful and vibrant look.
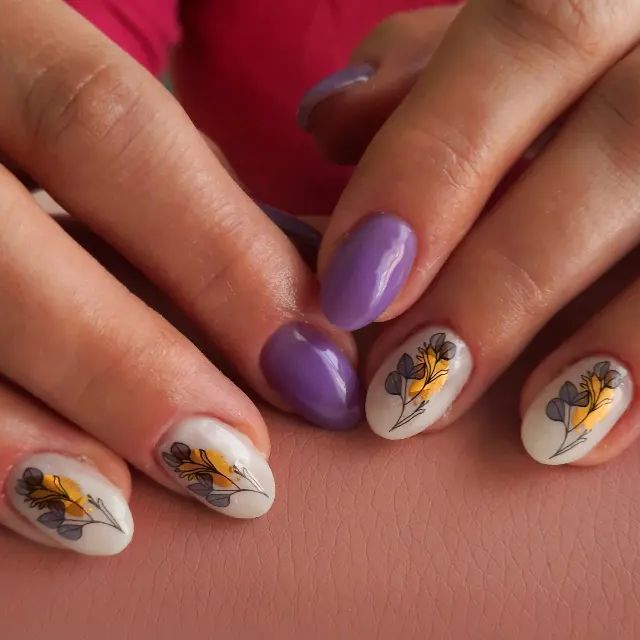
This design is perfect for those who love a mix of bold and delicate elements. The solid purple nails provide a striking contrast to the detailed floral designs on the white nails, making this a standout look for fall.
- Consumables:
- Purple nail polish (e.g., Essie “Play Date”)
- White nail polish (e.g., Sally Hansen “White On”)
- Nail art brushes or decals for floral design
- Base coat
- Top coat
- DIY Instructions:
- Apply a base coat to protect your nails.
- Paint some nails purple and others white.
- Use nail art brushes or decals to create floral designs on the white nails.
- Seal with a top coat to protect the designs and add shine.
Autumn Leaves Design
Autumn Leaves Design captures the essence of fall with a beautiful gradient and detailed leaf art, perfect for the season.
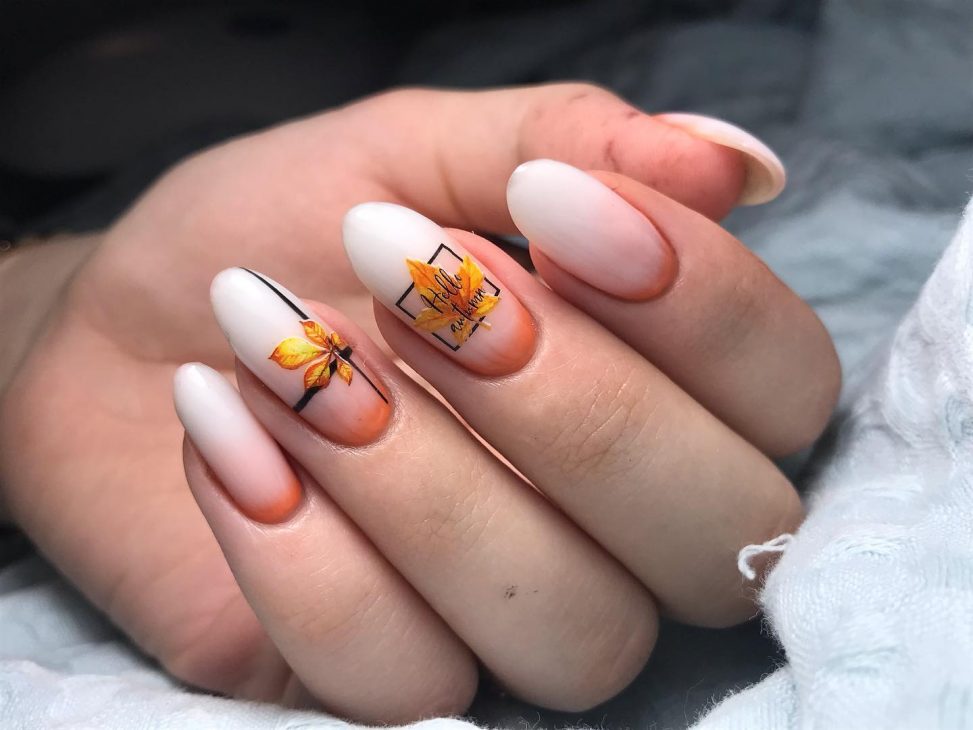
This design beautifully combines a gradient effect with detailed leaf art, creating a stunning visual representation of autumn. The almond shape adds a touch of elegance to the overall look, making it suitable for any fall occasion.
- Consumables:
- White nail polish (e.g., Essie “Blanc”)
- Orange and yellow polishes for gradient (e.g., OPI “Crawfishin’ for a Compliment” and “Sun, Sea, and Sand in My Pants”)
- Nail art brushes for leaf design
- Base coat
- Top coat
- DIY Instructions:
- Start with a base coat.
- Create a gradient effect using white, orange, and yellow polishes.
- Use nail art brushes to draw detailed leaves on the accent nails.
- Seal with a top coat to protect the design.
Sparkling Gold Glam
Sparkling Gold Glam features an all-over gold glitter design, perfect for adding a touch of sparkle to your fall look.
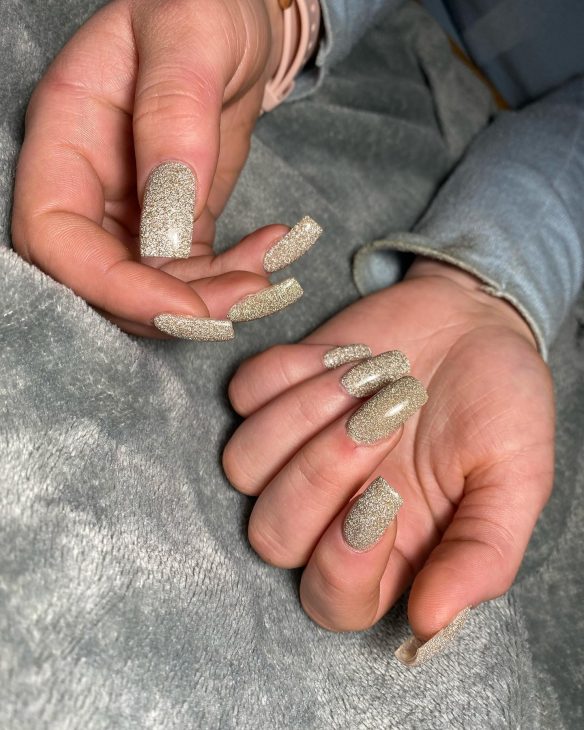
This design is perfect for those who love to shine. The all-over gold glitter is both glamorous and festive, making it ideal for special occasions. The square shape provides a modern and edgy look that complements the sparkling effect.
- Consumables:
- Gold glitter nail polish (e.g., China Glaze “Gold Digger”)
- Base coat
- Top coat
- DIY Instructions:
- Apply a base coat to protect your nails.
- Apply two coats of gold glitter polish, letting each layer dry completely.
- Seal with a top coat to add extra shine and longevity to the design.
Pink Marble Magic
Pink Marble Magic combines soft pink hues with delicate marble accents, creating a look that is both elegant and trendy.
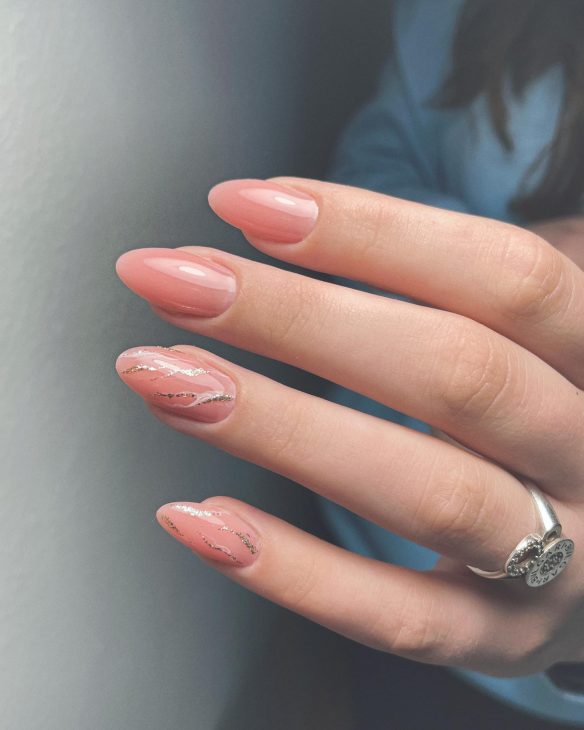
This design is perfect for those who want a subtle yet sophisticated look. The soft pink base is complemented by the marble accents, giving the nails a modern twist. The almond shape adds to the elegance and makes the fingers look slender.
- Consumables:
- Soft pink nail polish (e.g., Essie “Ballet Slippers”)
- White nail polish for marble effect (e.g., OPI “Alpine Snow”)
- Thin nail art brush
- Base coat
- Top coat
- DIY Instructions:
- Start with a base coat.
- Apply two coats of soft pink polish.
- Use a thin brush to create marble-like veins with white polish on a few accent nails.
- Finish with a top coat to seal and protect the design.
Subtle Gold Accents
Subtle Gold Accents showcases a beautiful nude base with delicate gold flakes, perfect for a chic and understated look.
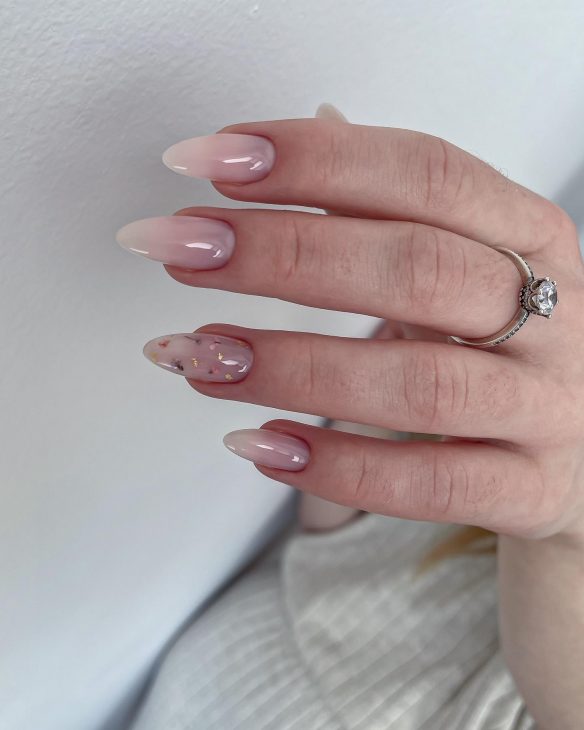
This design is ideal for those who love a minimalist aesthetic with a touch of glam. The nude base is versatile and timeless, while the gold flakes add a hint of luxury without being overwhelming. The almond shape enhances the overall elegance.
- Consumables:
- Nude nail polish (e.g., OPI “Samoan Sand”)
- Gold foil flakes
- Base coat
- Top coat
- DIY Instructions:
- Apply a base coat to your nails.
- Paint your nails with nude polish and let them dry completely.
- Carefully apply gold foil flakes to the accent nails.
- Finish with a top coat to seal and protect the design.
Iridescent Dream
Iridescent Dream features a stunning iridescent finish with sparkling accents, creating a look that is both ethereal and captivating.
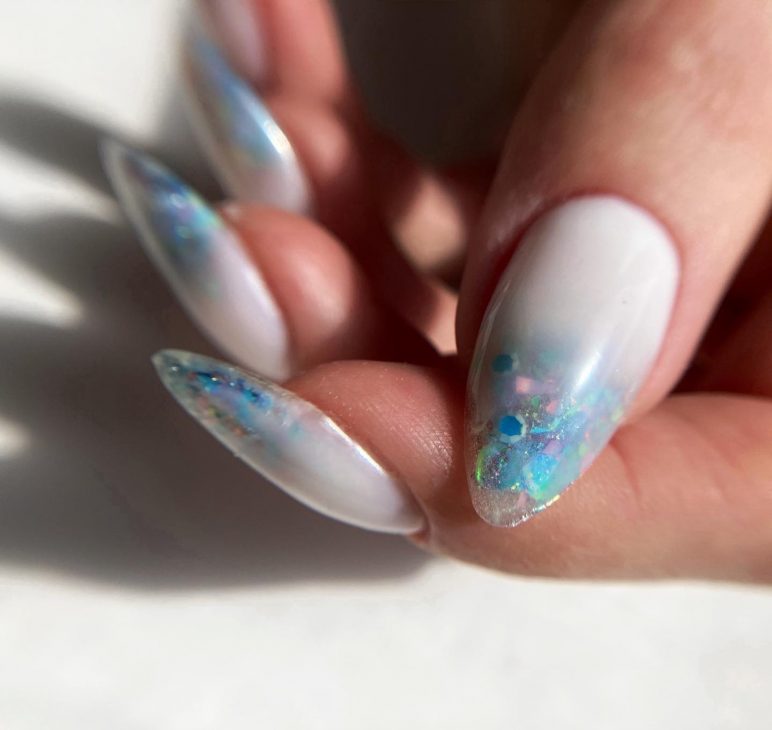
This design is perfect for those who want to stand out. The iridescent finish catches the light beautifully, while the sparkling accents add a magical touch. The stiletto shape adds drama and sophistication to the overall look.
- Consumables:
- Iridescent nail polish (e.g., ILNP “The Magician”)
- Chunky glitter for accents
- Base coat
- Top coat
- DIY Instructions:
- Start with a base coat.
- Apply two coats of iridescent polish.
- Add chunky glitter to the tips for an extra sparkle.
- Seal with a top coat to ensure longevity.
Pink Glitter Elegance
Pink Glitter Elegance combines a soft pink base with sparkling glitter accents, perfect for adding a touch of glamour to your nails.
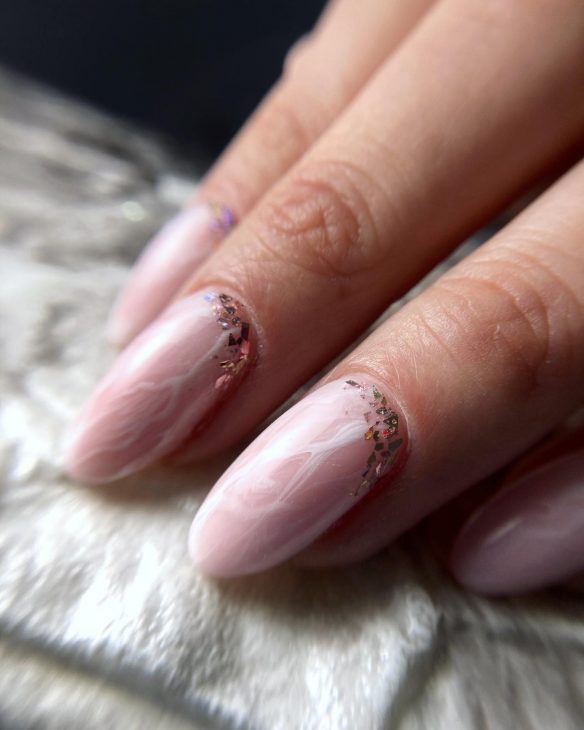
This design is great for those who want to add a bit of sparkle to their look. The soft pink base is elegant and versatile, while the glitter accents add a festive touch. The almond shape adds to the sophistication and elegance.
- Consumables:
- Soft pink nail polish (e.g., Essie “Fiji”)
- Pink glitter polish (e.g., China Glaze “Fairy Dust”)
- Base coat
- Top coat
- DIY Instructions:
- Apply a base coat to your nails.
- Paint your nails with soft pink polish.
- Add a layer of pink glitter polish on a few accent nails.
- Seal with a top coat to protect the design.
Marble and Glitter Combo
Marble and Glitter Combo combines the elegance of marble with the sparkle of glitter, creating a look that is both sophisticated and fun.
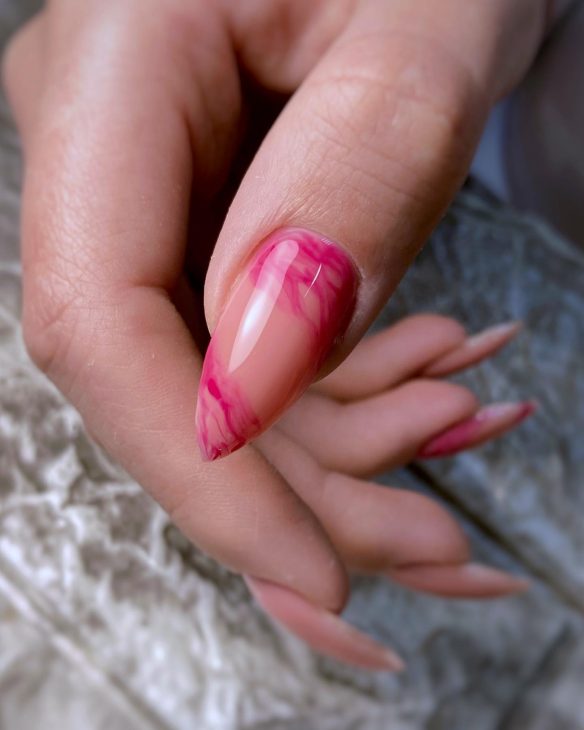
This design is perfect for those who love a mix of classic and trendy elements. The marble effect is timeless and elegant, while the glitter adds a fun and playful touch. The stiletto shape enhances the overall look, making it perfect for any occasion.
- Consumables:
- White nail polish (e.g., Essie “Blanc”)
- Grey polish for marble effect (e.g., OPI “Embrace the Gray”)
- Silver glitter polish (e.g., Zoya “Cosmo”)
- Thin nail art brush
- Base coat
- Top coat
- DIY Instructions:
- Start with a base coat.
- Apply two coats of white polish.
- Use a thin brush to create marble-like veins with grey polish on a few accent nails.
- Add a layer of silver glitter polish to the tips of the nails.
- Finish with a top coat to seal and protect the design.
Save Pin
