20 Stunning Fall Burnt Orange Nail Designs for 2024: Embrace Autumn with Style
When it comes to fall nail trends, burnt orange is the standout color of the season. This rich, warm hue perfectly captures the essence of autumn, bringing to mind cozy sweaters, pumpkin patches, and the beautiful changing leaves. But how do you take this color and make it your own? Let’s explore some of the most captivating fall burnt orange nail designs for 2024.
Vibrant Autumn Leaves
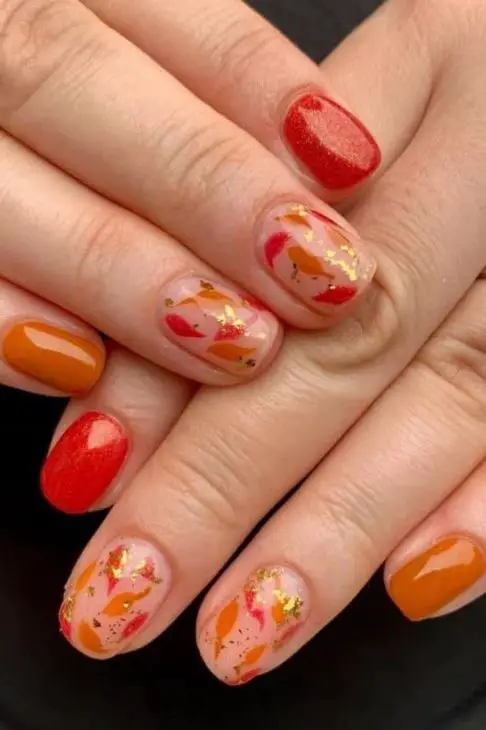
As a professional manicurist, I can tell you that this nail design captures the vibrant beauty of autumn leaves. The burnt orange base is accented with delicate leaf designs in red and gold, adding a touch of shimmer. The short, oval-shaped nails make this design both practical and stylish.
Consumables:
- Burnt orange nail polish (e.g., OPI “It’s a Piazza Cake”)
- Red and gold nail art pens or polish
- Fine detail brush
- Top coat with shimmer
DIY Instructions:
- Apply two coats of burnt orange polish and let it dry.
- Use the red and gold pens to draw leaf shapes on each nail.
- Add a touch of gold glitter to the leaves for a sparkling effect.
- Seal with a shimmer top coat.
Classy Marble Effect
Marble nails never go out of style, and this autumn twist on the classic design is simply stunning. The burnt orange and white marble effect gives a sophisticated look, perfect for any occasion.

Consumables:
- Burnt orange nail polish (e.g., Essie “Playing Koi”)
- White nail polish
- Thin brush or toothpick
- Clear top coat
DIY Instructions:
- Paint your nails with two coats of burnt orange polish.
- While still wet, add a few drops of white polish and swirl with a thin brush to create a marble effect.
- Let it dry completely before applying a clear top coat.
Burnt Orange French Tips
For a chic and modern look, try these burnt orange French tips. This design combines the timeless elegance of French tips with a trendy autumn twist, perfect for those who prefer a minimalist style.

Consumables:
- Nude or clear base polish
- Burnt orange nail polish (e.g., Sally Hansen “Hot Tamale”)
- French tip guides or a steady hand
- Clear top coat
DIY Instructions:
- Apply a nude or clear base coat.
- Use French tip guides to create perfect burnt orange tips.
- Carefully paint the tips and let them dry.
- Finish with a clear top coat for a glossy finish.
Plaid Perfection
Plaid nails scream autumn and this burnt orange plaid design is perfect for cozy fall days. The intricate pattern adds a touch of playfulness and can be customized with other fall colors like olive green or brown.

Consumables:
- Burnt orange nail polish (e.g., Zoya “Autumn”)
- Black and white nail art pens or striping brushes
- Clear top coat
DIY Instructions:
- Paint your nails with two coats of burnt orange polish.
- Use black and white nail art pens to create plaid lines.
- Let the design dry completely before applying a clear top coat.
Burnt Orange and Green Combo
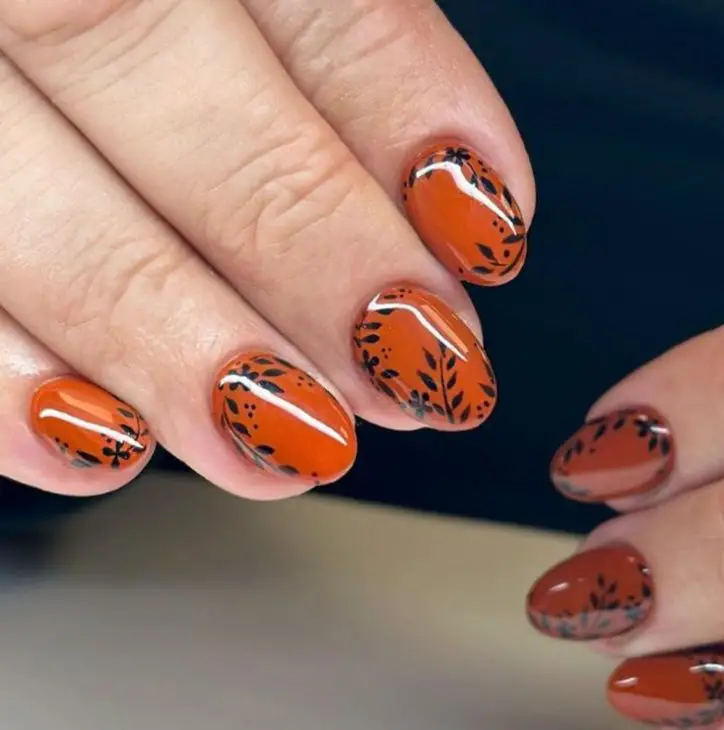
Combining burnt orange with olive green creates a unique and earthy nail design. This combination is perfect for those who love to experiment with colors and want something different for the fall season.
Consumables:
- Burnt orange nail polish (e.g., OPI “It’s a Piazza Cake”)
- Olive green nail polish (e.g., Essie “Sew Psyched”)
- Clear top coat
DIY Instructions:
- Apply burnt orange polish to half of your nails and olive green to the other half.
- Let the polish dry completely.
- Add a clear top coat for a smooth and shiny finish.
Elegant Autumn Mix
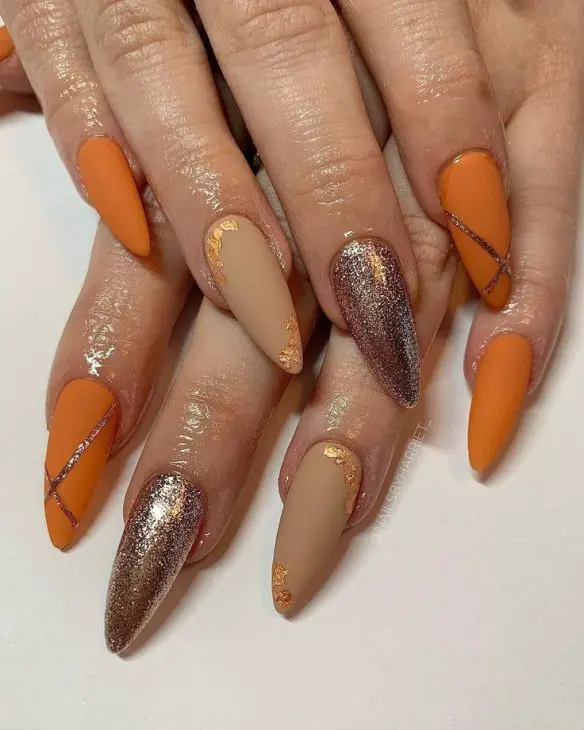
As a professional manicurist, I love the versatility of this nail design. The combination of matte burnt orange, neutral beige, and glittery bronze creates a sophisticated look. The almond-shaped nails are perfect for elongating the fingers, while the gold leaf accents add a touch of luxury.
Consumables:
- Burnt orange nail polish (e.g., Essie “Playing Koi”)
- Beige nail polish (e.g., OPI “Be There in a Prosecco”)
- Bronze glitter polish
- Gold leaf foil
- Clear matte top coat
DIY Instructions:
- Apply two coats of burnt orange polish to some nails and beige to others.
- Add bronze glitter polish to accent nails.
- Apply gold leaf foil to the base of the beige nails using a fine brush.
- Seal everything with a clear matte top coat for a chic finish.
Subtle Marbled Elegance
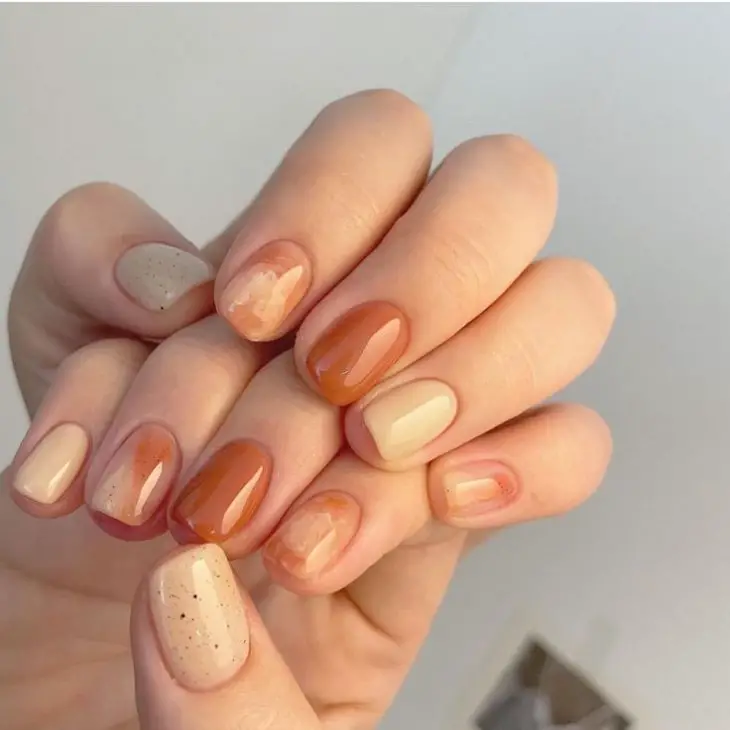
This design is perfect for those who prefer a more understated look. The combination of burnt orange, cream, and marbled effects gives a classy yet subtle appearance. The short, oval nails make it practical for everyday wear.
Consumables:
- Burnt orange nail polish (e.g., Zoya “Autumn”)
- Cream nail polish (e.g., Sally Hansen “Cream of the Crop”)
- Marbling tool or thin brush
- Clear top coat
DIY Instructions:
- Paint your nails with alternating burnt orange and cream polishes.
- Create a marbled effect on some nails by swirling the two colors together with a marbling tool.
- Let the design dry and apply a clear top coat for a polished look.
Golden Accents on Matte Burnt Orange
For a more textured look, this nail design features matte burnt orange with gold foil accents and glitter. The combination of matte and sparkle adds depth and interest to the nails.
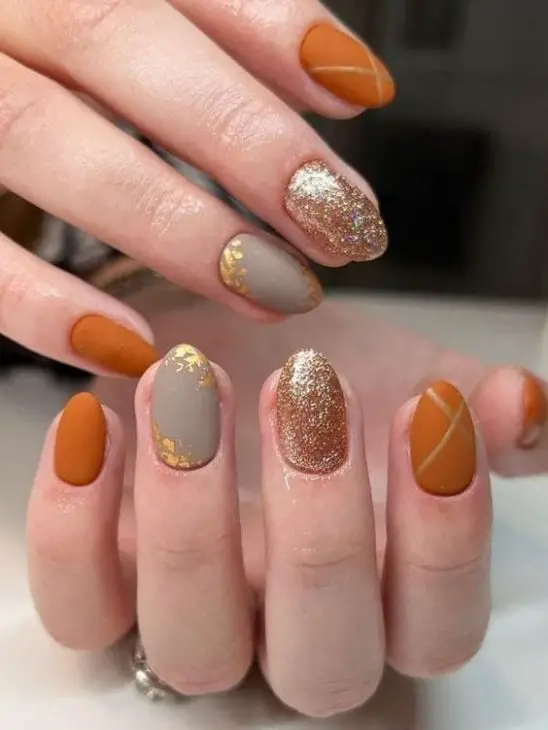
Consumables:
- Burnt orange matte nail polish (e.g., OPI “It’s a Piazza Cake” with a matte top coat)
- Gold glitter polish
- Gold foil flakes
- Clear top coat
DIY Instructions:
- Apply two coats of burnt orange polish and let it dry.
- Add gold foil flakes to the base of some nails.
- Use gold glitter polish on accent nails for extra sparkle.
- Finish with a matte top coat to seal the design.
Autumn Leaf Design
Nothing says autumn like leaves, and this nail design captures the fall spirit perfectly. The burnt orange base is decorated with colorful leaf stickers and a fun “It’s Fall” message, making it a festive choice for the season.
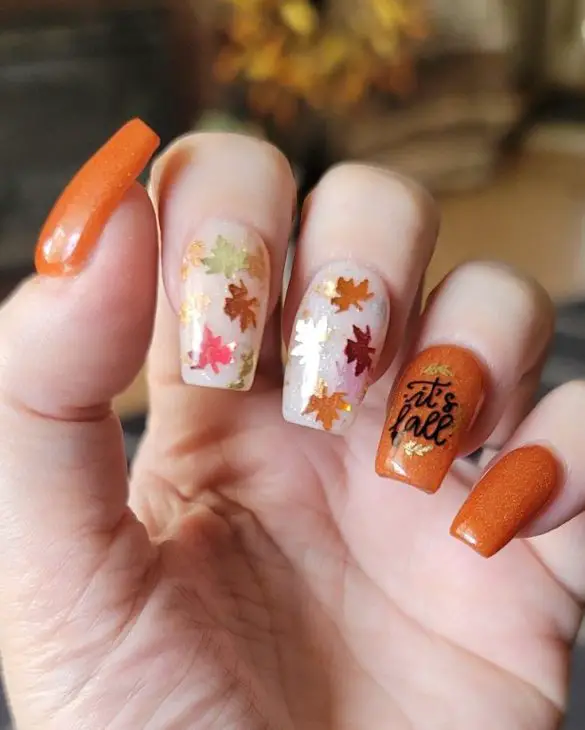
Consumables:
- Burnt orange nail polish (e.g., OPI “It’s a Piazza Cake”)
- Leaf nail stickers or decals
- Clear top coat
DIY Instructions:
- Paint your nails with two coats of burnt orange polish.
- Apply leaf stickers or decals to each nail.
- Add a fun “It’s Fall” message on an accent nail.
- Seal with a clear top coat to ensure the stickers stay in place.
Elegant Burnt Orange French Tips
This design combines the elegance of French tips with a bold burnt orange color. The glittery base adds a touch of glamour, making this look perfect for both everyday wear and special occasions.
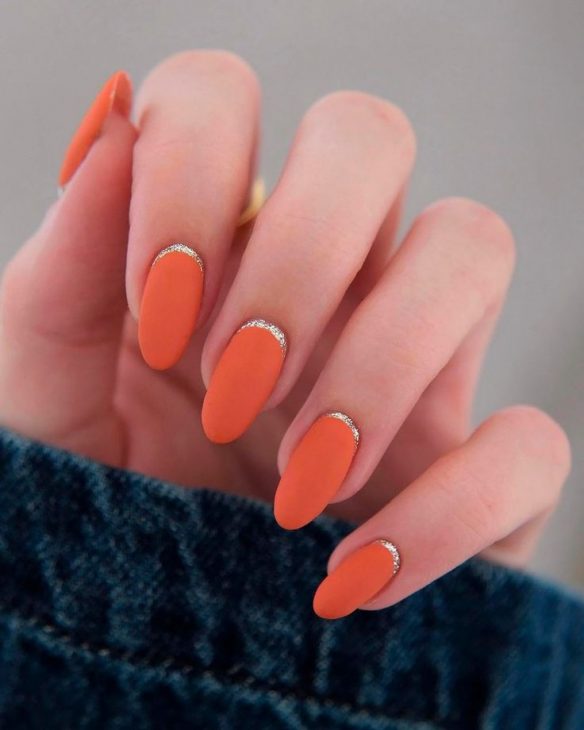
Consumables:
- Burnt orange nail polish (e.g., Essie “Playing Koi”)
- Fine glitter polish
- French tip guides
- Clear top coat
DIY Instructions:
- Apply a fine glitter polish as the base and let it dry.
- Use French tip guides to create burnt orange tips.
- Carefully paint the tips and remove the guides.
- Finish with a clear top coat for a glossy finish.
Autumn Floral Delight
This nail design features a stunning blend of burnt orange and transparent base adorned with delicate white flowers and gold foil. The floral accents give it a soft, feminine touch, making it perfect for autumn.
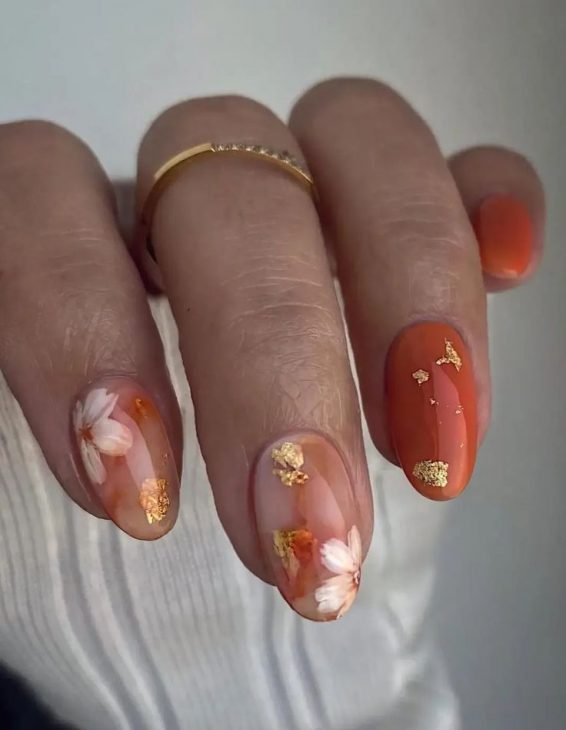
Consumables:
- Burnt orange nail polish (e.g., Essie “Playing Koi”)
- Transparent base polish
- White floral nail stickers or decals
- Gold foil flakes
- Clear top coat
DIY Instructions:
- Apply a transparent base polish and let it dry.
- Use a fine brush to apply burnt orange polish on alternate nails.
- Add white floral stickers or decals to the transparent nails.
- Apply gold foil flakes for added elegance.
- Finish with a clear top coat to seal the design.
Dotted Burnt Orange Elegance
This design combines matte burnt orange with a nude base featuring burnt orange dots and gold leaf accents. The contrast between matte and shine creates a sophisticated and eye-catching look.
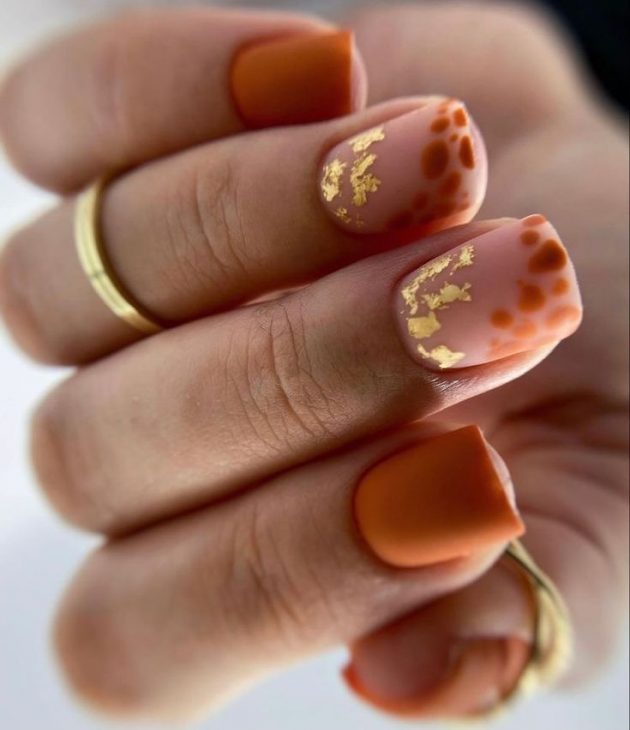
Consumables:
- Matte burnt orange nail polish (e.g., Zoya “Autumn” with a matte top coat)
- Nude base polish
- Burnt orange nail art pen or dotting tool
- Gold leaf foil
- Clear top coat
DIY Instructions:
- Apply nude base polish and let it dry.
- Use a dotting tool to create burnt orange dots on the nude nails.
- Apply matte burnt orange polish to alternate nails.
- Add gold leaf foil for an extra touch of luxury.
- Seal everything with a clear top coat.
Leafy Autumn Charm
This design features a bright burnt orange polish with a single accent nail adorned with autumn leaf stickers. The simplicity of the design makes it both elegant and easy to achieve.
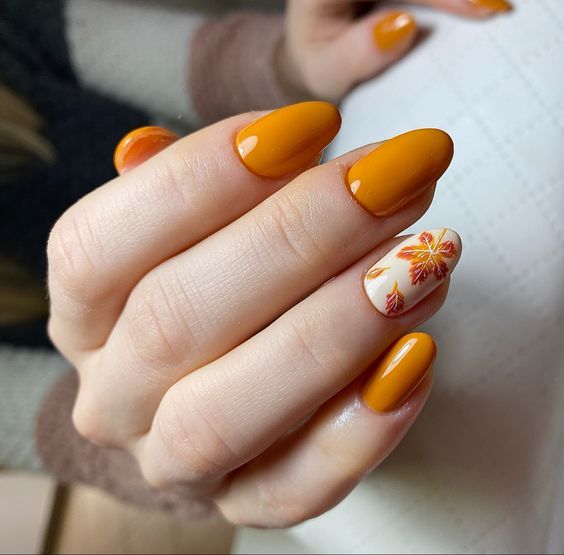
Consumables:
- Bright burnt orange nail polish (e.g., OPI “It’s a Piazza Cake”)
- White nail polish for the accent nail
- Autumn leaf stickers or decals
- Clear top coat
DIY Instructions:
- Paint all nails with bright burnt orange polish except for one accent nail.
- Paint the accent nail with white polish.
- Apply autumn leaf stickers or decals to the white nail.
- Finish with a clear top coat to ensure the stickers stay in place.
Dark Autumn Elegance
This dark brown nail design with autumn leaf accents perfectly captures the essence of fall. The rich brown base makes the bright orange leaves pop, creating a striking contrast.

Consumables:
- Dark brown nail polish (e.g., Essie “Wicked”)
- Autumn leaf stickers or decals
- Clear top coat
DIY Instructions:
- Apply two coats of dark brown nail polish and let it dry.
- Carefully place autumn leaf stickers on each nail.
- Seal with a clear top coat to protect the design and add shine.
Festive Autumn Splendor
This design is a beautiful blend of red and white, featuring intricate autumn leaf art and gold glitter accents. The combination of colors and textures makes it perfect for festive fall occasions.

Consumables:
- Red nail polish (e.g., OPI “Big Apple Red”)
- White nail polish
- Gold glitter polish
- Autumn leaf nail art stickers or decals
- Clear top coat
DIY Instructions:
- Apply white polish to the accent nails and red polish to the rest.
- Use a fine brush to create a gold glitter line on the white nails.
- Apply autumn leaf stickers or decals along the glitter line.
- Finish with a clear top coat to seal and protect the design.
Fiery Fall Elegance
This nail design blends the sophistication of French tips with a fiery burnt orange twist. The nails feature a glossy burnt orange polish, accented with a shimmering metallic finish on one nail and delicate leaf patterns on another. This mix of textures and designs creates a chic and elegant look perfect for any fall occasion.
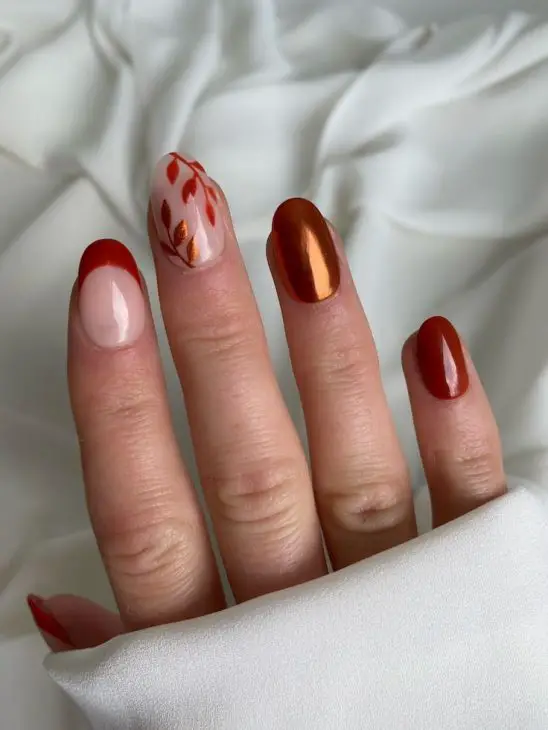
Consumables:
- Burnt orange nail polish (e.g., Essie “Playing Koi”)
- Metallic orange chrome powder
- Leaf nail stickers or decals
- Clear top coat
DIY Instructions:
- Apply two coats of burnt orange polish and let them dry.
- For the metallic nail, rub the chrome powder onto the base polish and seal with a top coat.
- Apply leaf stickers to the accent nail and finish with a clear top coat.
Festive Autumn Colors
This playful nail design features a nude base with splashes of burnt orange, green, and white, creating a colorful autumnal palette. The scattered dots and gold accents add a festive and whimsical touch, perfect for celebrating the fall season.
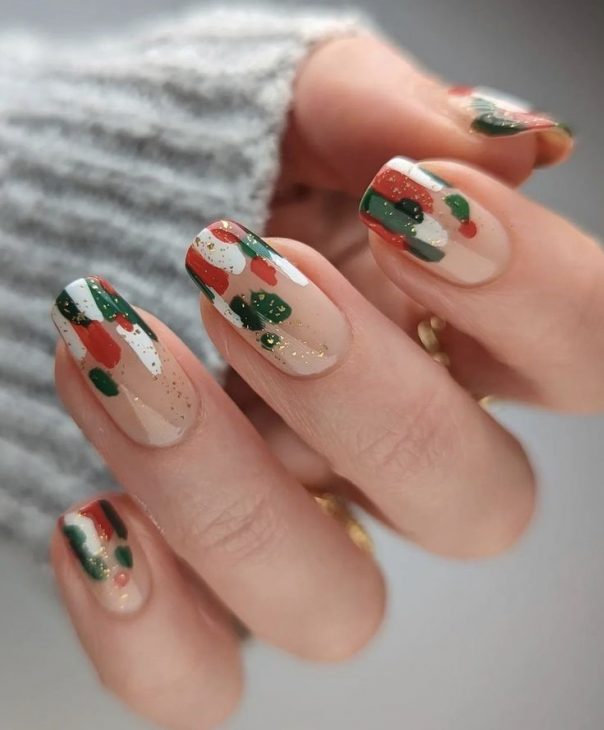
Consumables:
- Nude base polish
- Burnt orange, green, and white nail polish
- Dotting tool or small brush
- Gold glitter polish
- Clear top coat
DIY Instructions:
- Apply a nude base polish and let it dry.
- Use a dotting tool to create scattered dots with burnt orange, green, and white polish.
- Add gold glitter accents for extra sparkle.
- Finish with a clear top coat to seal the design.
Classic Autumn Leaves
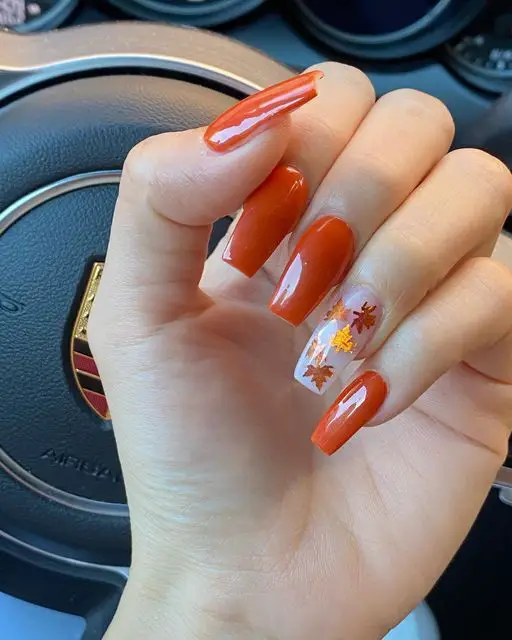
This design showcases a classic autumn look with burnt orange nails accented by a single nail featuring autumn leaf stickers. The glossy finish adds a polished touch, making it a simple yet elegant choice for the season.
Consumables:
- Burnt orange nail polish (e.g., OPI “It’s a Piazza Cake”)
- Transparent base polish for the accent nail
- Autumn leaf stickers or decals
- Clear top coat
DIY Instructions:
- Apply burnt orange polish to all nails except one accent nail.
- Paint the accent nail with a transparent base polish.
- Apply autumn leaf stickers to the accent nail.
- Seal with a clear top coat for a glossy finish.
Peachy Marble Delight
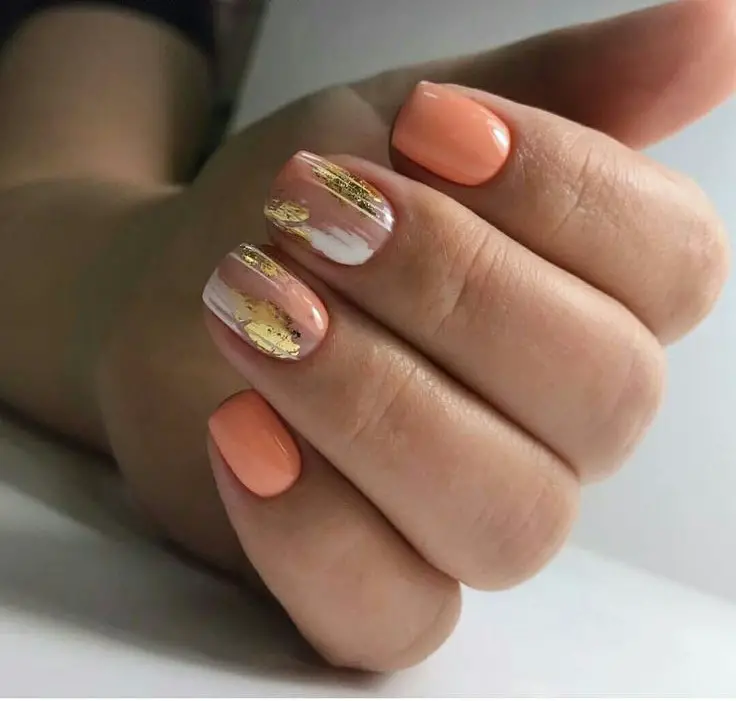
This design features a soft peachy orange polish combined with marble accents and gold leaf. The marble effect on the accent nails adds a luxurious touch, while the gold leaf enhances the overall elegance.
Consumables:
- Peachy orange nail polish (e.g., Sally Hansen “Peach of Cake”)
- White nail polish for marbling
- Gold leaf foil
- Clear top coat
DIY Instructions:
- Apply peachy orange polish to most nails and let them dry.
- On the accent nails, create a marbled effect by swirling white polish with the peachy orange using a thin brush.
- Add gold leaf flakes for a touch of luxury.
- Finish with a clear top coat to seal the design.
Autumn Floral Fantasy
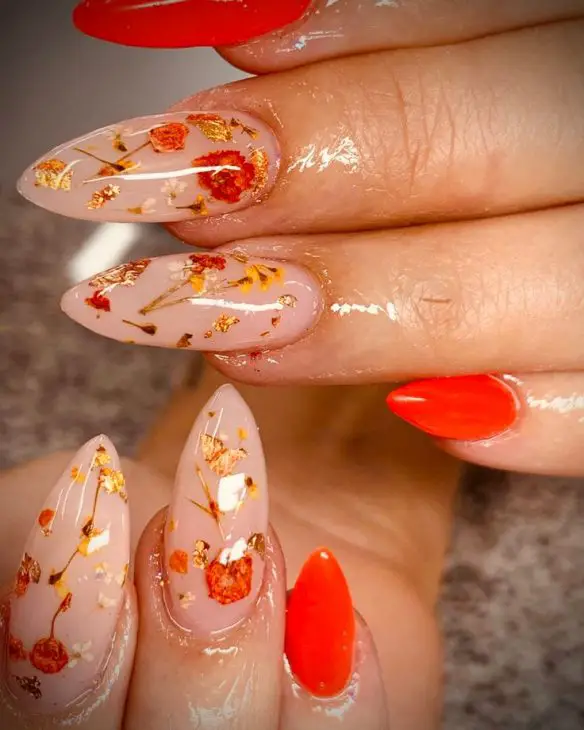
This enchanting design features a nude base with pressed floral accents and a pop of bright burnt orange. The combination of real flowers and gold flakes creates a unique and captivating look that celebrates the beauty of autumn.
Consumables:
- Burnt orange nail polish (e.g., OPI “It’s a Piazza Cake”)
- Nude base polish
- Pressed flower nail art
- Gold leaf flakes
- Clear top coat
DIY Instructions:
- Apply a nude base polish to most nails and burnt orange to the others.
- Carefully place pressed flowers and gold leaf flakes onto the nude nails.
- Seal with a clear top coat to ensure the floral accents stay in place.
Save Pin

