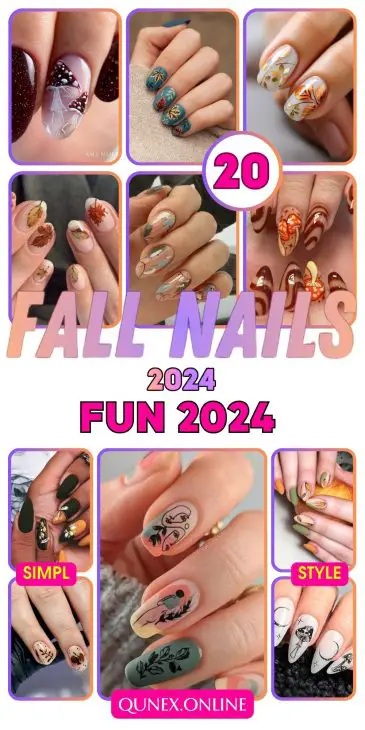
20 Trendy Fun Fall Nail Ideas for 2024: From Acrylic to Short, Almond, and Coffin Designs
Fall is just around the corner, and it’s the perfect time to update your nail game with some fun and trendy designs. Whether you prefer short nails, acrylics, or natural nails, this season has something for everyone. In this article, I’ll share some fabulous nail ideas that are sure to make your fall manicure stand out. From almond-shaped nails to coffin styles, and even fun designs for kids, there’s a look for everyone. So, let’s dive into these exciting fun fall nails for 2024!
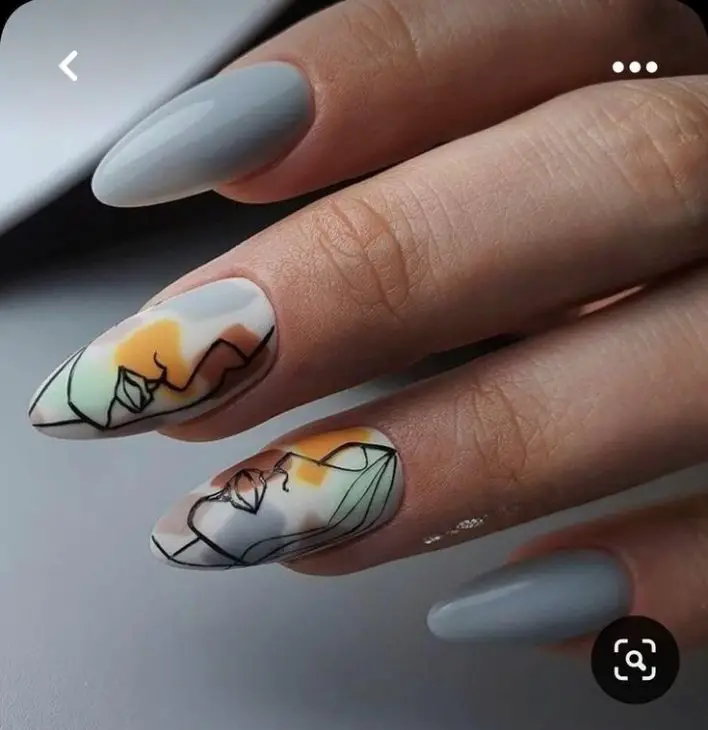
Sage Green and Mustard Floral Design
As a professional manicurist, I find the combination of sage green and mustard yellow incredibly refreshing for fall. This nail design features a matte finish, which gives it a sophisticated edge. The floral accents on a mustard base add a playful yet elegant touch, perfect for those who love a bit of art on their nails.
Consumables:
-
- Sage Green Matte Nail Polish (e.g., OPI Nature Strong)
- Mustard Yellow Matte Nail Polish (e.g., Essie Fall for NYC)
- Fine Detail Brush (e.g., Winstonia Nail Art Brushes)
- Floral Nail Stickers or Stamps
- Matte Top Coat (e.g., Sally Hansen Big Matte Top Coat)
- DIY Instructions:
- Start with clean, shaped nails. Apply a base coat.
- Paint two nails with sage green and the other three with mustard yellow.
- Use a fine detail brush to paint floral designs on the mustard nails or apply floral nail stickers.
- Seal the design with a matte top coat.
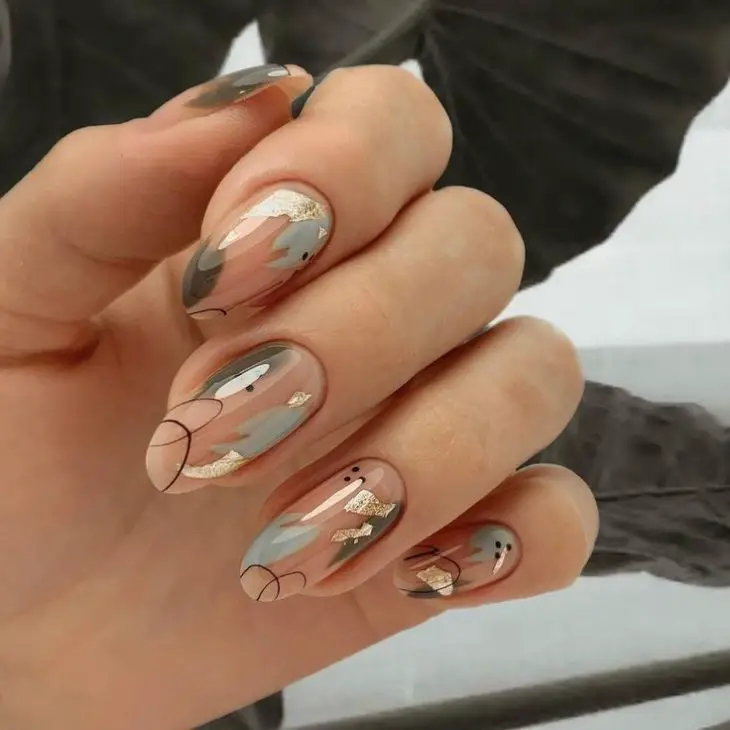
Modern Abstract Art
This modern abstract art design is a fun and creative way to embrace fall colors. The use of maroon, green, and beige in geometric patterns creates a visually appealing look. The matte finish gives it a contemporary touch that’s perfect for both short and long nails.
Consumables:
-
- Maroon Matte Nail Polish (e.g., Zoya Spencer)
- Green Matte Nail Polish (e.g., Essie Sweater Weather)
- Beige Matte Nail Polish (e.g., OPI Samoan Sand)
- Striping Tape (e.g., Orly Instant Artist)
- Matte Top Coat
- DIY Instructions:
- Apply a base coat to protect your nails.
- Paint each nail with the base color of your choice (maroon, green, or beige).
- Use striping tape to create geometric patterns and paint over them with contrasting colors.
- Remove the tape carefully and finish with a matte top coat.
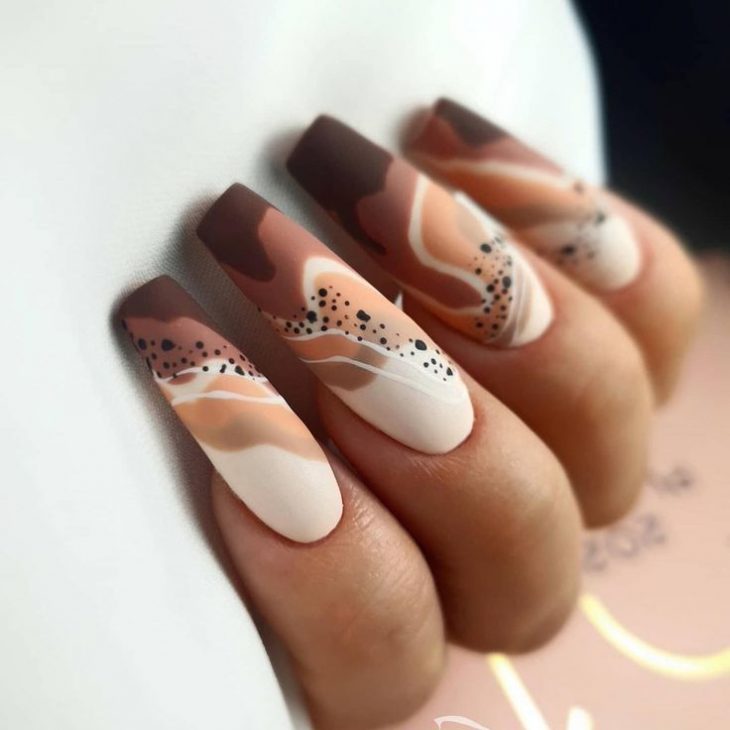
Earthy Tones and Abstract Waves
The earthy tones and abstract wave design are perfect for those who love a blend of simplicity and creativity. The combination of browns, tans, and whites with black dots adds depth and interest to the nails, making it a versatile look for fall.
Consumables:
-
- Brown Nail Polish (e.g., Essie Chocolat)
- Tan Nail Polish (e.g., OPI Beige of Reason)
- White Nail Polish (e.g., Zoya Purity)
- Black Nail Art Pen (e.g., Sally Hansen I Heart Nail Art Pen)
- Fine Detail Brush
- Matte Top Coat
- DIY Instructions:
- Prep your nails with a base coat.
- Paint your nails with a white base color.
- Using a fine detail brush, create wave patterns with brown and tan polishes.
- Add black dots with a nail art pen for extra detail.
- Seal the design with a matte top coat.
Neutral Tones with Gold Accents
This neutral tone design with gold accents is perfect for those who prefer a minimalist yet chic look. The mix of gray, beige, and gold foil creates a sophisticated and elegant manicure that’s perfect for any occasion.

Consumables:
-
- Gray Nail Polish (e.g., OPI Suzi Takes the Wheel)
- Beige Nail Polish (e.g., Essie Sand Tropez)
- Gold Foil (e.g., Born Pretty Gold Foil Flakes)
- Clear Top Coat (e.g., Seche Vite)
- DIY Instructions:
- Apply a base coat to your nails.
- Paint your nails with gray and beige polishes.
- Apply gold foil to the tips or as accents on the nails.
- Seal the design with a clear top coat to keep the foil in place.
Artistic Faces Design
For a truly unique and artistic look, this design featuring abstract faces is a showstopper. The blend of pastel colors and fine line art makes it a standout choice for those who love a bit of artistic flair on their nails.

Consumables:
-
- Light Gray Nail Polish (e.g., OPI It’s a Boy!)
- White Nail Polish (e.g., Zoya Purity)
- Black Nail Art Pen
- Fine Detail Brush
- Clear Top Coat
- DIY Instructions:
- Start with a base coat to protect your nails.
- Paint your nails with a light gray base color.
- Using a black nail art pen or fine detail brush, draw abstract faces on your nails.
- Add pastel accents with small brushes.
- Finish with a clear top coat to protect the design.
Bold Black and Mustard Floral Design
As a professional manicurist, I adore the striking contrast between black and mustard yellow in this nail design. The matte finish enhances the boldness, while the floral accents on the mustard nails add a touch of elegance and fun. This design is perfect for those who love a statement look with a hint of autumn charm.

Consumables:
-
- Black Matte Nail Polish (e.g., Zoya Willa)
- Mustard Yellow Matte Nail Polish (e.g., Essie Fall for NYC)
- Fine Detail Brush (e.g., Winstonia Nail Art Brushes)
- Floral Nail Stickers or Stamps
- Matte Top Coat (e.g., Sally Hansen Big Matte Top Coat)
- DIY Instructions:
- Begin with a base coat to protect your nails.
- Paint two nails with black and the others with mustard yellow.
- Use a fine detail brush to paint floral designs on the mustard nails or apply floral nail stickers.
- Seal the design with a matte top coat for a chic finish.
Rustic Orange and Glitter
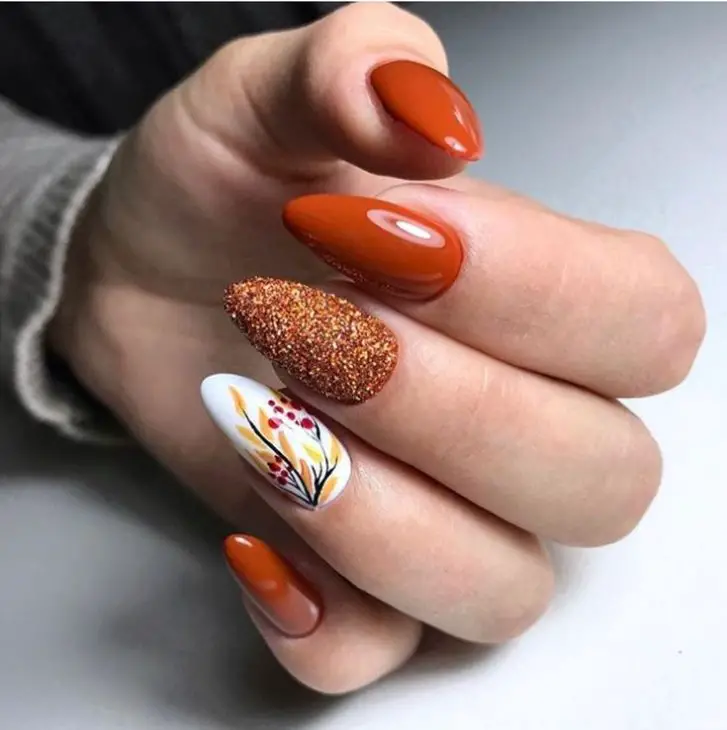
This rustic orange and glitter design is a delightful blend of simplicity and sparkle. The glossy orange polish paired with the glittery accent nail creates a fun and festive look perfect for fall. The floral accent on the white nail adds an extra touch of creativity and elegance.
Consumables:
-
- Orange Nail Polish (e.g., OPI It’s a Piazza Cake)
- White Nail Polish (e.g., Zoya Purity)
- Orange Glitter Nail Polish (e.g., China Glaze I Herd That)
- Floral Nail Stickers or Stamps
- Clear Top Coat (e.g., Seche Vite)
- DIY Instructions:
- Apply a base coat to your nails.
- Paint your nails with orange polish, leaving one nail for the white base.
- Apply orange glitter polish to the accent nail.
- Use floral stickers or stamps on the white nail.
- Seal the design with a clear top coat for a glossy finish.
Sunset Inspired Design
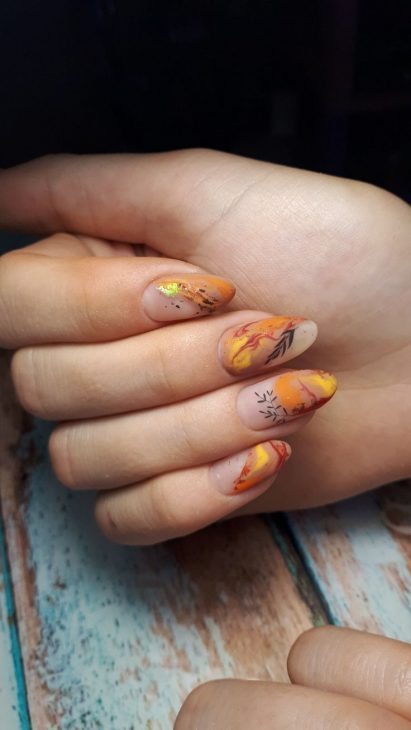
This sunset-inspired nail design captures the warm and vibrant colors of fall. The blend of oranges, yellows, and subtle hints of gold create a stunning and unique manicure. The leaf accents add a touch of nature, making it perfect for the autumn season.
Consumables:
-
- Orange Nail Polish (e.g., Essie Playing Koi)
- Yellow Nail Polish (e.g., OPI Exotic Birds Do Not Tweet)
- Gold Foil or Glitter (e.g., Born Pretty Gold Foil Flakes)
- Fine Detail Brush
- Clear Top Coat
- DIY Instructions:
- Start with a base coat to protect your nails.
- Paint your nails with a blend of orange and yellow polishes to create a gradient effect.
- Use a fine detail brush to add leaf accents with gold foil or glitter.
- Finish with a clear top coat to secure the design.
Pastel Leaves Design
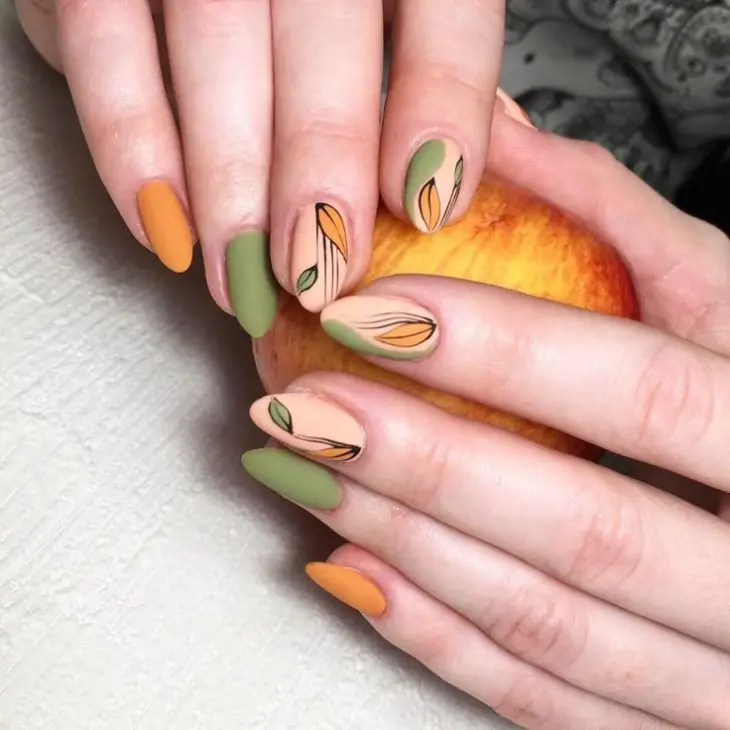
This pastel leaves design is a beautiful and subtle take on fall nails. The combination of sage green, peach, and mustard yellow creates a soft and elegant look. The delicate leaf patterns add a touch of nature, making it a perfect choice for those who prefer a more understated yet stylish manicure.
Consumables:
-
- Sage Green Nail Polish (e.g., Essie Sage You Love Me)
- Peach Nail Polish (e.g., OPI Crawfishin’ for a Compliment)
- Mustard Yellow Nail Polish (e.g., Essie Fall for NYC)
- Fine Detail Brush (e.g., Winstonia Nail Art Brushes)
- Clear Top Coat (e.g., Seche Vite)
- DIY Instructions:
- Apply a base coat to your nails.
- Paint your nails with sage green, peach, and mustard yellow polishes.
- Use a fine detail brush to paint delicate leaf patterns.
- Seal the design with a clear top coat.
Autumn Leaves on Teal
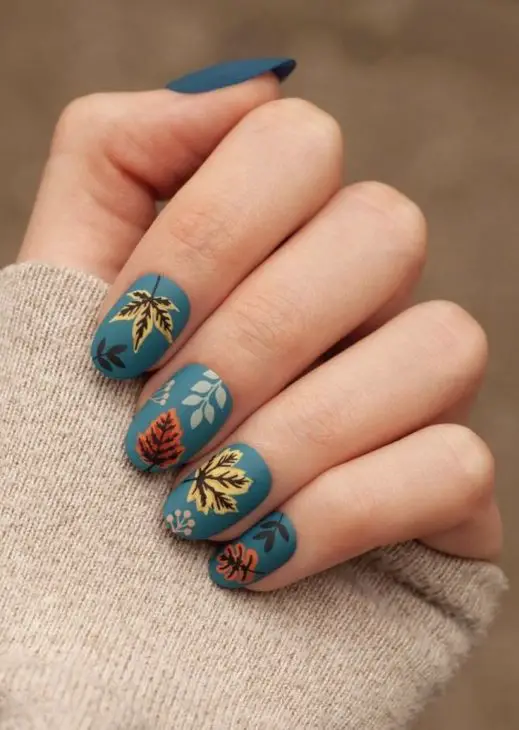
This autumn leaves design on a teal base is a striking and vibrant look for fall. The combination of teal and multicolored leaves creates a bold and festive manicure. The matte finish adds a modern touch, making it a perfect choice for those who love to experiment with colors and designs.
Consumables:
-
- Teal Matte Nail Polish (e.g., OPI Suzi Says Feng Shui)
- Nail Art Pens in Various Colors (e.g., Sally Hansen I Heart Nail Art Pens)
- Fine Detail Brush
- Matte Top Coat
- DIY Instructions:
- Start with a base coat to protect your nails.
- Paint your nails with teal polish and let them dry.
- Use nail art pens or a fine detail brush to draw multicolored leaves.
- Finish with a matte top coat to complete the look.
Fox and Leaf Design
This adorable fox and leaf design is perfect for fall and a great choice for those who love a bit of whimsy in their manicure. The soft, earthy tones of brown, green, and yellow create a cozy autumn feel. The cute fox face on the middle nail adds a playful touch, making it an ideal design for both adults and kids.

Consumables:
-
- Nude Base Coat (e.g., OPI Bubble Bath)
- Brown Nail Polish (e.g., Essie Partner in Crime)
- Green Nail Polish (e.g., Zoya Tiana)
- Yellow Nail Polish (e.g., OPI Exotic Birds Do Not Tweet)
- Fine Detail Brush (e.g., Winstonia Nail Art Brushes)
- Clear Top Coat (e.g., Seche Vite)
- DIY Instructions:
- Start with a nude base coat on all nails.
- Paint the fox face and leaves using brown, green, and yellow polishes with a fine detail brush.
- Add details like the fox’s eyes and nose using a tiny brush.
- Finish with a clear top coat to protect the design.
Pastel Abstract and Botanical Art
This pastel abstract design combined with botanical art is a stunning and modern take on fall nails. The soft shades of pink, green, and beige provide a gentle backdrop for the intricate black line art. This design is both sophisticated and trendy, making it perfect for anyone looking to make a stylish statement.

Consumables:
-
- Pastel Pink Nail Polish (e.g., OPI Pink-ing of You)
- Pastel Green Nail Polish (e.g., Essie Mint Candy Apple)
- Beige Nail Polish (e.g., Zoya Avery)
- Black Nail Art Pen (e.g., Sally Hansen I Heart Nail Art Pen)
- Clear Top Coat
- DIY Instructions:
- Apply pastel pink, green, and beige polishes as a base.
- Use a black nail art pen to draw abstract faces and botanical elements.
- Finish with a clear top coat to seal the design and add shine.
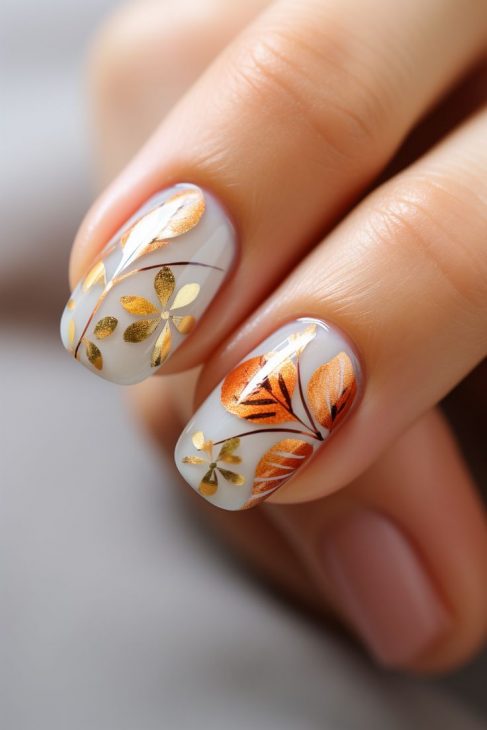
Golden Autumn Leaves
The golden autumn leaves design is a luxurious and elegant option for fall. The combination of gold and copper leaves on a nude base creates a warm and rich look. This manicure is perfect for special occasions or whenever you want to add a touch of glamour to your nails.
Consumables:
-
- Nude Base Coat (e.g., OPI Samoan Sand)
- Gold Nail Polish (e.g., Essie Good as Gold)
- Copper Nail Polish (e.g., China Glaze Harvest Moon)
- Fine Detail Brush (e.g., Winstonia Nail Art Brushes)
- Clear Top Coat
- DIY Instructions:
- Start with a nude base coat.
- Paint golden and copper leaves using a fine detail brush.
- Add fine details to the leaves to make them stand out.
- Seal the design with a clear top coat for a glossy finish.
Delicate Fall Leaves
This delicate fall leaves design is perfect for those who love a subtle yet seasonal look. The nude base with intricate orange, yellow, and green leaves creates a beautiful and understated manicure. The simplicity of this design makes it versatile and suitable for any occasion.

Consumables:
-
- Nude Base Coat (e.g., Essie Ballet Slippers)
- Orange Nail Polish (e.g., OPI It’s a Piazza Cake)
- Yellow Nail Polish (e.g., Essie Sunny Business)
- Green Nail Polish (e.g., Zoya Tiana)
- Fine Detail Brush (e.g., Winstonia Nail Art Brushes)
- Clear Top Coat
- DIY Instructions:
- Apply a nude base coat to all nails.
- Use a fine detail brush to paint delicate fall leaves in orange, yellow, and green.
- Add fine details to the leaves to enhance their look.
- Finish with a clear top coat to protect the design.
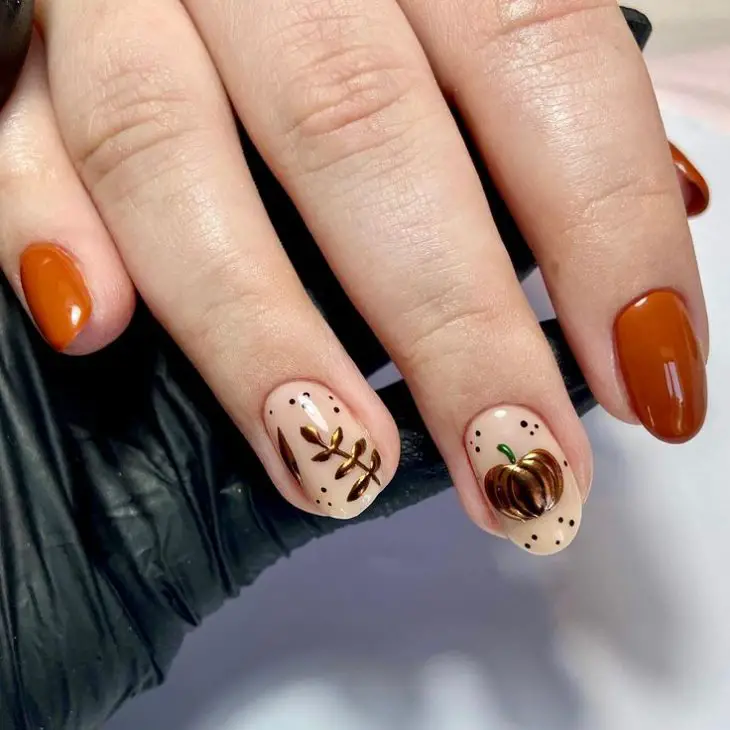
Pumpkin and Leaf Art
This pumpkin and leaf art design is a fun and festive choice for fall. The combination of orange and nude nails with metallic gold accents creates a warm and inviting look. The small pumpkin and leaves add a cute and seasonal touch, making it perfect for Halloween or Thanksgiving.
Consumables:
-
- Nude Nail Polish (e.g., OPI Bubble Bath)
- Orange Nail Polish (e.g., Essie Playing Koi)
- Gold Metallic Nail Polish (e.g., Sally Hansen Insta-Dri Go for Gold)
- Fine Detail Brush (e.g., Winstonia Nail Art Brushes)
- Clear Top Coat
- DIY Instructions:
- Apply a nude base coat to all nails.
- Paint some nails orange and others with gold metallic polish.
- Use a fine detail brush to draw a small pumpkin and leaves on the nude nails.
- Finish with a clear top coat to protect and seal the design.
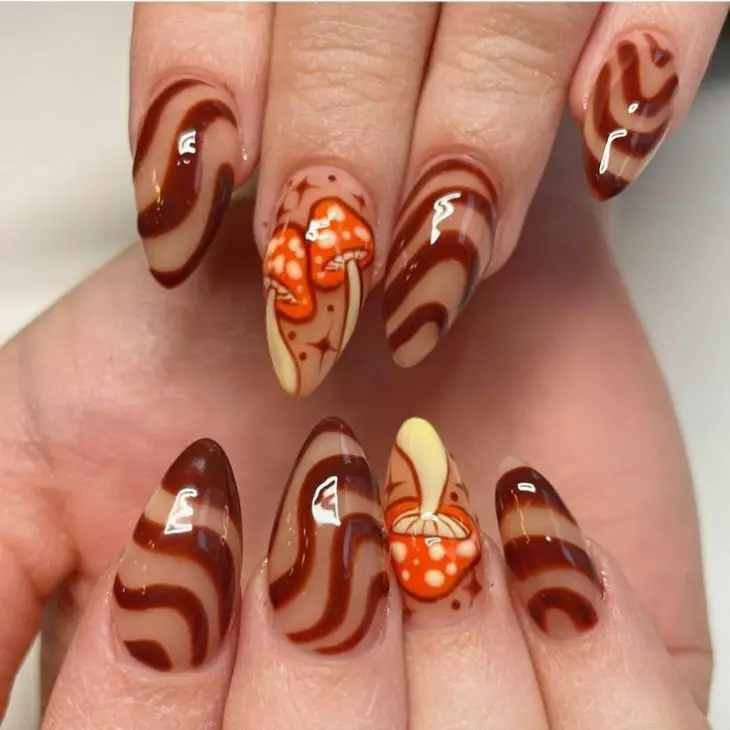
Swirly Mushrooms
This swirly mushroom design is perfect for those who love earthy tones and playful details. The combination of rich browns and vibrant orange mushrooms creates a stunning and unique look. The swirly patterns add a touch of whimsy, making these nails perfect for autumn.
Consumables:
-
- Brown Nail Polish (e.g., OPI Chocolate Moose)
- Nude Nail Polish (e.g., Zoya Avery)
- Orange Nail Polish (e.g., Essie Playing Koi)
- Fine Detail Brush (e.g., Winstonia Nail Art Brushes)
- Clear Top Coat (e.g., Seche Vite)
- DIY Instructions:
- Apply a nude base coat on all nails.
- Create swirly patterns using brown nail polish with a fine detail brush.
- Add mushroom designs using orange nail polish.
- Finish with a clear top coat to seal the design.
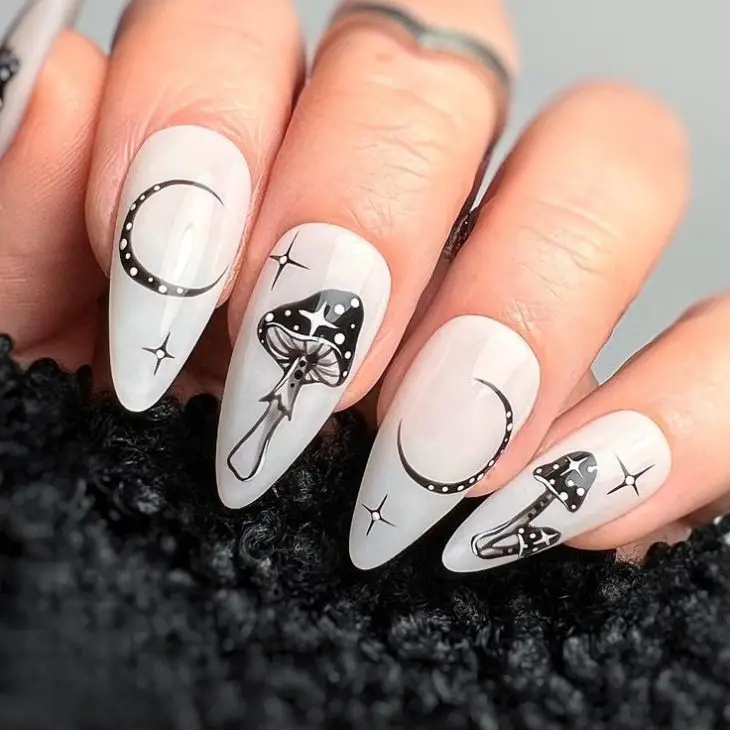
Monochrome Mushrooms and Moon
This monochrome mushroom and moon design is perfect for those who love a minimalist yet mystical look. The black and white color scheme adds a touch of elegance, while the detailed mushrooms and moon create an ethereal vibe. This design is ideal for almond-shaped nails.
Consumables:
-
- White Nail Polish (e.g., OPI Alpine Snow)
- Black Nail Art Pen (e.g., Sally Hansen I Heart Nail Art Pen)
- Clear Top Coat
- DIY Instructions:
- Apply a white base coat on all nails.
- Draw mushrooms, moon, and star details using a black nail art pen.
- Seal the design with a clear top coat for a glossy finish.
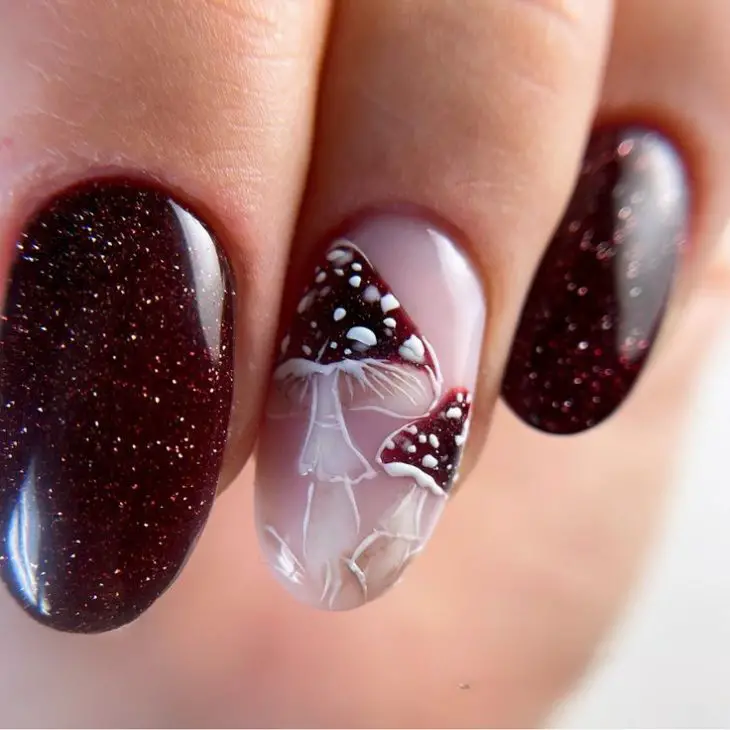
Sparkling Burgundy and Mushrooms
For those who love a bit of sparkle, this burgundy and mushroom design is perfect. The deep, glittery burgundy nails paired with intricate mushroom details create a luxurious and enchanting look. This design is ideal for special occasions or whenever you want to add a touch of glamour.
Consumables:
-
- Burgundy Glitter Nail Polish (e.g., Essie Leggy Legend)
- Nude Nail Polish (e.g., OPI Bubble Bath)
- White Nail Art Pen (e.g., Sally Hansen I Heart Nail Art Pen)
- Clear Top Coat
- DIY Instructions:
- Paint most of your nails with burgundy glitter polish.
- Use nude polish on the accent nails.
- Draw detailed mushroom designs using a white nail art pen.
- Finish with a clear top coat to protect the design.
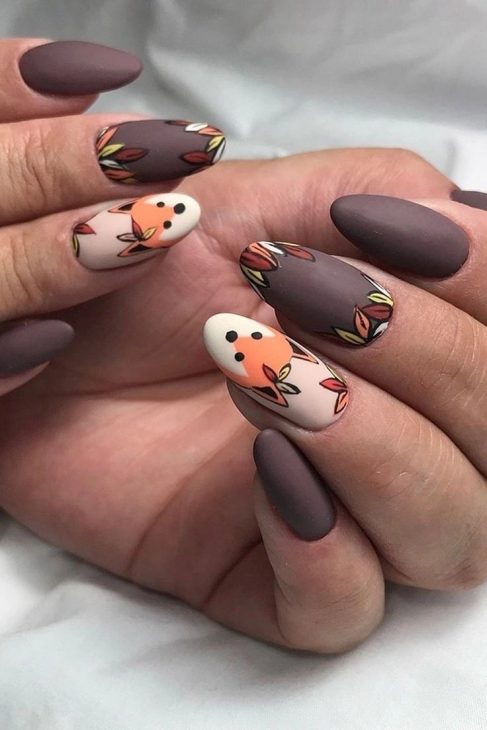
Autumn Fox and Leaves
This adorable fox and leaves design is perfect for fall. The matte brown and nude nails paired with cute fox faces and autumn leaves create a cozy and fun look. This design is perfect for both adults and kids who love to embrace the fall season.
Consumables:
-
- Matte Brown Nail Polish (e.g., Zoya Desiree)
- Nude Nail Polish (e.g., Essie Ballet Slippers)
- Orange Nail Polish (e.g., OPI It’s a Piazza Cake)
- Fine Detail Brush (e.g., Winstonia Nail Art Brushes)
- Matte Top Coat
- DIY Instructions:
- Apply matte brown and nude base coats to different nails.
- Paint fox faces and leaves using orange and nude polishes with a fine detail brush.
- Add fine details to the fox faces and leaves.
- Seal the design with a matte top coat.
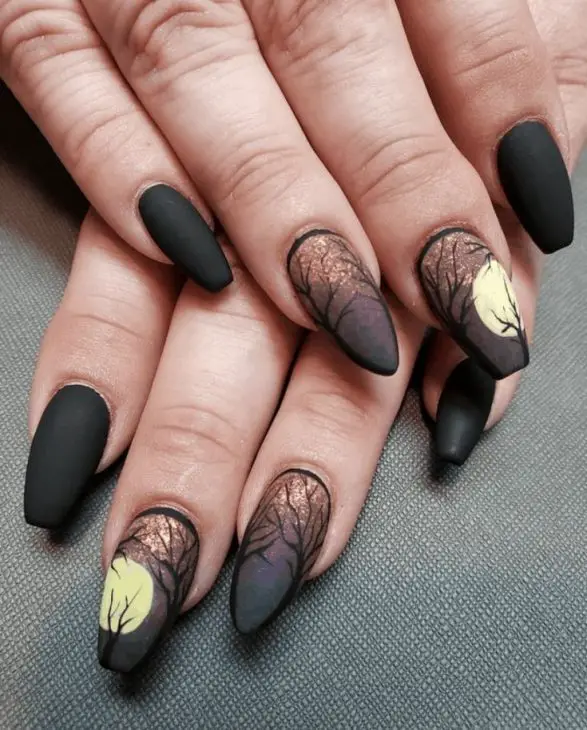
Haunted Forest Night
For a more dramatic and spooky look, this haunted forest night design is perfect. The black matte nails with eerie forest and moon designs create a hauntingly beautiful manicure. This design is ideal for Halloween or any fall event where you want to make a statement.
Consumables:
-
- Black Matte Nail Polish (e.g., OPI Black Onyx)
- Yellow Nail Polish (e.g., Essie Sunny Business)
- Fine Detail Brush (e.g., Winstonia Nail Art Brushes)
- Matte Top Coat
- DIY Instructions:
- Apply a black matte base coat on all nails.
- Use a fine detail brush to paint forest and moon designs with yellow polish.
- Add details to create an eerie night scene.
- Seal the design with a matte top coat to finish.
Save Pin
