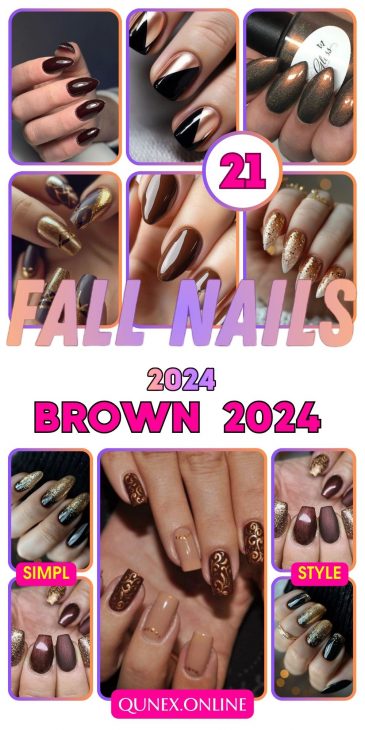
21 Trendy Fall Brown Nails Design Ideas to Try in 2024
As the leaves start to turn and the air becomes crisp, it’s the perfect time to refresh your manicure with rich, earthy tones that embody the spirit of autumn. Brown nails are a timeless choice for the fall season, offering a versatile and sophisticated palette that can be dressed up or down depending on your style. Whether you’re drawn to deep chocolate hues, warm caramel shades, or chic matte finishes, there’s a brown nail design out there that will perfectly complement your fall wardrobe.
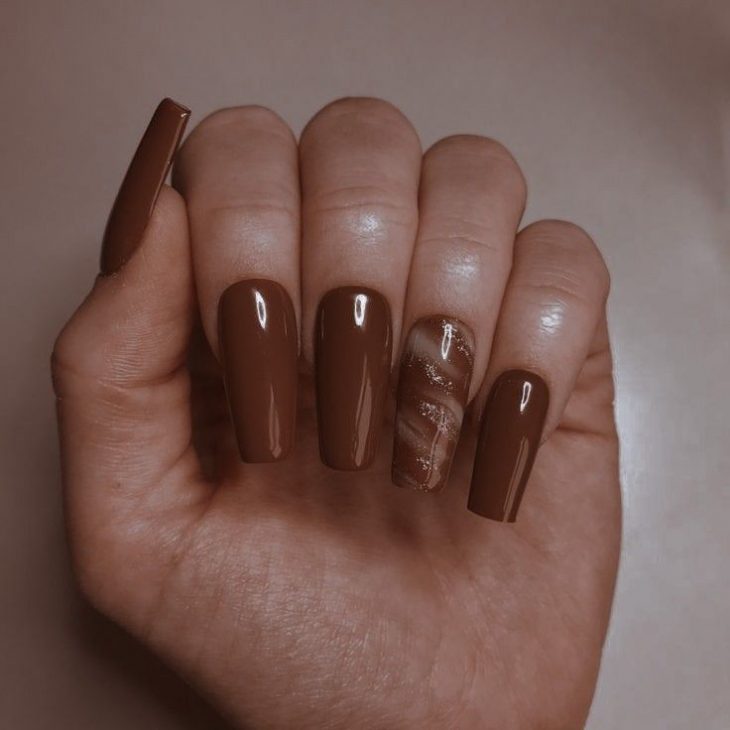
Chic Coffin Brown Nails with a Subtle Swirl Accent
These long, sleek coffin-shaped nails in a rich, chocolate brown shade are a perfect choice for the fall season. The glossy finish adds a touch of sophistication, while the subtle swirl accent on the ring finger introduces a bit of flair without overwhelming the design. This look is versatile and elegant, suitable for both everyday wear and special occasions.
Consumables:
-
- Base coat: OPI Natural Nail Base Coat
- Brown polish: Essie Nail Polish in ‘Wicked’
- Accent swirl: Nail Art Striping Brush, OPI Nail Lacquer in ‘Glitzerland’
- Top coat: Seche Vite Dry Fast Top Coat
- DIY Instructions:
- Begin by applying a base coat to protect your nails.
- Apply two coats of the brown polish to all nails, allowing each layer to dry completely.
- Use a nail art striping brush to create a subtle swirl design on the ring finger with the gold polish.
- Finish with a top coat for a glossy, long-lasting finish.
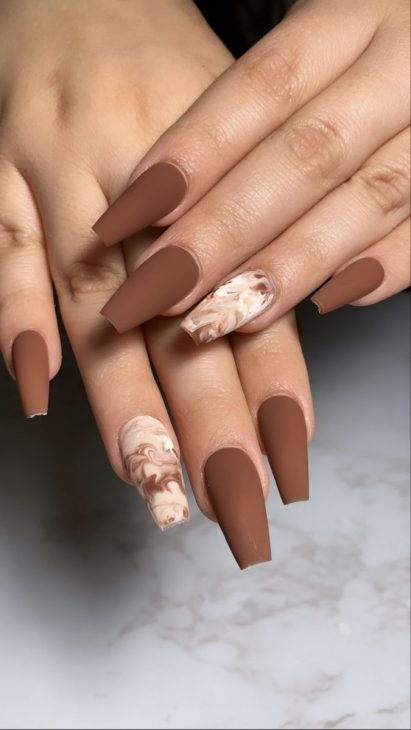
Matte Brown Nails with Marbled Accent
These matte brown nails offer a modern twist on a classic fall look. The matte finish gives the nails a soft, velvety texture, making the design feel understated yet chic. The standout feature is the marbled accent nail, which blends shades of brown and cream for a luxurious, artistic effect.
Consumables:
-
- Matte top coat: Sally Hansen Big Matte Top Coat
- Brown polish: ZOYA Nail Polish in ‘Spencer’
- Marble effect: Nail art brush, acrylic paint in white and beige
- Base coat: ORLY Bonder Rubberized Base Coat
- DIY Instructions:
- Apply the base coat and let it dry.
- Paint all nails with the brown polish.
- Use a nail art brush to create the marble effect on one nail by lightly blending the white and beige paints.
- Once dry, apply a matte top coat to seal the design.
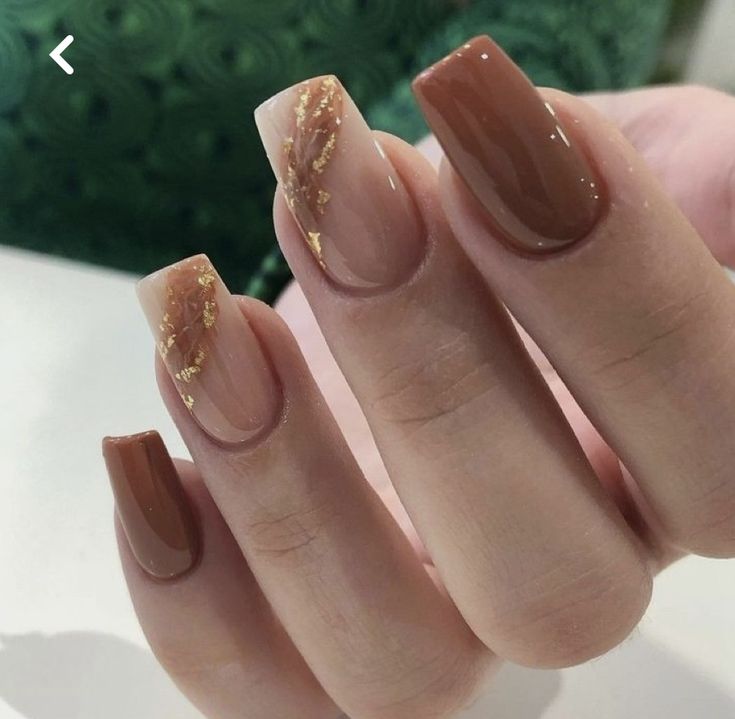
Elegant Brown French Tips with Gold Leaf
This design is a sophisticated take on the French tip, featuring a nude base with brown tips. The addition of delicate gold leaf accents adds a touch of luxury, making this design perfect for those who want something both simple and eye-catching.
Consumables:
-
- Nude base coat: OPI Nail Lacquer in ‘Samoan Sand’
- Brown polish: OPI Nail Lacquer in ‘Chocolate Moose’
- Gold leaf: Transfer gold leaf sheets
- Top coat: Essie Gel Couture Top Coat
- DIY Instructions:
- Apply a nude base coat to all nails.
- Create the French tips using the brown polish.
- Carefully apply gold leaf to the base of the tips using a small brush or tweezers.
- Seal the design with a top coat to keep the gold leaf in place.
Subtle Brown Ombre with Gold Flakes
These nails feature a subtle ombre effect transitioning from a nude base to a deep brown tip. The addition of gold flakes at the transition point enhances the design, adding a bit of sparkle that catches the light beautifully.
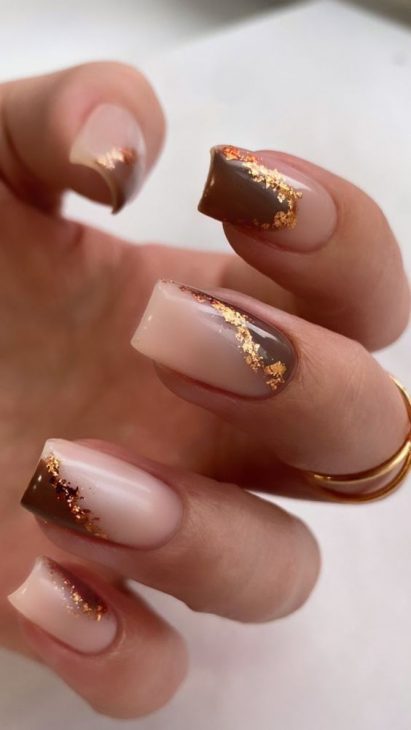
Consumables:
-
- Nude polish: Butter London Patent Shine 10X in ‘Mum’s the Word’
- Brown polish: OPI Nail Lacquer in ‘Espresso Your Inner Self’
- Gold flakes: Loose gold flakes for nail art
- Gradient sponge: Cosmetic sponge for blending
- DIY Instructions:
- Start with a nude base coat on all nails.
- Use a cosmetic sponge to create the ombre effect by dabbing the brown polish on the tips, blending towards the base.
- Apply gold flakes where the nude transitions into brown.
- Finish with a clear top coat to protect the design.
Short Burgundy Nails with Gold Leaf Accent
These short, rounded nails are painted in a deep burgundy, exuding warmth and richness perfect for the fall. The gold leaf accent on the ring finger adds a luxurious touch to the simple yet elegant design, making it ideal for both day and night.

Consumables:
-
- Burgundy polish: Essie Nail Polish in ‘Bordeaux’
- Gold leaf: Transfer gold leaf sheets
- Base coat: Deborah Lippmann Hard Rock Base and Top Coat
- Top coat: Sally Hansen Miracle Gel Top Coat
- DIY Instructions:
- Apply a base coat to all nails.
- Paint the nails with two coats of burgundy polish.
- Add gold leaf to the ring finger while the polish is still slightly tacky.
- Seal with a top coat for a glossy, long-lasting finish.
Ombre Brown to Nude with Gold Flake Tips
This stunning set of nails features an ombre effect that transitions from a rich brown at the base to a soft nude at the tips. The gold flakes along the edges add a touch of elegance and luxury, making this design perfect for anyone looking to make a statement this fall. The almond shape complements the gradient beautifully, elongating the fingers and adding to the overall sophistication.
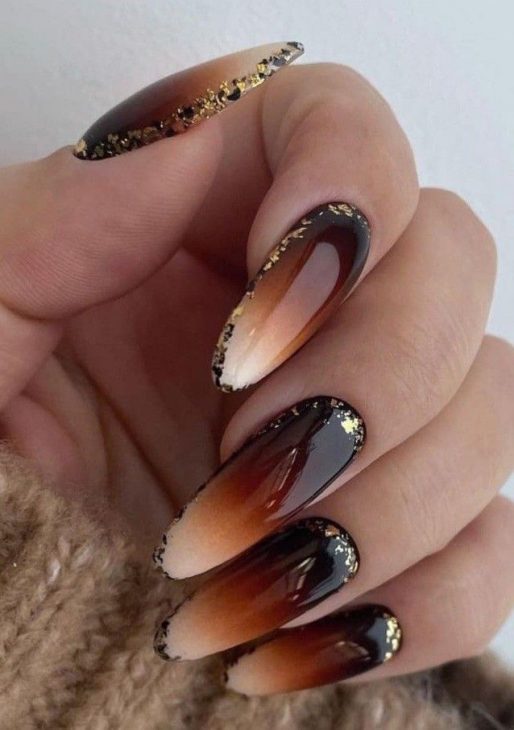
Consumables:
-
- Brown polish: OPI Nail Lacquer in ‘Espresso Your Inner Self’
- Nude polish: Butter London Nail Lacquer in ‘Mum’s the Word’
- Gold flakes: Foil gold leaf sheets
- Top coat: Essie Gel Couture Top Coat
- DIY Instructions:
- Apply a brown base coat to all nails, focusing on the cuticle area.
- Use a cosmetic sponge to blend the nude polish from the middle of the nail to the tips, creating an ombre effect.
- Carefully apply gold flakes to the tips using a small brush or tweezers.
- Seal the design with a glossy top coat to ensure the gold flakes stay in place and to give the nails a high-shine finish.
Brown Marble Nails with Gold Leaf Accents
These nails showcase a beautiful marble effect in various shades of brown, accented with delicate gold leaf. The intricate marbling gives the nails a luxurious and unique appearance, perfect for the fall season. The gold leaf adds a touch of opulence, making this design ideal for special occasions or just to elevate your everyday look.
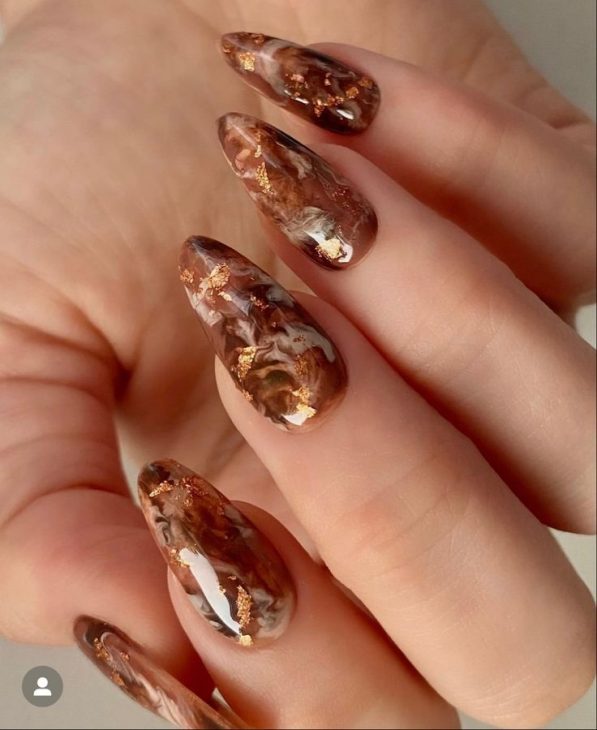
Consumables:
-
- Brown polishes: Essie Nail Polish in ‘Wicked’, OPI Nail Lacquer in ‘Chocolate Moose’
- Marble effect: Nail art brush, white and beige acrylic paints
- Gold leaf: Transfer gold leaf sheets
- Base coat: ORLY Bonder Rubberized Base Coat
- DIY Instructions:
- Start with a base coat to protect your nails.
- Create the marble effect by applying small dots of brown polish and acrylic paint, then swirling them together with a nail art brush.
- Add gold leaf accents randomly across the nails while the polish is still tacky.
- Finish with a top coat to smooth the surface and protect the design.
Short Brown Marble Nails with a Minimalist Charm
This design features short, rounded nails with a marble effect in warm brown tones. The minimalist approach keeps the design subtle yet chic, making it perfect for those who prefer understated elegance. A small gold star accent on one nail adds a playful touch, making this look both versatile and stylish for any occasion.
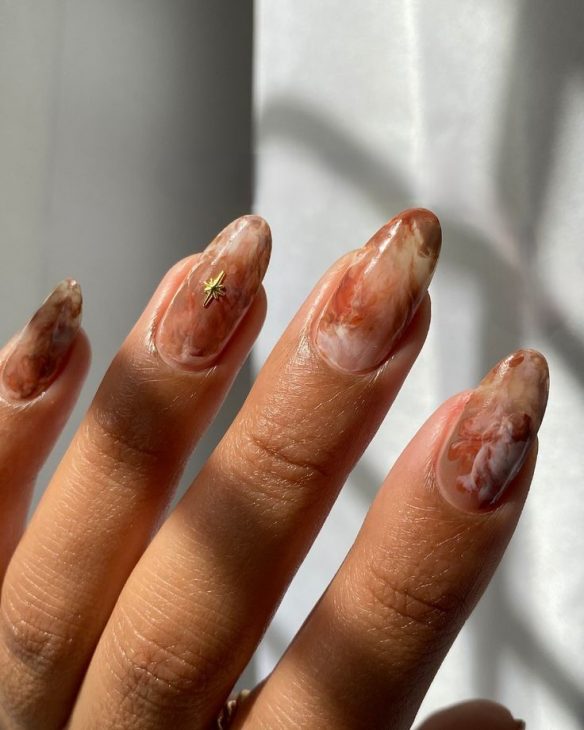
Consumables:
-
- Brown polish: ZOYA Nail Polish in ‘Spencer’
- Marble effect: Nail art brush, white and beige acrylic paints
- Gold star accent: Nail art stickers or small metal studs
- Top coat: Sally Hansen Miracle Gel Top Coat
- DIY Instructions:
- Apply a base coat to all nails and let it dry.
- Create the marble effect by applying small dots of brown polish and acrylic paint, then swirling them with a nail art brush.
- Apply a gold star accent to one nail while the polish is still tacky.
- Seal the design with a top coat for a smooth and shiny finish.
Brown Marble Nails with Glossy Finish
These brown marble nails are crafted with precision, showcasing a swirl of rich brown tones with a glossy finish. The almond shape complements the marbled effect, giving the nails a natural and elegant look. This design is ideal for anyone who loves the combination of simplicity and luxury.
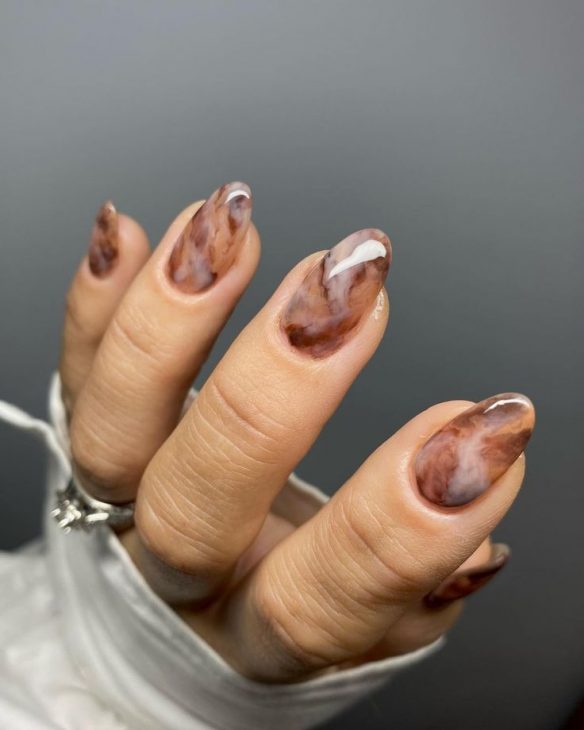
Consumables:
-
- Brown polishes: OPI Nail Lacquer in ‘Squeaker of the House’, Essie Nail Polish in ‘Cliff Hanger’
- Marble effect: Nail art brush, white and beige acrylic paints
- Base coat: Deborah Lippmann Hard Rock Base and Top Coat
- Top coat: Seche Vite Dry Fast Top Coat
- DIY Instructions:
- Begin by applying a base coat to protect the nails.
- Apply the marble effect by swirling together different shades of brown polish and acrylic paint.
- Let the design dry completely, then apply a glossy top coat to enhance the marbled effect and add shine.
Smoky Brown Almond Nails with Gold Leaf Accents
This set of nails features a smoky brown effect, with each nail transitioning from a light to a dark shade. The gold leaf accents add a touch of luxury, making this design both modern and elegant. The almond shape enhances the overall look, creating a sophisticated and polished appearance.
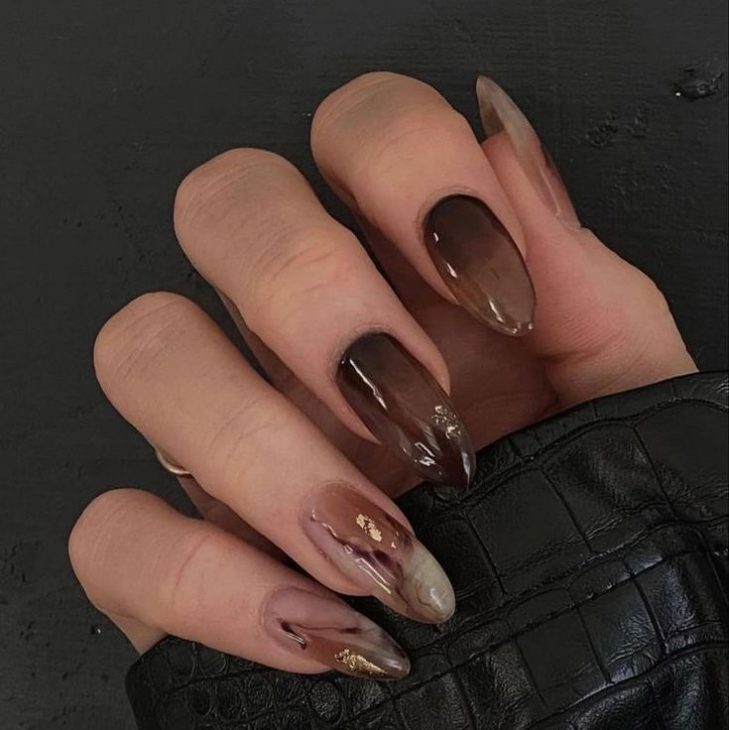
Consumables:
-
- Brown polish: Essie Nail Polish in ‘Chinchilly’
- Gold leaf: Foil gold leaf sheets
- Top coat: Essie Gel Couture Top Coat
- Base coat: OPI Nail Lacquer Base Coat
- DIY Instructions:
- Apply the base coat and let it dry completely.
- Paint the nails with the brown polish, creating a smoky gradient effect by layering the color from light to dark.
- Apply gold leaf accents using a small brush or tweezers.
- Seal the design with a top coat for a glossy and long-lasting finish.
Glossy Brown Nails with Beige Accent
This design showcases a set of glossy, almond-shaped nails in a deep brown hue, with a standout beige accent nail featuring a wavy line of tiny rhinestones. The rich brown color is perfect for fall, and the beige accent adds a touch of softness and contrast, making this design both chic and versatile.
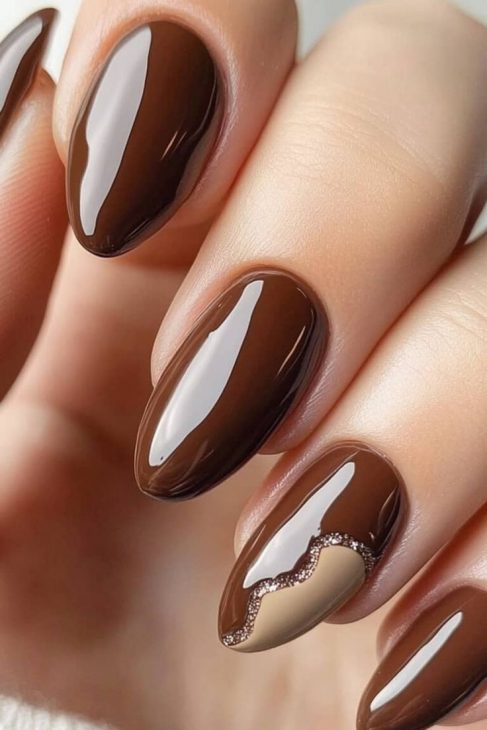
Consumables:
-
- Brown polish: OPI Nail Lacquer in ‘Espresso Your Inner Self’
- Beige polish: Essie Nail Polish in ‘Sand Tropez’
- Rhinestones: Swarovski flat-back crystals
- Top coat: Seche Vite Dry Fast Top Coat
- DIY Instructions:
- Apply the base coat to all nails and allow it to dry.
- Paint all nails with two coats of the brown polish, leaving the accent nail for the beige color.
- On the beige nail, apply a thin line of clear polish along the wavy line and place the rhinestones carefully.
- Finish with a top coat to seal the rhinestones and give all nails a high-gloss finish.
Short Burgundy Nails with Leaf Accents
These short nails are painted in a rich burgundy color, perfect for the fall season. The delicate gold leaf accents on a couple of nails add a natural touch, making this design elegant and refined. The short length is practical, yet the design remains stylish and seasonally appropriate.
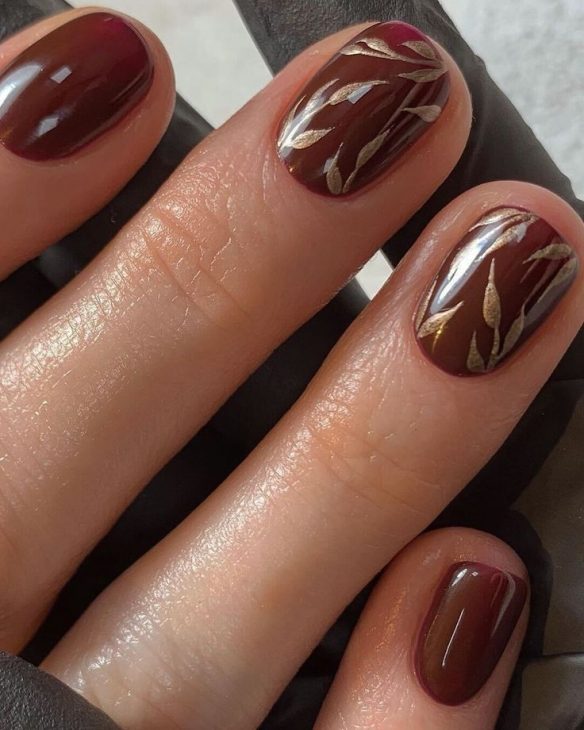
Consumables:
-
- Burgundy polish: Essie Nail Polish in ‘Bordeaux’
- Gold leaf accents: Nail art stickers or transfer foils
- Base coat: OPI Nail Lacquer Base Coat
- Top coat: Sally Hansen Miracle Gel Top Coat
- DIY Instructions:
- Apply a base coat to all nails.
- Paint the nails with two coats of the burgundy polish.
- Apply the gold leaf accents to the desired nails using tweezers for precision.
- Seal the design with a top coat to protect the accents and add shine.
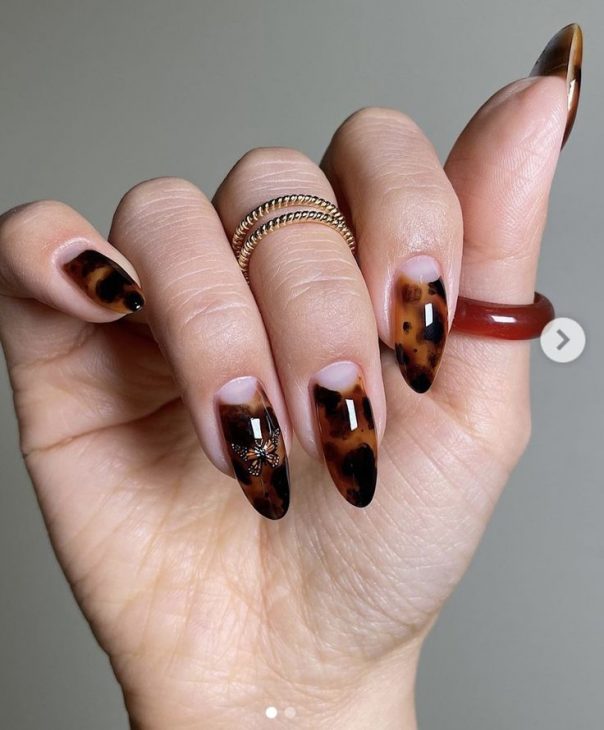
Tortoiseshell Brown Nails with Butterfly Accent
These almond-shaped nails feature a tortoiseshell pattern in warm brown tones, creating a trendy and stylish look. The design is further enhanced by a subtle butterfly accent on one nail, adding a whimsical touch to this sophisticated pattern. The tortoiseshell effect is ideal for those who love a bold yet classic design.
Consumables:
-
- Brown polishes: Essie Nail Polish in ‘Mink Muffs’, OPI Nail Lacquer in ‘Squeaker of the House’
- Butterfly accent: Nail art sticker or stamping kit
- Top coat: Essie Gel Couture Top Coat
- Base coat: Deborah Lippmann Hard Rock Base and Top Coat
- DIY Instructions:
- Begin with a base coat to protect the nails.
- Apply the tortoiseshell effect by layering different shades of brown polish using a small brush for precision.
- Add the butterfly accent to one nail.
- Finish with a top coat for a glossy and durable finish.
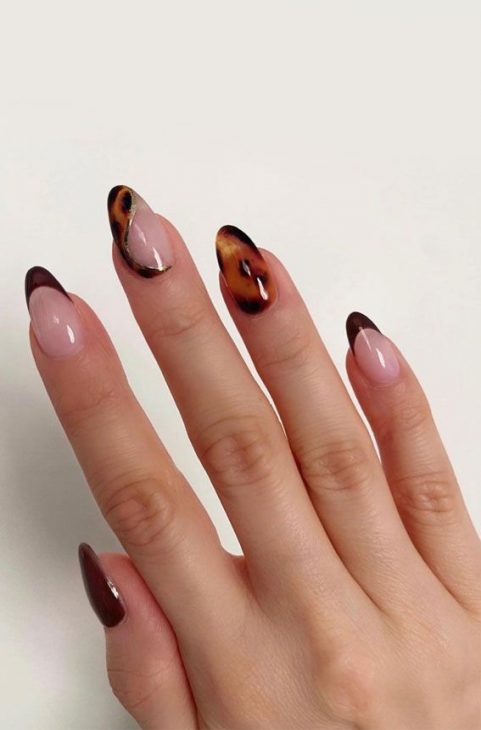
Tortoiseshell French Tips on Nude Base
This design features a nude base with tortoiseshell French tips, creating a chic and modern look. The combination of the soft nude color with the bold tortoiseshell pattern is perfect for those who want a stylish yet understated design. The almond shape enhances the elegance of the manicure.
Consumables:
-
- Nude polish: OPI Nail Lacquer in ‘Bubble Bath’
- Brown polishes: Essie Nail Polish in ‘Mink Muffs’, OPI Nail Lacquer in ‘Squeaker of the House’
- Top coat: Seche Vite Dry Fast Top Coat
- DIY Instructions:
- Apply a nude base coat to all nails.
- Create the tortoiseshell French tips by layering different shades of brown polish on the tips.
- Use a small brush to perfect the French tip shape.
- Finish with a top coat to seal the design and add shine.
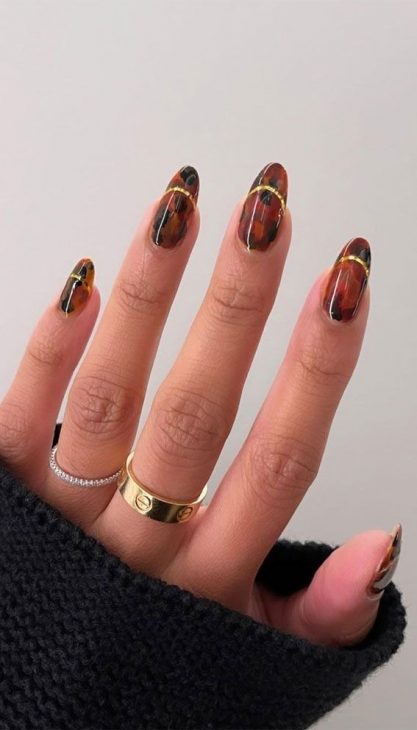
Classic Tortoiseshell Nails with Gold Stripes
These nails are adorned with a classic tortoiseshell pattern, further enhanced by delicate gold stripes that add a touch of luxury to the design. The almond shape and warm brown tones make this manicure a perfect choice for the fall season. The gold stripes add just the right amount of sparkle, making this design stand out.
Consumables:
-
- Brown polishes: Essie Nail Polish in ‘Cliff Hanger’, OPI Nail Lacquer in ‘Squeaker of the House’
- Gold stripe tape: Nail art striping tape
- Top coat: Sally Hansen Miracle Gel Top Coat
- DIY Instructions:
- Apply a base coat to protect your nails.
- Create the tortoiseshell pattern by layering the brown polishes using a nail art brush.
- Apply gold stripe tape across the middle of the nails for a precise line.
- Seal the design with a top coat to ensure the stripes stay in place and to give the nails a glossy finish.
Elegant Almond Brown with a Twist
This nail design showcases a deep, glossy brown almond shape with a unique accent twist. The ring finger stands out with a creative half-moon of nude polish, framed by a delicate wave of shimmering rhinestones. The contrast between the rich brown and the nude base offers an elegant yet modern look, perfect for anyone who enjoys a sophisticated manicure with a touch of glamour.
Consumables:
-
- Deep brown gel polish (e.g., OPI’s “Espresso Your Inner Self”)
- Nude gel polish (e.g., Essie’s “Bare With Me”)
- Rhinestones (small size)
- Top coat (e.g., Seche Vite Top Coat)
- Detailing brush for rhinestone application
- DIY Instructions:
- Start by shaping your nails into an almond shape and apply a base coat.
- Apply two coats of deep brown gel polish on all nails except the ring finger.
- On the ring finger, apply two coats of nude gel polish.
- Use a detailing brush to apply rhinestones along the curve of the nude polish.
- Finish with a top coat to seal and add shine.
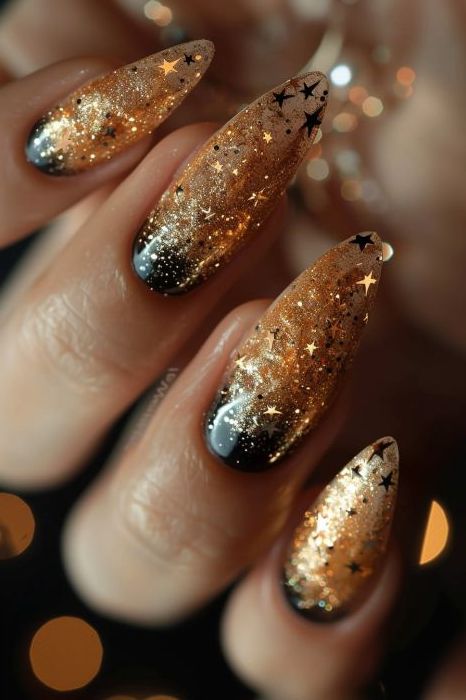
Autumnal Maroon and Gold Leaf Art
This short, rounded nail design embraces autumn with its warm maroon base and delicate gold leaf accents. The combination of the rich, glossy maroon with the fine, almost ethereal gold leaf art on the index and middle fingers creates a sophisticated and understated look that’s perfect for fall.
Consumables:
-
- Maroon gel polish (e.g., Essie’s “Bordeaux”)
- Gold leaf flakes
- Nail adhesive or foil glue
- Top coat (e.g., Sally Hansen’s “Miracle Gel Top Coat”)
- DIY Instructions:
- Begin by trimming and filing your nails into a rounded shape.
- Apply a base coat followed by two coats of maroon gel polish.
- Using a fine brush, apply a small amount of nail adhesive to the areas where you want to place the gold leaf.
- Carefully apply the gold leaf flakes using tweezers, pressing them gently onto the nail.
- Seal the design with a top coat for a smooth, long-lasting finish.
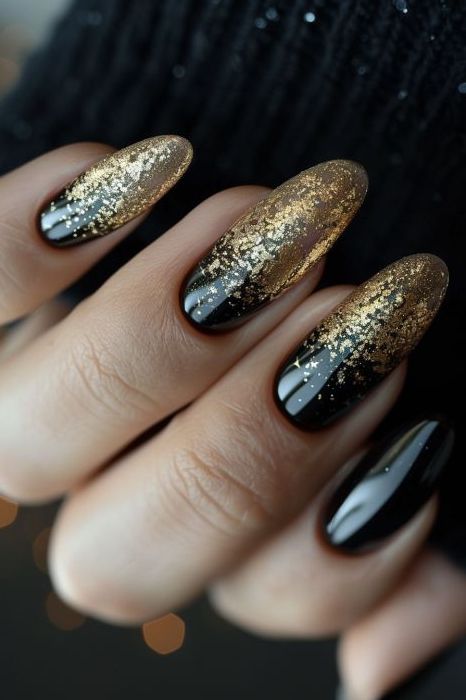
Tortoiseshell Elegance
The tortoiseshell design on almond-shaped nails adds an element of classic elegance. This look is created with varying shades of brown and black, resulting in a sophisticated, layered effect that mimics the natural pattern of tortoiseshell. The subtle placement of a small metallic detail on the ring finger adds a modern twist to the traditional design.
Consumables:
-
- Light brown base polish (e.g., Zoya’s “Spencer”)
- Dark brown and black gel polish
- Gold metallic detail (e.g., small studs or foil)
- Detailing brush
- Top coat (e.g., Essie’s “Gel Couture Top Coat”)
- DIY Instructions:
- Apply a light brown base coat and let it dry.
- Using a detailing brush, layer dark brown and black polish in irregular patterns to create the tortoiseshell effect.
- Add a small metallic detail on the ring finger.
- Finish with a top coat to enhance the shine and durability of the design.
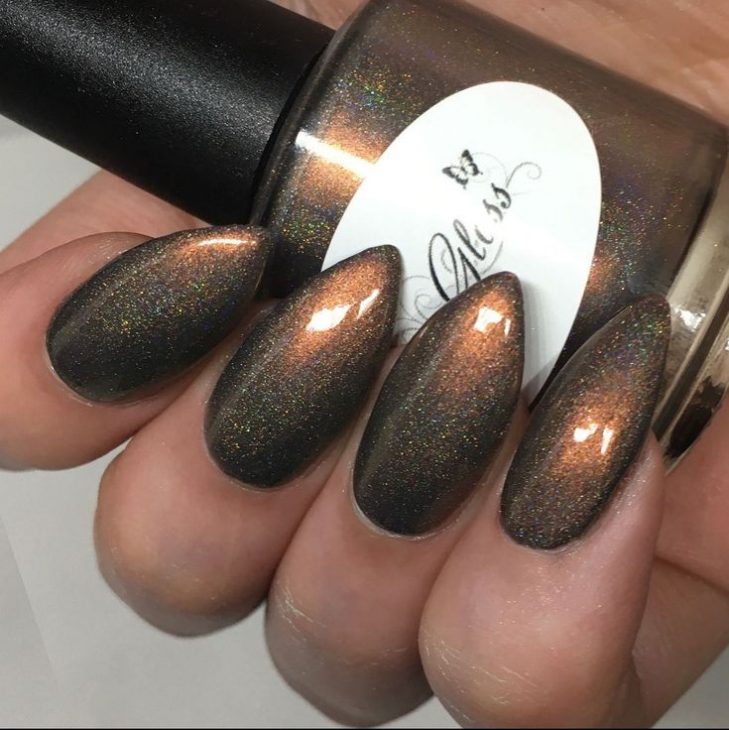
Abstract Brown Swirls
This nail design features a combination of translucent and opaque brown swirls, creating a mesmerizing and dynamic effect. The almond shape of the nails enhances the fluidity of the design, making it both sophisticated and trendy. The swirls give the nails a marbled look, perfect for those who appreciate intricate nail art.
Consumables:
-
- Brown gel polish (e.g., OPI’s “I Love You Just Be-Cusco”)
- Clear gel polish
- Detailing brush
- Top coat (e.g., CND’s “Super Shiney Top Coat”)
- DIY Instructions:
- Start by applying a base coat to your nails.
- Using a detailing brush, create abstract swirls with brown and clear polish on each nail.
- Ensure the swirls blend seamlessly by lightly dragging the brush through the wet polish.
- Finish with a top coat to protect the design and add a glossy finish.
Rich Metallic Brown Shimmer
This manicure features a rich, metallic brown shade that catches the light beautifully, giving the nails a luxurious and glamorous appearance. The use of a high-shine top coat enhances the metallic effect, making these nails a perfect choice for an evening out or a special occasion.
Consumables:
-
- Metallic brown gel polish (e.g., ILNP’s “Cygnus Loop”)
- Top coat (e.g., Essie’s “Good to Go Top Coat”)
- DIY Instructions:
- Apply a base coat to clean, dry nails.
- Apply two coats of metallic brown polish, allowing each layer to dry fully.
- Seal the design with a high-shine top coat to enhance the metallic effect.
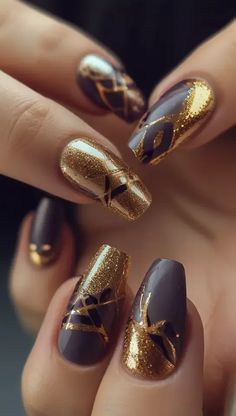
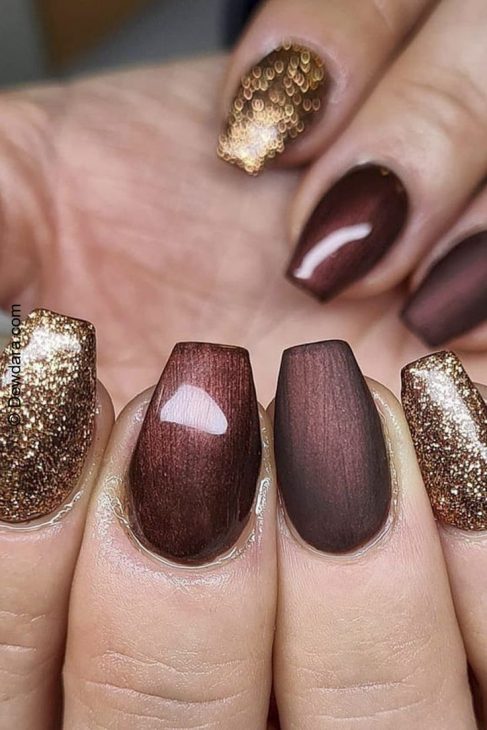
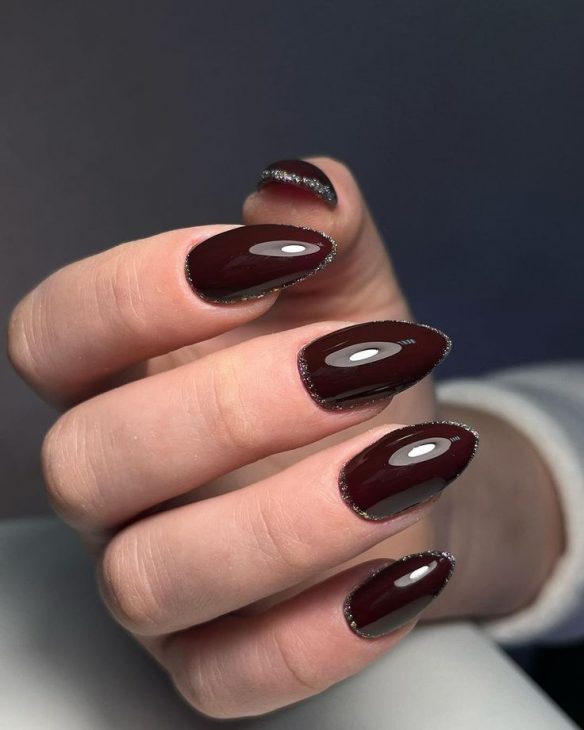
Matte Brown and Gold Glitz
This nail design balances the richness of matte brown polish with the glamour of gold glitter accents. The contrast between the matte and the sparkling gold creates a chic and modern look, perfect for those who love understated elegance with a touch of luxury.
Consumables:
-
- Matte brown gel polish (e.g., Chanel’s “Particulière”)
- Gold glitter polish (e.g., China Glaze’s “Golden Enchantment”)
- Matte top coat (e.g., OPI’s “Matte Top Coat”)
- DIY Instructions:
- Apply a matte brown polish to all nails, followed by a matte top coat.
- On the ring finger, apply gold glitter polish to create a statement nail.
- Finish with a top coat on the glitter nail to add extra shine, while keeping the other nails matte.
Save Pin
