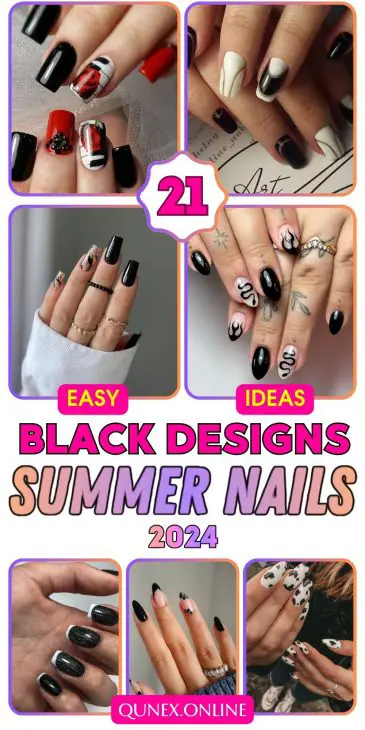
Black Summer Nails 2024: Bold, Beautiful, and Trendy
When it comes to summer nails, black might not be the first color that comes to mind. But trust me, black nails are making a major statement this summer. From glossy to matte, short to almond, there’s a black nail design for everyone. Let’s dive into some stunning black summer nail designs that are sure to turn heads.
Glossy Black with Gold Accents
For a sophisticated yet edgy look, these glossy black nails with gold accents are perfect. The rich black polish creates a sleek base, while the gold studs add a touch of luxury. The contrast between the glossy finish and the sparkling gold makes this design a standout choice for any occasion.
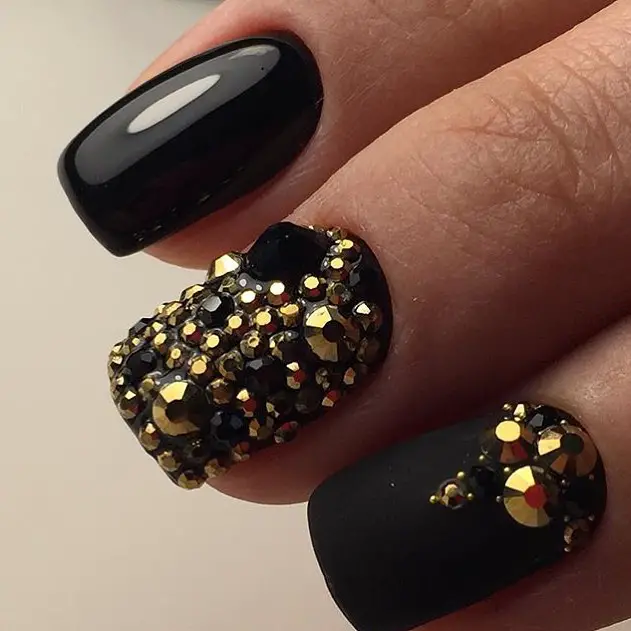
Materials Needed:
-
- Black nail polish (e.g., OPI Nail Lacquer in Black Onyx)
- Gold nail studs (e.g., Born Pretty Gold Nail Art Rhinestones)
- Top coat (e.g., Seche Vite Dry Fast Top Coat)
- Nail glue (e.g., Nailene Ultra Quick Nail Glue)
DIY Steps:
-
- Apply a base coat to protect your natural nails.
- Paint your nails with two coats of black polish. Let each coat dry completely.
- Use nail glue to apply gold studs to the accent nails. Arrange them in a pattern or scatter them for a more random look.
- Seal everything with a top coat for a long-lasting finish.
Black and Pink Leopard Print
This playful design combines the boldness of black with a fun, pink leopard print accent. It’s perfect for those who want to add a bit of flair to their black summer nails. The leopard print adds a trendy and youthful touch, making it a cute and eye-catching option.
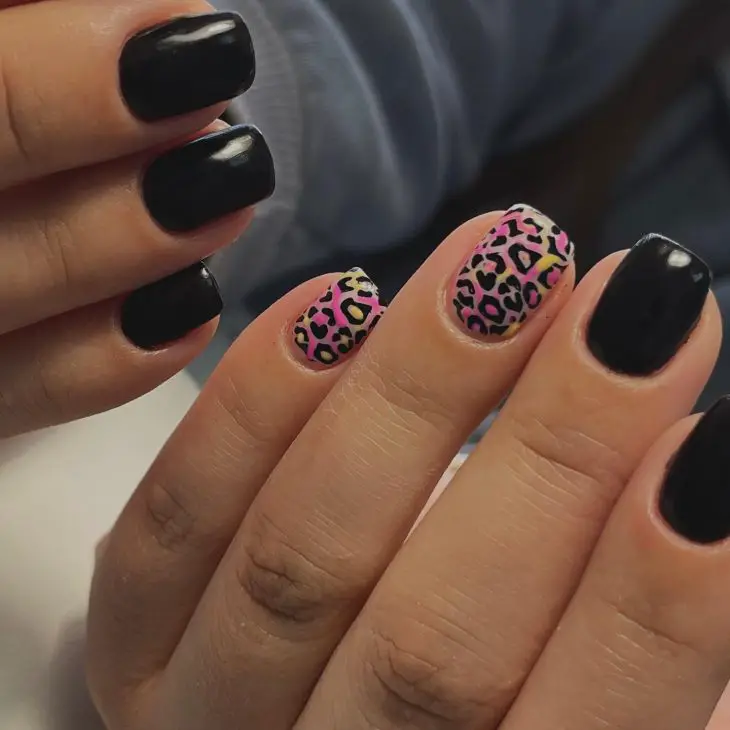
Materials Needed:
-
- Black nail polish (e.g., Essie Nail Polish in Licorice)
- Pink and yellow nail polish (e.g., Sally Hansen Insta-Dri in Pink Blink and Lightning)
- Thin nail art brush or dotting tool
- Top coat (e.g., Essie Gel Couture Top Coat)
DIY Steps:
-
- Apply a base coat to all nails.
- Paint all nails with black polish, leaving one accent nail on each hand for the leopard print.
- On the accent nails, use a thin brush or dotting tool to create irregular pink spots.
- Outline the pink spots with black polish to create the leopard print effect. Add small yellow dots within the pink spots for extra detail.
- Finish with a top coat to protect your design.
Glittery Galaxy Nails
For a cosmic twist on black summer nails, try this glittery galaxy design. The dark base and sparkling glitter give the impression of a starry night sky, making your nails look out of this world.
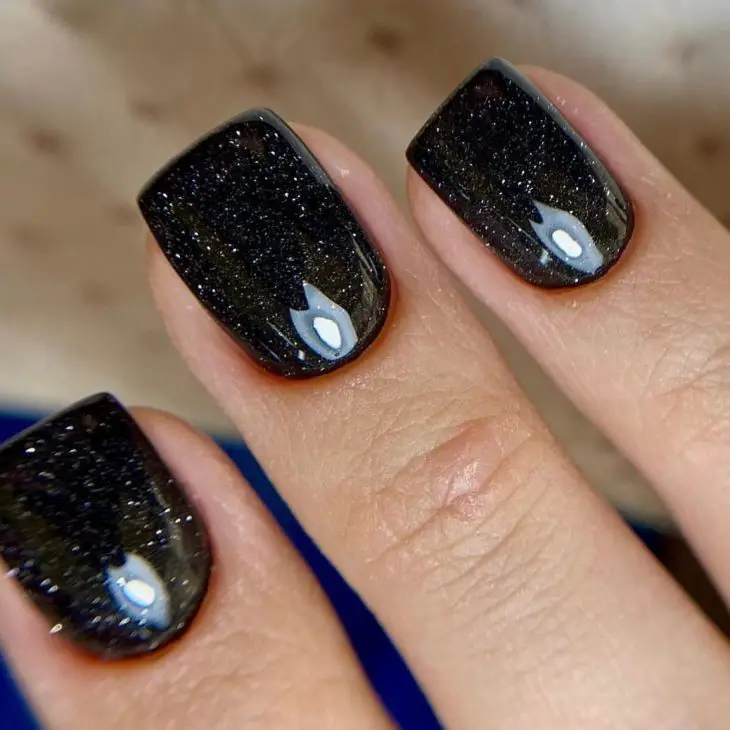
Materials Needed:
-
- Black nail polish (e.g., Zoya Nail Polish in Willa)
- Holographic glitter polish (e.g., ILNP Holographic Topper in Mega)
- Sponge applicator
- Top coat (e.g., Glisten & Glow Top Coat)
DIY Steps:
-
- Apply a base coat.
- Paint your nails with two coats of black polish.
- Using a sponge applicator, dab holographic glitter polish onto the nails, focusing on the tips for a gradient effect.
- Apply a top coat to lock in the glitter and add shine.
Chic Stripes and Rhinestones
This design is a perfect blend of elegance and modern chic. The alternating black and white stripes on a nude base create a stunning contrast, while the matte black nails adorned with delicate rhinestones add a touch of luxury. The combination of different textures and patterns makes this look sophisticated and trendy.
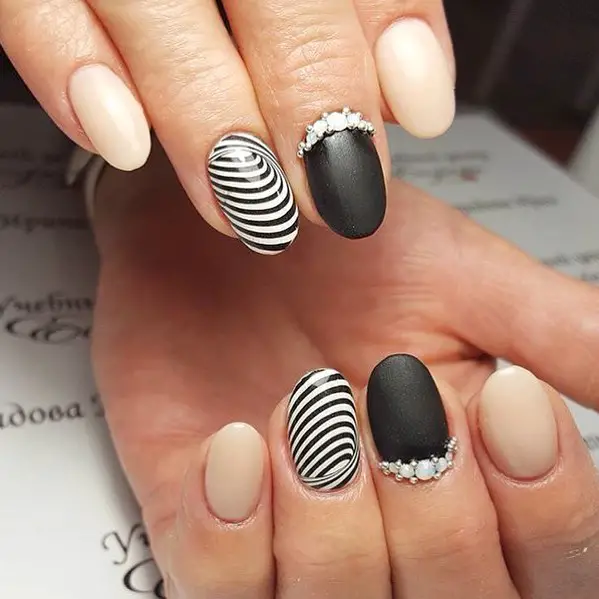
Materials Needed:
-
- Nude nail polish (e.g., OPI Nail Lacquer in Bubble Bath)
- Black nail polish (e.g., Essie Nail Polish in Licorice)
- White nail polish (e.g., Zoya Nail Polish in Purity)
- Matte top coat (e.g., Sally Hansen Big Matte Top Coat)
- Rhinestones (e.g., Kiss Salon Secrets Luxe Accents)
- Nail striping tape (e.g., Beetles Nail Art Striping Tape)
- Nail glue (e.g., Nailene Ultra Quick Nail Glue)
- DIY Steps:
- Apply a base coat to all nails.
- Paint some nails with nude polish and others with black polish. Let them dry completely.
- Use nail striping tape to create the striped pattern on the nude nails. Apply white and black polish over the tape and remove it before the polish dries.
- Apply a matte top coat to the black nails.
- Attach rhinestones to the matte black nails using nail glue.
- Finish with a top coat over the rhinestones to secure them in place.
Black with Blue Accent
This design combines sleek black nails with a striking blue accent nail, featuring a geometric pattern. The glossy finish of the black nails contrasts beautifully with the intricate blue design, creating a modern and stylish look. This is perfect for those who want to add a pop of color to their black summer nails.
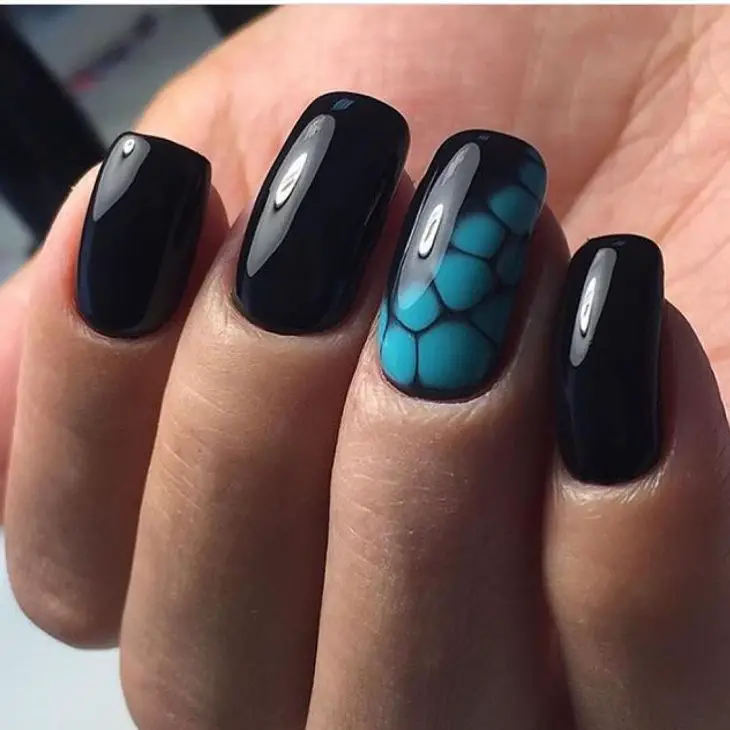
Materials Needed:
-
- Black nail polish (e.g., Chanel Le Vernis in Black Satin)
- Blue nail polish (e.g., Essie Nail Polish in Aruba Blue)
- Thin nail art brush
- Top coat (e.g., Seche Vite Dry Fast Top Coat)
- DIY Steps:
- Apply a base coat to all nails.
- Paint all nails with black polish, leaving one accent nail on each hand for the blue design.
- Use a thin brush to create a geometric pattern on the blue accent nails.
- Finish with a top coat to protect your design and add shine.
Matte Black with Glossy Accents
This design features matte black nails with glossy black accents, creating a striking contrast. The mix of matte and glossy finishes, along with the unique chevron and dotted patterns, adds a sophisticated edge to this look. It’s perfect for anyone who loves a bold yet classy manicure.
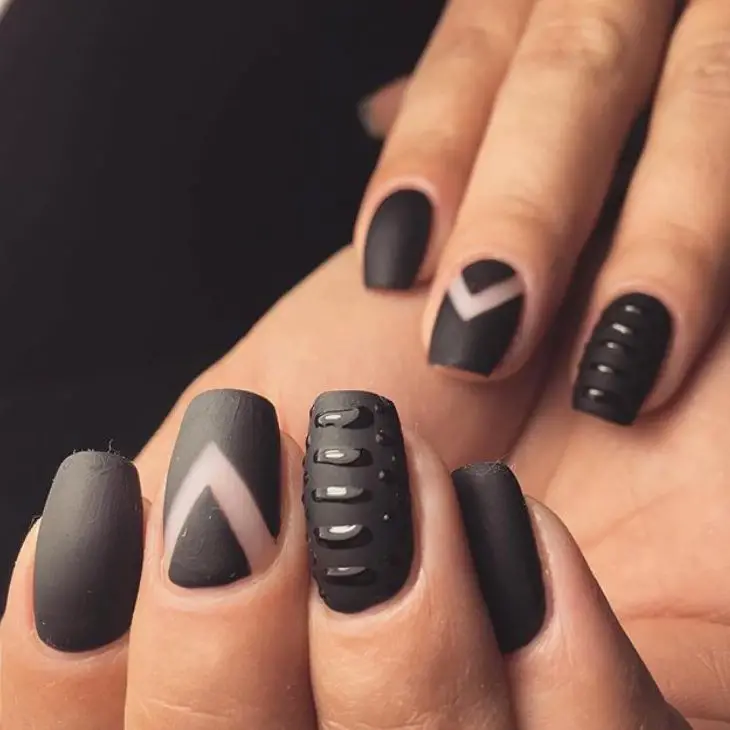
Materials Needed:
-
- Black nail polish (e.g., OPI Nail Lacquer in Black Onyx)
- Matte top coat (e.g., OPI Matte Top Coat)
- Glossy top coat (e.g., Essie Gel Couture Top Coat)
- Nail striping tape (e.g., Beetles Nail Art Striping Tape)
- Dotting tool
- DIY Steps:
- Apply a base coat to all nails.
- Paint all nails with black polish and let them dry.
- Apply a matte top coat to all nails.
- Use striping tape and a dotting tool to create the glossy accents on the matte nails.
- Finish with a glossy top coat over the accents to enhance the contrast.
Geometric Black and Nude
This geometric design combines black and nude polishes for a modern, minimalist look. The clean lines and contrasting colors make this design both stylish and versatile, perfect for any occasion. The addition of a glitter accent nail adds a touch of sparkle without overwhelming the overall look.
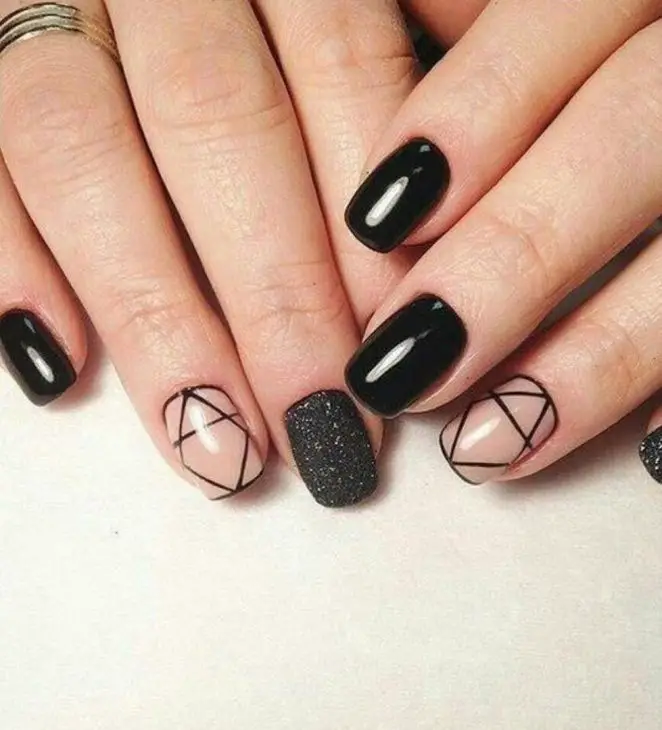
Materials Needed:
-
- Black nail polish (e.g., Sally Hansen Miracle Gel in Blacky O)
- Nude nail polish (e.g., Essie Nail Polish in Ballet Slippers)
- Black glitter polish (e.g., China Glaze Nail Lacquer in Glitter Goblin)
- Thin nail art brush
- Top coat (e.g., Glisten & Glow Top Coat)
DIY Steps:
-
- Apply a base coat to all nails.
- Paint some nails with black polish and others with nude polish.
- Use a thin brush to create geometric lines on the nude nails with black polish.
- Apply black glitter polish to the accent nails.
- Finish with a top coat to protect your design and add shine.
Geometric Lines
This design is a minimalist’s dream with its clean lines and geometric patterns. The nude base with black and yellow lines adds a modern and sophisticated touch, while the black nails provide a bold contrast. It’s a perfect look for those who appreciate simplicity with a twist.
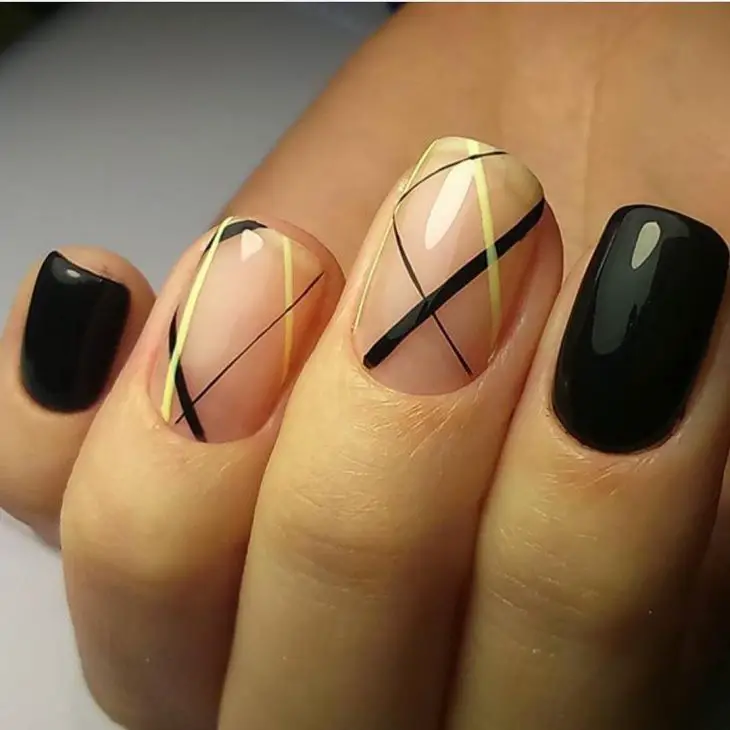
Materials Needed:
-
- Nude nail polish (e.g., Essie Nail Polish in Ballet Slippers)
- Black nail polish (e.g., OPI Nail Lacquer in Black Onyx)
- Yellow nail polish (e.g., China Glaze Nail Lacquer in Lemon Fizz)
- Thin nail art brush
- Top coat (e.g., Seche Vite Dry Fast Top Coat)
DIY Steps:
-
- Apply a base coat to all nails.
- Paint some nails with nude polish and others with black polish.
- Use a thin nail art brush to draw intersecting black and yellow lines on the nude nails.
- Finish with a top coat to protect your design and add shine.
Red and Black Floral
This striking design combines black and red nails with an intricate floral accent. The mix of glossy black, vibrant red, and the detailed flower art creates a bold and artistic look. This design is perfect for those who want to make a statement with their manicure.
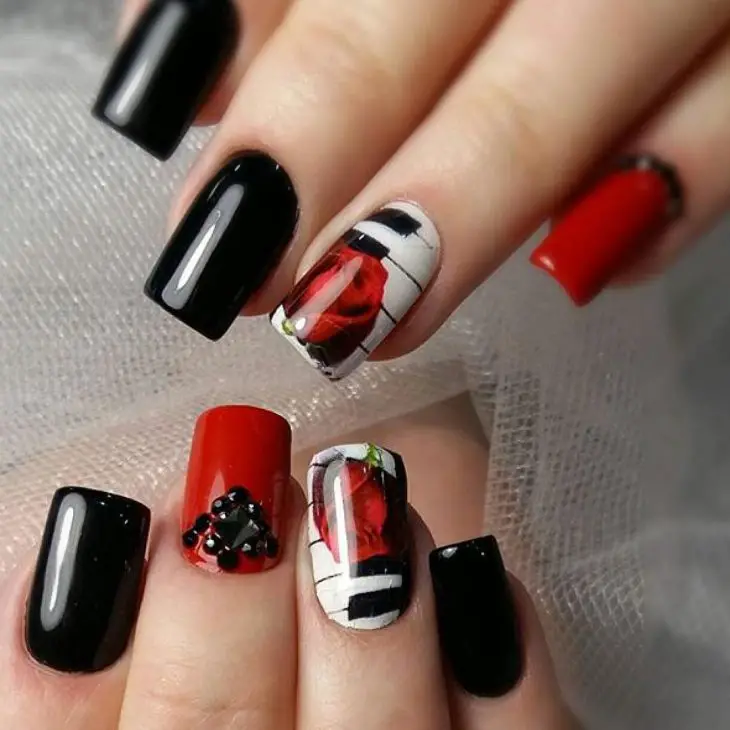
Materials Needed:
-
- Black nail polish (e.g., Essie Nail Polish in Licorice)
- Red nail polish (e.g., OPI Nail Lacquer in Big Apple Red)
- Floral nail decals or stickers
- Rhinestones (e.g., Born Pretty Black Rhinestones)
- Top coat (e.g., Glisten & Glow Top Coat)
DIY Steps:
-
- Apply a base coat to all nails.
- Paint some nails with black polish and others with red polish.
- Apply floral nail decals to the accent nails.
- Attach rhinestones to the red nails using nail glue.
- Finish with a top coat to secure the design and add shine.
Black and White Triangles
This chic design features black and white nails with bold triangle patterns. The matte and glossy finishes create an interesting contrast, making this design both modern and stylish. It’s a versatile look that works for any occasion.
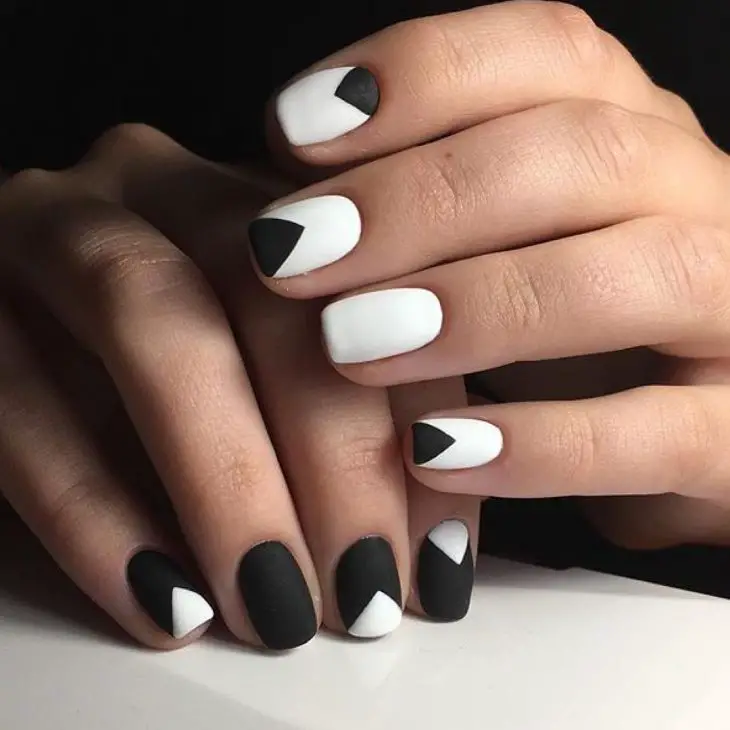
Materials Needed:
-
- Black nail polish (e.g., Sally Hansen Miracle Gel in Blacky O)
- White nail polish (e.g., Essie Nail Polish in Blanc)
- Matte top coat (e.g., OPI Matte Top Coat)
- Nail striping tape (e.g., Beetles Nail Art Striping Tape)
- Top coat (e.g., Essie Gel Couture Top Coat)
DIY Steps:
-
- Apply a base coat to all nails.
- Paint some nails with black polish and others with white polish.
- Use striping tape to create triangle patterns on the nails.
- Apply a matte top coat to some of the nails to create a contrast with the glossy finish.
- Finish with a top coat over the triangle patterns to protect the design.
Black and White with Stripes
This trendy design combines black and white nails with stripes and triangles for a modern and edgy look. The mix of patterns and the glossy finish make this design stand out. It’s perfect for those who love unique and eye-catching manicures.
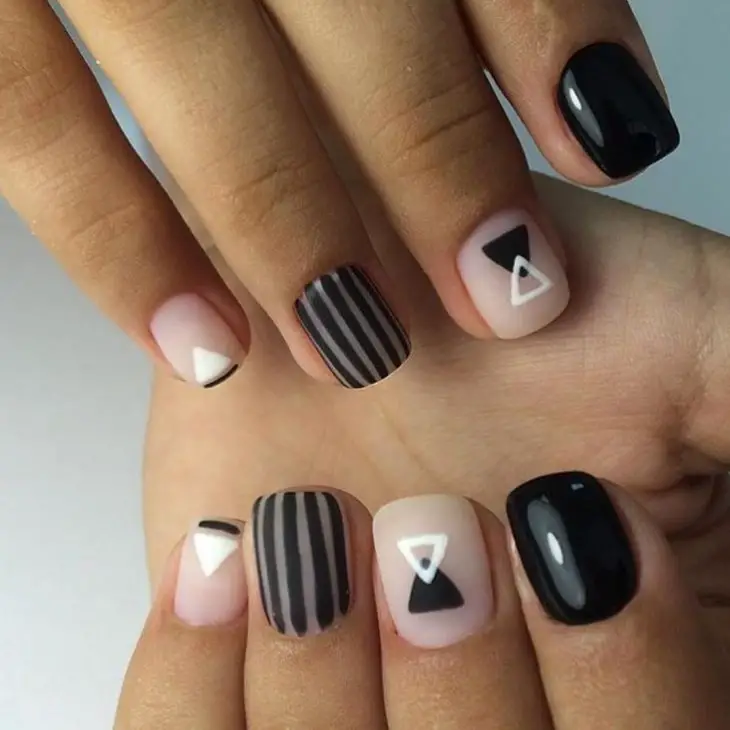
Materials Needed:
-
- Black nail polish (e.g., OPI Nail Lacquer in Black Onyx)
- White nail polish (e.g., Essie Nail Polish in Blanc)
- Thin nail art brush
- Top coat (e.g., Seche Vite Dry Fast Top Coat)
DIY Steps:
-
- Apply a base coat to all nails.
- Paint some nails with black polish and others with white polish.
- Use a thin nail art brush to create stripe and triangle patterns on the nails.
- Finish with a top coat to protect your design and add shine.
Matte Black with Gold Accents
This design is all about elegance with a touch of drama. The matte black base paired with gold accents creates a striking look. The golden patterns add a touch of luxury and sophistication to the sharp, stiletto-shaped nails.
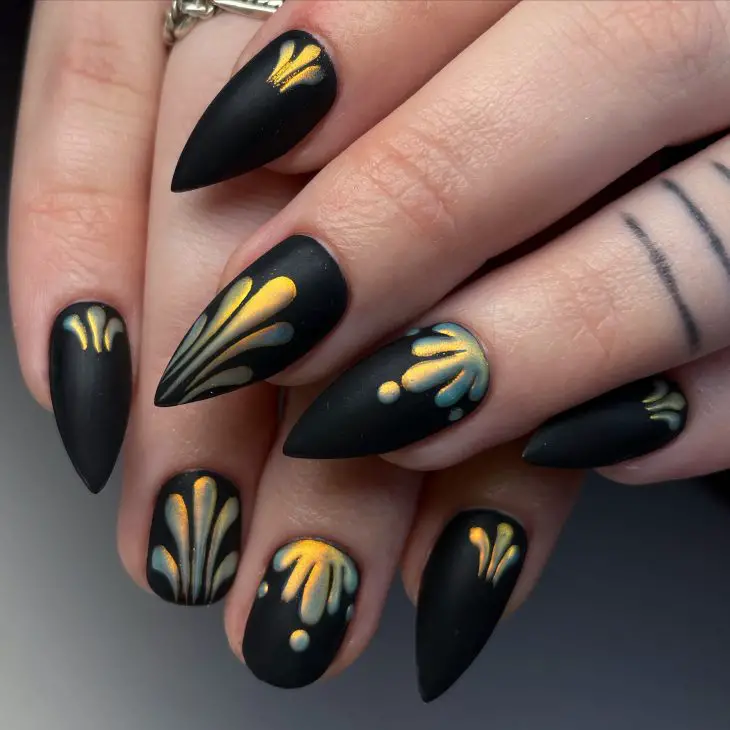
Materials Needed:
-
- Matte black nail polish (e.g., OPI Matte Top Coat over any black polish)
- Gold nail polish (e.g., Sally Hansen Color Foil in Liquid Gold)
- Thin nail art brush
- Top coat (e.g., Seche Vite Dry Fast Top Coat)
DIY Steps:
-
- Apply a base coat to protect your natural nails.
- Paint all nails with a matte black polish.
- Using a thin nail art brush, create gold accents on each nail.
- Finish with a top coat over the gold accents to ensure they stay in place.
Glossy Black and Nude with Gold Foil
This chic design features glossy black nails paired with nude nails adorned with gold foil. The contrast between the black and nude creates a sophisticated look, while the gold foil adds a touch of glamour.
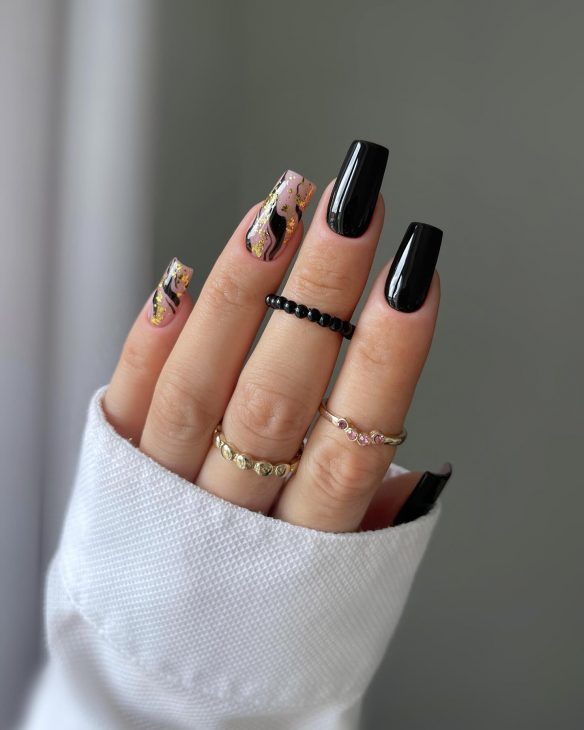
Materials Needed:
-
- Black nail polish (e.g., Essie Nail Polish in Licorice)
- Nude nail polish (e.g., OPI Nail Lacquer in Samoan Sand)
- Gold foil flakes (e.g., Born Pretty Gold Foil Nail Art)
- Top coat (e.g., Essie Gel Couture Top Coat)
DIY Steps:
-
- Apply a base coat to all nails.
- Paint some nails with black polish and others with nude polish.
- Apply gold foil to the nude nails using a top coat to help it adhere.
- Finish with a top coat to protect the design and add shine.
Black Flames and Snakes
This design combines edgy black flames and snake patterns on a nude base. The glossy finish and intricate details make this design stand out, perfect for those who love bold and unique nail art.
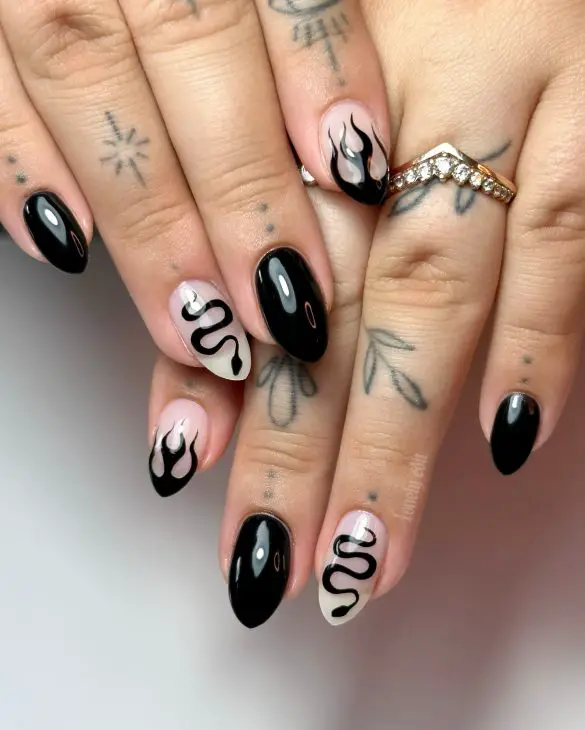
Materials Needed:
-
- Black nail polish (e.g., Chanel Le Vernis in Black Satin)
- Nude nail polish (e.g., Essie Nail Polish in Ballet Slippers)
- Thin nail art brush
- Top coat (e.g., Seche Vite Dry Fast Top Coat)
DIY Steps:
-
- Apply a base coat to all nails.
- Paint some nails with black polish and others with nude polish.
- Use a thin nail art brush to create flame and snake patterns on the nude nails.
- Finish with a top coat to protect your design and add shine.
Black and White Abstract
This modern design features a black and white abstract pattern. The combination of glossy black and white nails with delicate line work creates a sophisticated and artistic look, ideal for any occasion.
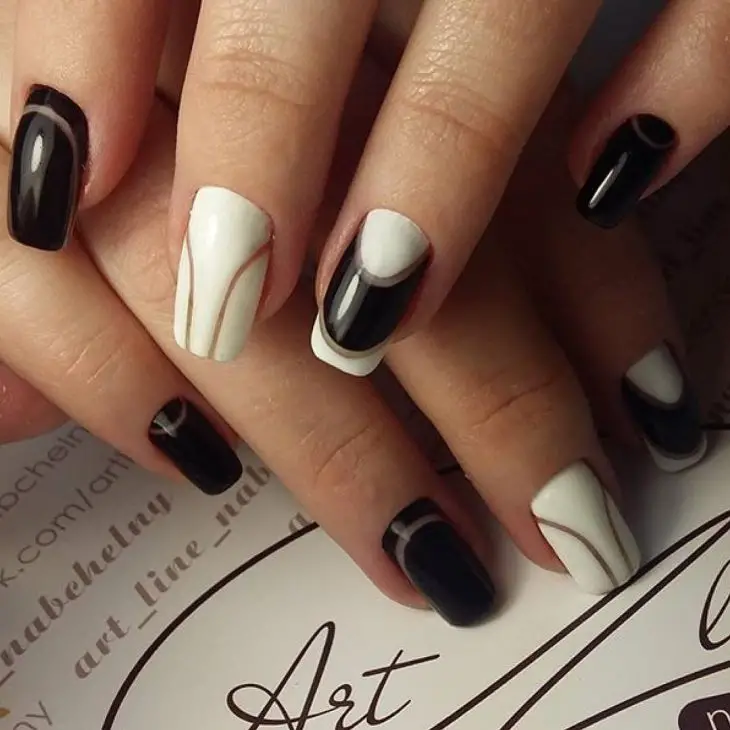
Materials Needed:
-
- Black nail polish (e.g., OPI Nail Lacquer in Black Onyx)
- White nail polish (e.g., Essie Nail Polish in Blanc)
- Thin nail art brush
- Top coat (e.g., Glisten & Glow Top Coat)
DIY Steps:
-
- Apply a base coat to all nails.
- Paint some nails with black polish and others with white polish.
- Use a thin nail art brush to create abstract line patterns on the nails.
- Finish with a top coat to protect your design and add shine.
Matte Black with Leopard Accent
This design features matte black nails with a single leopard print accent. The matte finish gives the black nails a sophisticated edge, while the leopard print adds a playful and trendy touch. The combination of these elements makes for a chic and eye-catching manicure.
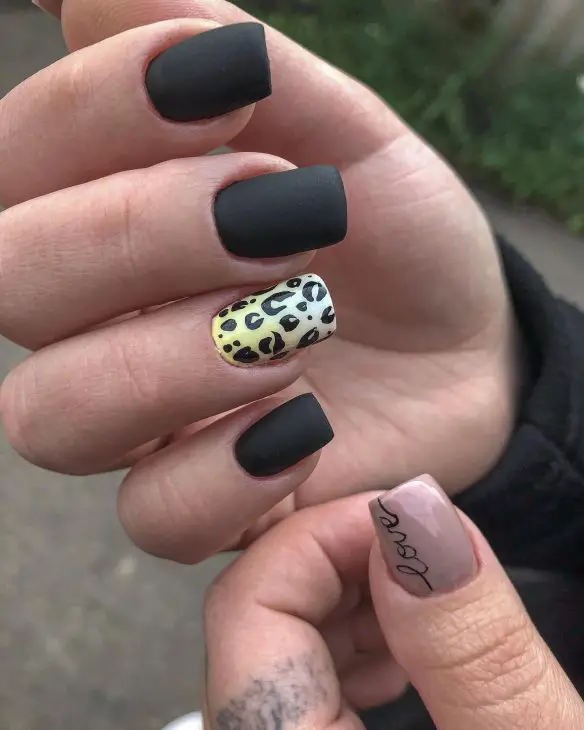
Materials Needed:
-
- Matte black nail polish (e.g., OPI Matte Top Coat over any black polish)
- Yellow nail polish (e.g., Essie Nail Polish in Sunny Business)
- Black nail polish (e.g., Sally Hansen Miracle Gel in Blacky O)
- Dotting tool
- Top coat (e.g., Seche Vite Dry Fast Top Coat)
DIY Steps:
-
- Apply a base coat to all nails.
- Paint most nails with a matte black polish.
- Paint the accent nail with yellow polish.
- Use a dotting tool to create black leopard spots on the yellow accent nail.
- Finish with a top coat on the accent nail to protect the design.
Black and White Cow Print
This fun and unique design features black and white cow print nails. The playful pattern is perfect for those who love to experiment with bold and quirky nail art. The black and white combination is both striking and stylish, making this design a standout choice.
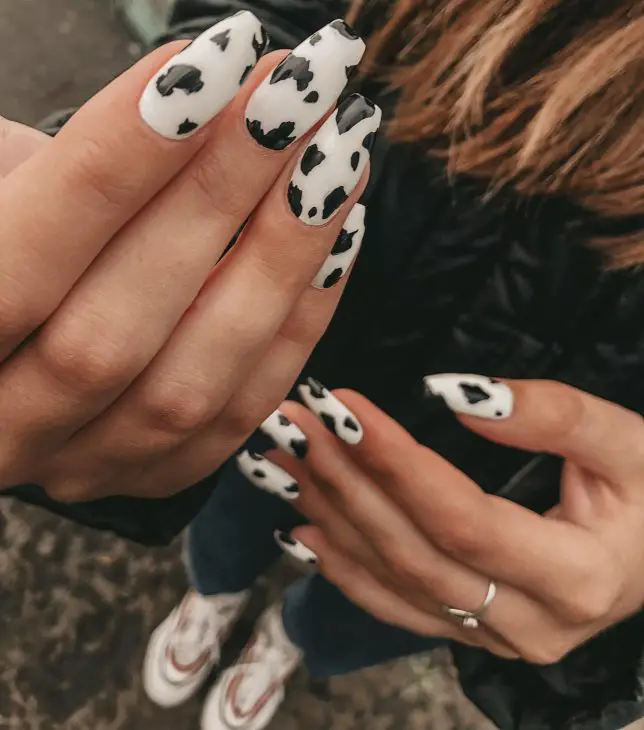
Materials Needed:
-
- White nail polish (e.g., OPI Nail Lacquer in Alpine Snow)
- Black nail polish (e.g., Essie Nail Polish in Licorice)
- Thin nail art brush
- Top coat (e.g., Glisten & Glow Top Coat)
DIY Steps:
-
- Apply a base coat to all nails.
- Paint all nails with white polish.
- Use a thin nail art brush to create irregular black spots on each nail.
- Finish with a top coat to protect your design and add shine.
Black French Tips with Glitter
This elegant design features black nails with white French tips and a touch of glitter. The glittery black base adds a touch of glamour, while the white tips provide a classic and clean look. This design is perfect for those who want a sophisticated and dazzling manicure.
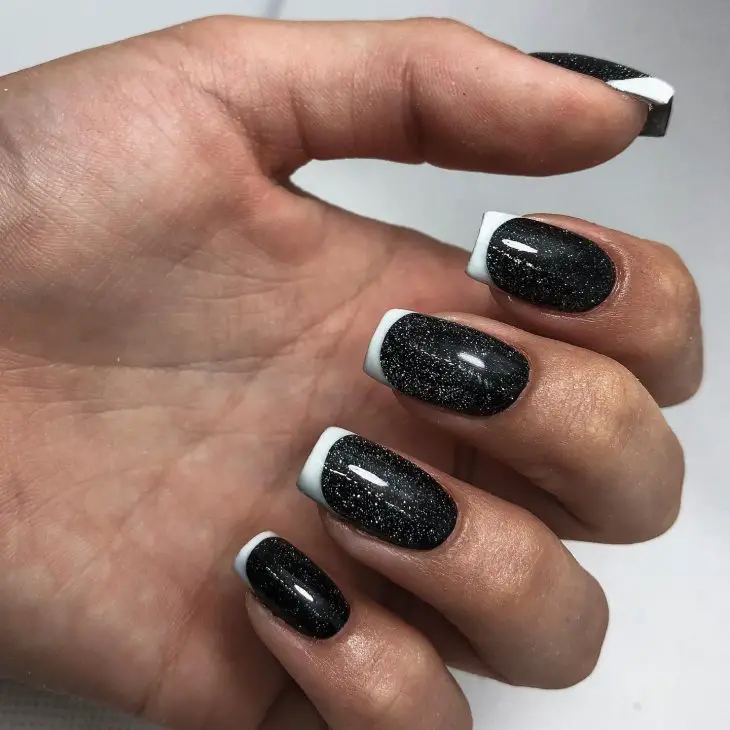
Materials Needed:
-
- Black glitter nail polish (e.g., China Glaze Nail Lacquer in Glitter Goblin)
- White nail polish (e.g., Essie Nail Polish in Blanc)
- Top coat (e.g., Seche Vite Dry Fast Top Coat)
DIY Steps:
-
- Apply a base coat to all nails.
- Paint all nails with black glitter polish.
- Use white polish to create French tips on each nail.
- Finish with a top coat to protect the design and add shine.
Black and Nude with Silver Accents
This modern design features black and nude nails with silver accents. The sleek black and soft nude combination is both stylish and versatile, while the silver accents add a touch of elegance. This design is perfect for any occasion, from casual outings to formal events.
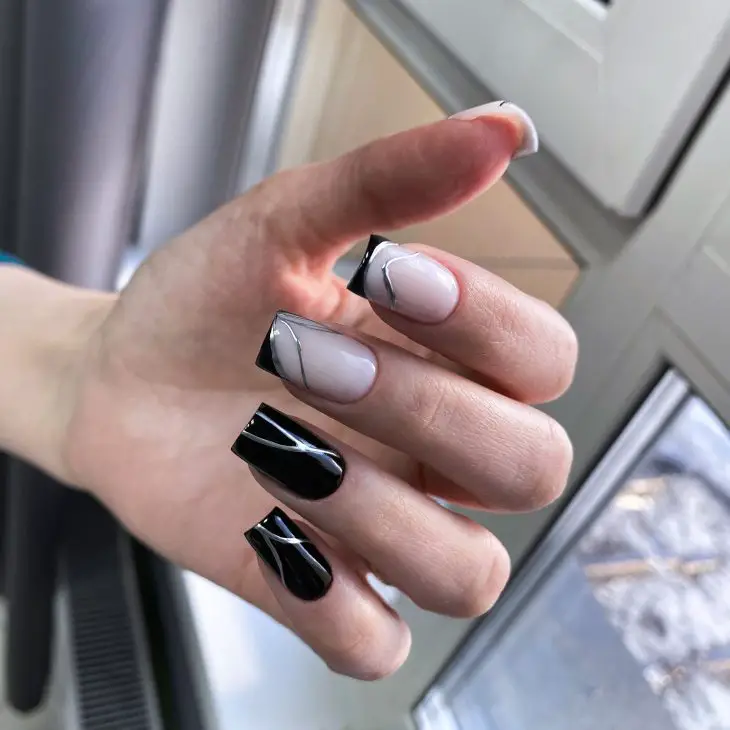
Materials Needed:
-
- Black nail polish (e.g., OPI Nail Lacquer in Black Onyx)
- Nude nail polish (e.g., Essie Nail Polish in Ballet Slippers)
- Silver nail polish (e.g., Sally Hansen Color Foil in Sterling Silver)
- Thin nail art brush
- Top coat (e.g., Seche Vite Dry Fast Top Coat)
DIY Steps:
-
- Apply a base coat to all nails.
- Paint some nails with black polish and others with nude polish.
- Use a thin nail art brush to create silver accents on the nails.
- Finish with a top coat to protect your design and add shine.
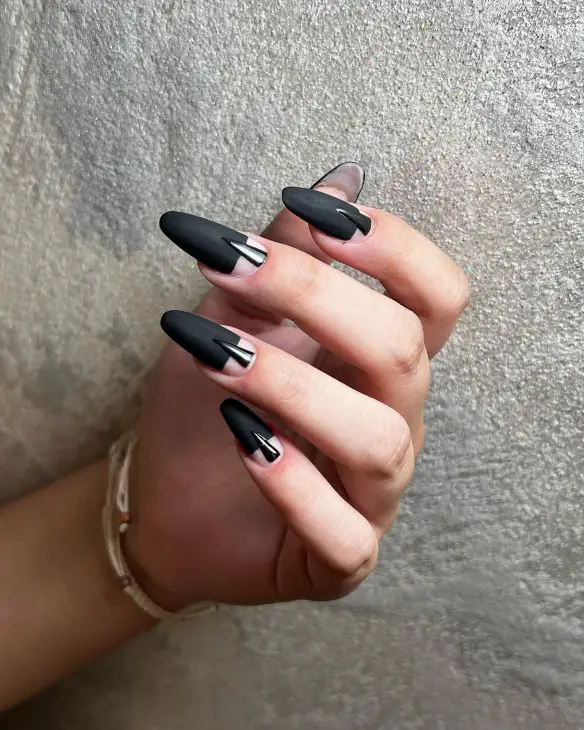
Matte Black with Chrome Accents
This design exudes modern elegance with its matte black finish and sleek chrome accents. The matte black nails provide a sophisticated base, while the chrome details add a futuristic and edgy touch. This look is perfect for those who want to make a bold fashion statement with their nails.
Materials Needed:
-
- Matte black nail polish (e.g., OPI Matte Top Coat over any black polish)
- Chrome nail powder (e.g., Born Pretty Chrome Mirror Nail Powder)
- Top coat (e.g., Seche Vite Dry Fast Top Coat)
DIY Steps:
-
- Apply a base coat to all nails.
- Paint all nails with a matte black polish.
- Apply chrome powder to the desired areas using an eyeshadow applicator.
- Seal the chrome accents with a top coat to ensure they stay in place.
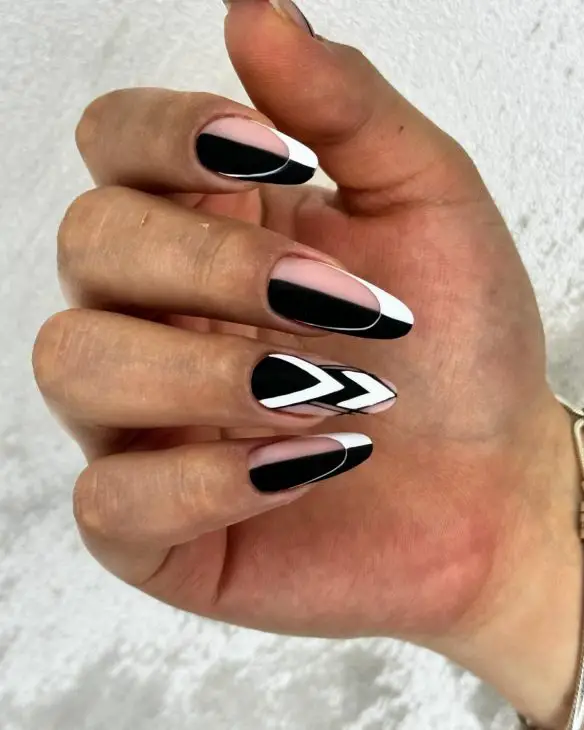
Black and White Geometric Design
This striking design features a mix of black and white geometric patterns. The combination of sharp lines and contrasting colors creates a bold and eye-catching look. The geometric patterns give a modern twist to classic black and white nails, making this design both stylish and unique.
Materials Needed:
-
- Black nail polish (e.g., Essie Nail Polish in Licorice)
- White nail polish (e.g., Essie Nail Polish in Blanc)
- Thin nail art brush
- Top coat (e.g., Glisten & Glow Top Coat)
DIY Steps:
-
- Apply a base coat to all nails.
- Paint some nails with black polish and others with white polish.
- Use a thin nail art brush to create geometric patterns on the nails.
- Finish with a top coat to protect your design and add shine.
Save Pin
