Chic and Simple: 20 Must-Try Nude Summer Nail Designs for 2024
Are you on the hunt for the perfect nude summer nails to flaunt this season? Whether you’re a fan of short, square, almond, or coffin shapes, the allure of nude polish remains timeless and chic. But what makes the nude palette such a hit during the warmer months? And how can you incorporate designs that are both simple and striking? Stay tuned as we explore various nude manicures that will not only enhance your summer wardrobe but also make you stand out at any event.
Subtle Elegance with a Twist
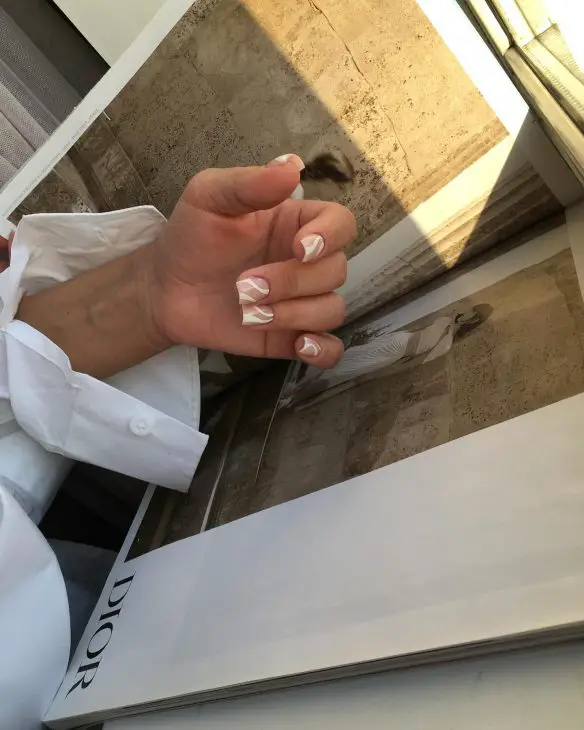
Nude summer nails often conjure images of simplicity and subtlety, and this look is no exception. The design features a soft nude base accented with delicate white swirls that elevate its overall elegance. The swirls add a dynamic contrast while maintaining the manicure’s understated appeal. This is a perfect example of nude summer nails with design that balances artistry with wearable simplicity.
Materials Needed:
- Nude polish (e.g., Essie’s “Ballet Slippers”)
- White nail art liner
- Top coat for shine and durability
DIY Instructions:
Start by applying two coats of your chosen nude polish, allowing each coat to dry completely. Using a thin nail art brush, create gentle swirls with white liner. There’s no need for perfection here; the beauty lies in the uniqueness of each swirl. Finish with a clear top coat to protect your design and add a glossy sheen.
Classic Chic: Nude and Gold Flecks
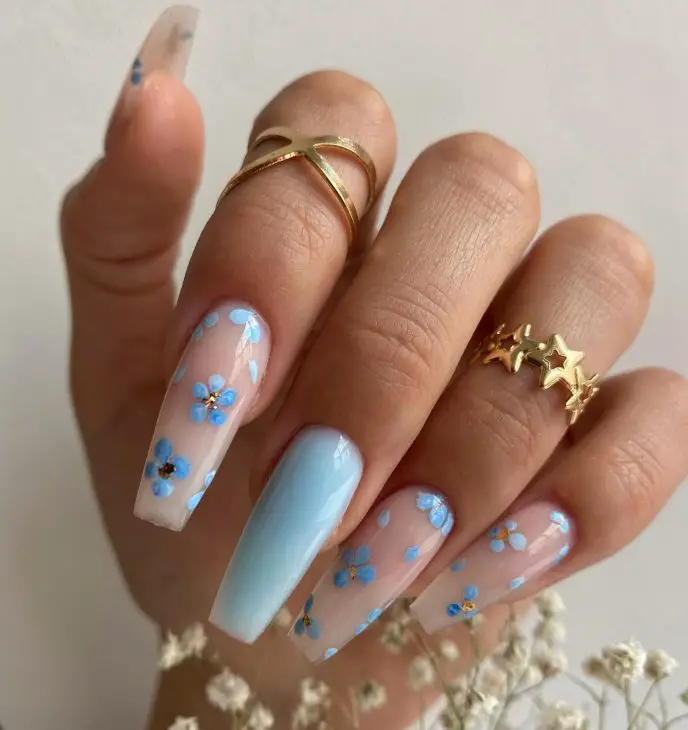
The design showcases a classic nude base with a sprinkle of gold flecks, making it ideal for those who prefer a hint of glamour in their nude summer nails designs. The gold adds a touch of luxury without overpowering the soft nude background, making it suitable for both daytime and evening occasions.
Materials Needed:
- Nude nail polish
- Gold flake top coat
- Base and top coat
DIY Instructions:
Apply a base coat to protect your nails and follow up with two coats of your nude polish. Once dry, apply a layer of gold flake top coat for that subtle yet stunning sparkle. Seal it all with a top coat to ensure longevity and extra shine.
Modern Minimalist: Nude with a Single Stripe
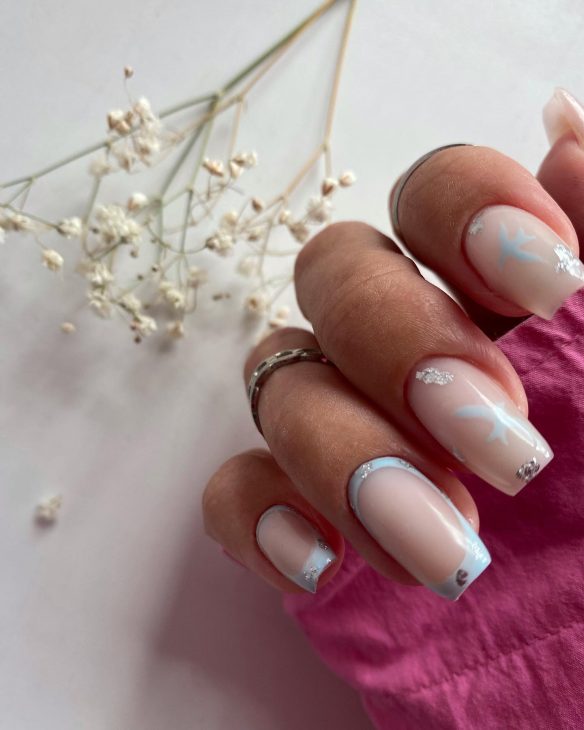
This nail design features a clean, minimalist look with a single black stripe over a nude base, exemplifying simple yet sophisticated nude summer nails. It’s perfect for those who embrace the ‘less is more’ philosophy but still want a modern twist on their nails.
Materials Needed:
- Nude polish (prefer a matte finish for a modern touch)
- Black nail striping tape
- Matte top coat
DIY Instructions:
After applying a base coat, cover your nails with two coats of matte nude polish. Once dry, place a strip of black tape horizontally across each nail. For a durable finish, apply a matte top coat to seal in the tape and polish.
Whimsical Floral Art on Nude Nails
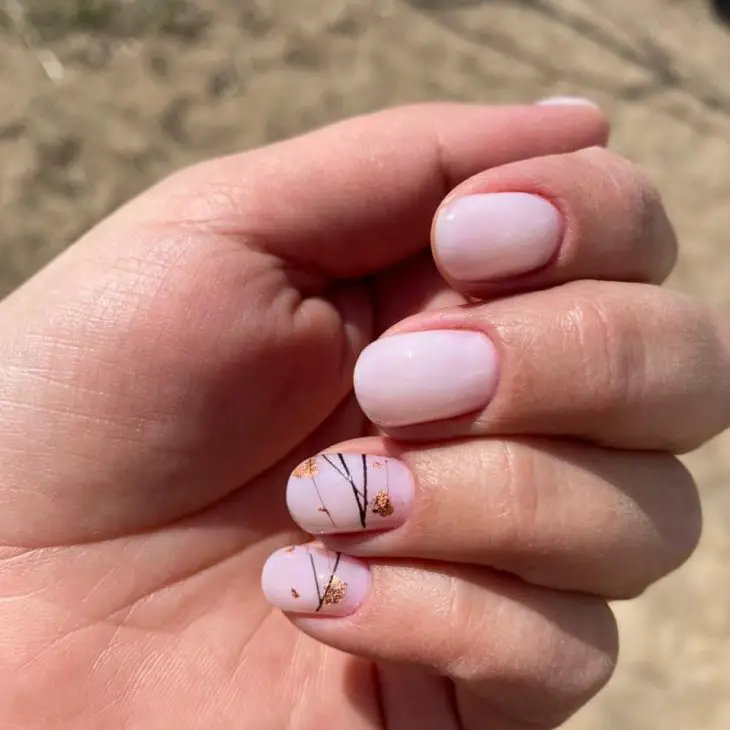
This design breathes life into nude summer nails with design, featuring delicate, hand-painted flowers that evoke a serene garden scene. The soft pink nude base provides a perfect canvas for the golden floral artwork, making this style ideal for those who love a touch of nature in their manicure.
Materials Needed:
- Light pink nude polish
- Fine-tip nail art brush
- Gold nail polish
- Clear top coat
DIY Instructions:
Paint your nails with two coats of light pink nude polish as the base. Once dry, use a fine-tip brush to hand-paint small branches and flowers using gold polish. Allow your artistic flair to guide the design. Finish with a clear top coat to enhance durability and shine.
Modern Geometry: Nude with Black Accents
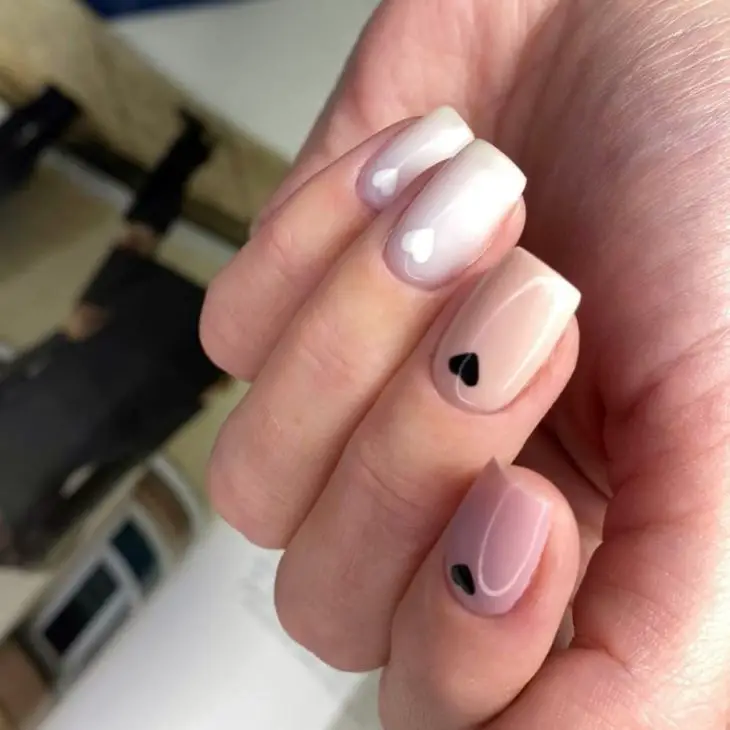
The design showcases a chic, minimalist approach with geometric black accents over a nude base. It’s perfect for those who prefer nude summer nails acrylic with a modern twist. This look combines simplicity with a bold statement, ideal for both office and casual outings.
Materials Needed:
- Nude acrylic polish
- Black nail polish
- Tape for precise lines
- Top coat
DIY Instructions:
Apply a nude acrylic base and let it dry completely. Use tape to create sharp, geometric shapes or lines and paint over them with black polish. Remove the tape carefully to reveal clean lines. Finish with a top coat to seal the design.
Lavender Fade: Ombre Nude Summer Nails
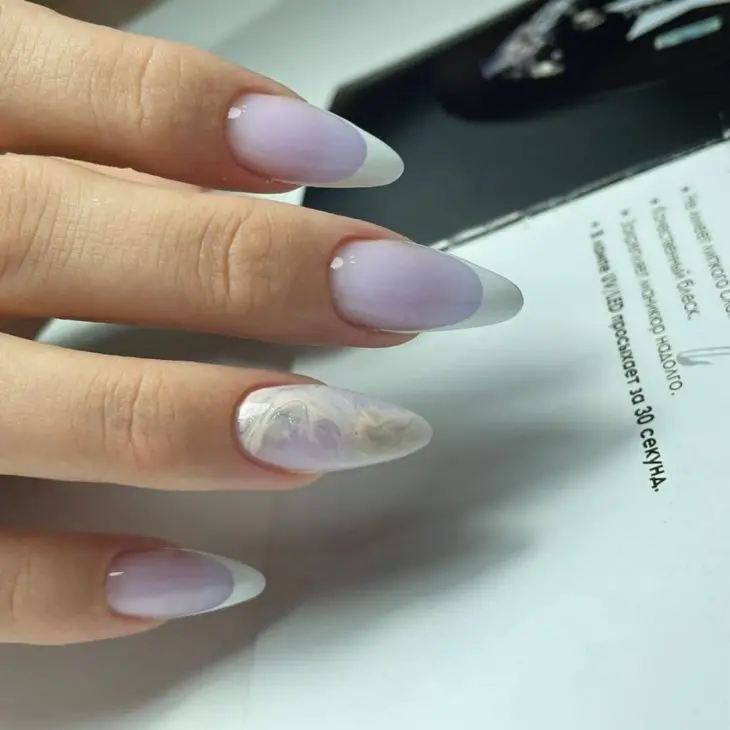
Ombre nails are a stunning way to sport nude summer nails designs. This design fades from a soft lavender to a translucent nude, adding a dreamy and ethereal quality to your nail art. It’s perfect for those looking for something both subtle and eye-catching.
Materials Needed:
- Lavender and nude nail polishes
- Makeup sponge for ombre effect
- Top coat
DIY Instructions:
Start by applying a nude base coat. Dab a makeup sponge with both lavender and nude polishes and gently press it onto your nails, creating a seamless ombre transition. Finish with a top coat for a glossy, smooth finish.
Elegant Marble Effect on Nude Nails
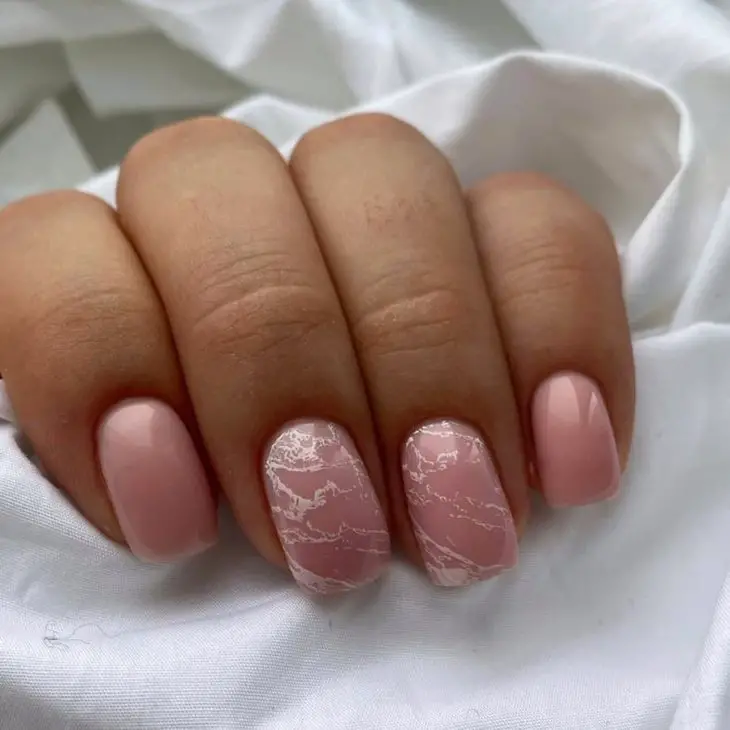
This sophisticated design features a marble effect using swirls of white and grey over a nude base, perfect for nude summer nails almond or any shape you prefer. It’s an artistic choice that mimics the luxurious look of natural marble.
Materials Needed:
- Nude polish
- White and grey nail polishes
- Plastic wrap
- Top coat
DIY Instructions:
Apply a nude base coat. While still wet, add small dots of white and grey polish. Use plastic wrap to dab the nails gently, creating a marbled effect. Allow it to dry before applying a top coat for a smooth and shiny finish.
Playful Polka Dots on Nude Nails
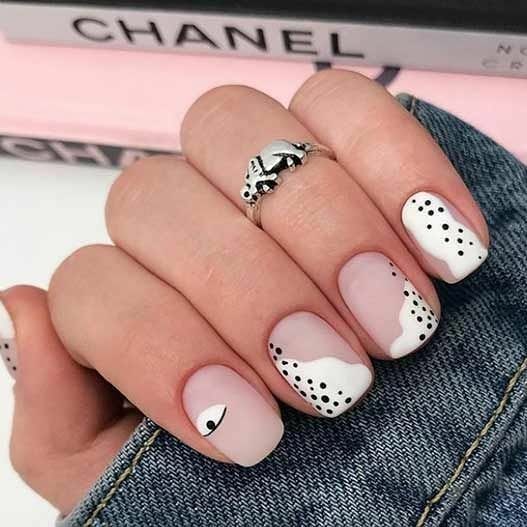
This whimsical design infuses fun into nude summer nails with design. Perfect for those who wish to express their playful side, this nail art uses a nude base adorned with white polka dots, which add a pop of pattern without overwhelming the natural look.
Materials Needed:
- Nude polish
- White dotting polish or tool
- Top coat for sealing
DIY Instructions:
After applying a nude base, use a dotting tool to add evenly spaced white polka dots across each nail. The key is to keep the dots small and uniform for a clean, playful look. Finish with a clear top coat to protect your design and add a glossy finish.
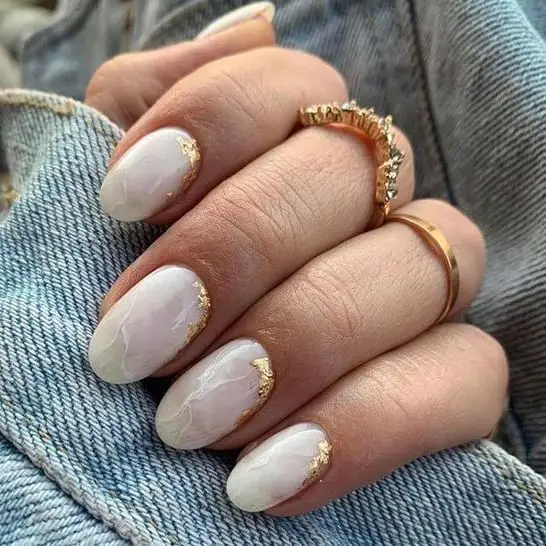
Luxurious Gold Flakes on Nude Nails
Showcasing a rich blend of simplicity and opulence, this design features a translucent nude base with gold flakes, perfect for elevating your nude summer nails coffin style. It’s ideal for special occasions or anyone looking to add a touch of luxury to their everyday style.
Materials Needed:
- Clear nude polish
- Gold leaf or flake polish
- Top coat
DIY Instructions:
Start with a clear nude base coat. Carefully apply small pieces of gold leaf on the nails while the base is still tacky. Once you’re satisfied with the arrangement, seal the design with a top coat for lasting wear and an extra gloss.
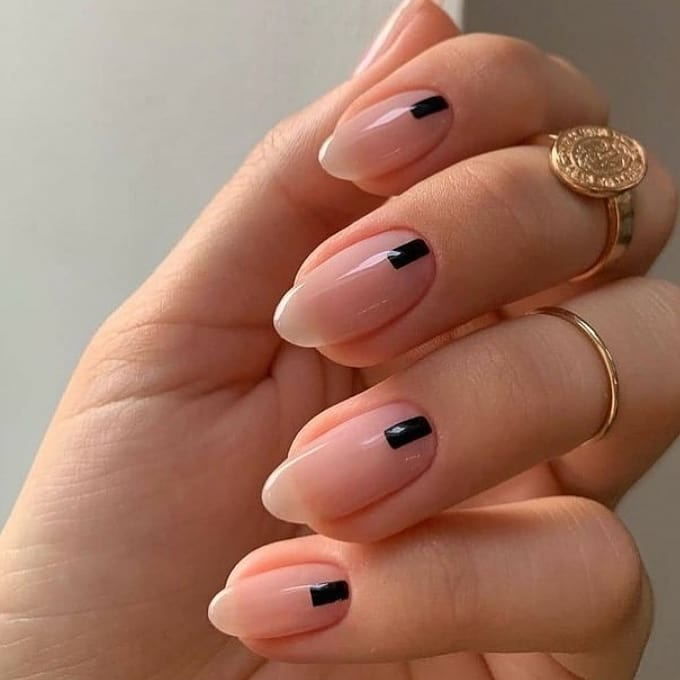
Chic Contrast: Nude with Black Tips
This sleek and stylish design brings a modern twist to nude summer nails square. It combines the subtlety of nude polish with striking black tips, creating a contrast that’s both eye-catching and sophisticated.
Materials Needed:
- Nude polish
- Black nail polish
- Tape or stencils for precision
DIY Instructions:
Apply a nude base coat and let it dry thoroughly. Use tape or nail stencils to define the tips, then apply black polish to the tips only. Remove the tape while the black polish is still wet to ensure clean lines. Seal with a top coat for durability.
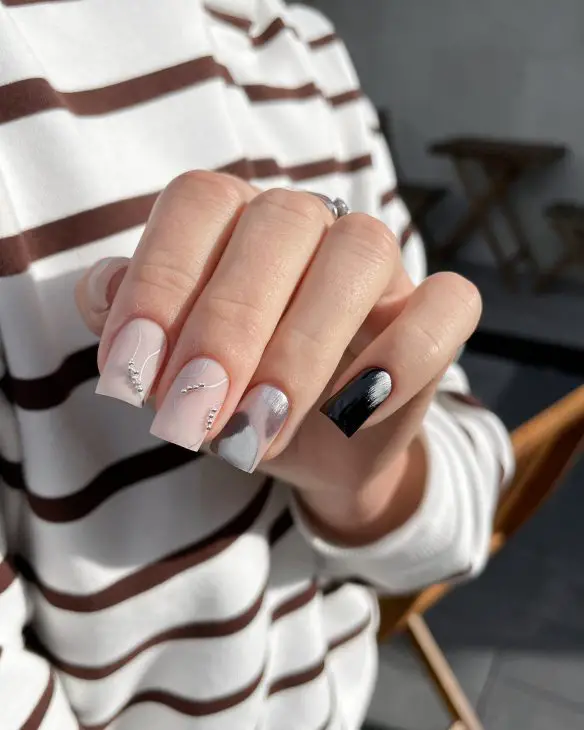
Sophisticated Silver Accents on Nude Nails
This manicure incorporates subtle silver accents over a soft nude base, providing a refined and elegant look suitable for both day and night settings. The silver accents are carefully placed to add just the right amount of flair without overpowering the overall design.
Materials Needed:
- Nude polish
- Silver striping tape or polish
- Top coat
DIY Instructions:
Paint your nails with a nude base color. Once dry, use silver striping tape or a thin brush with silver polish to create delicate designs. Popular choices include thin lines, small dots, or geometric shapes. Finish with a clear top coat to ensure your manicure shines and stays put.
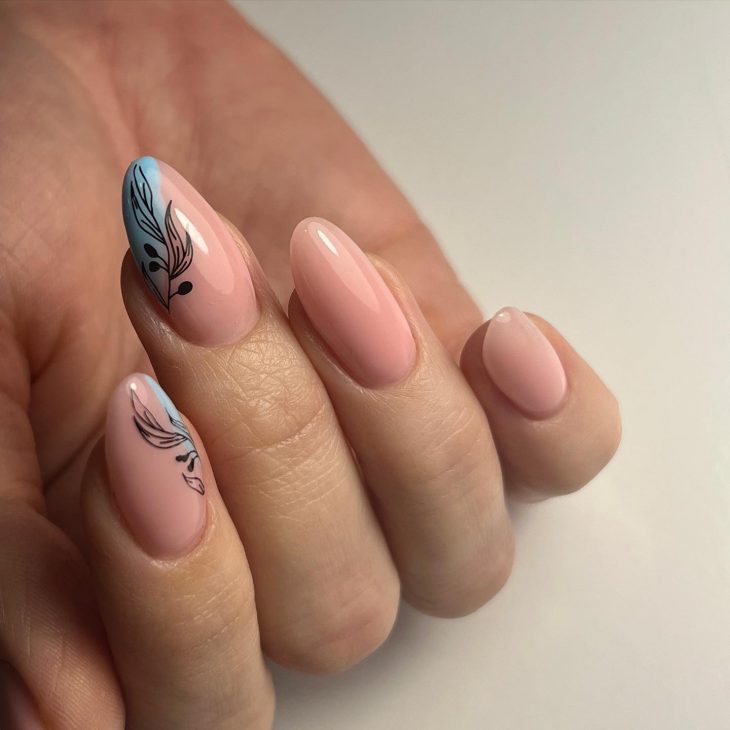
Feathered Flair on Nude Nails
This nail design adds an artistic touch to nude summer nails almond with elegantly drawn black and blue feathers. It’s a sophisticated choice for those looking for something uniquely detailed yet understated enough for everyday wear.
Materials Needed:
- Nude polish
- Black and blue nail art pens
- Top coat
DIY Instructions:
Start with a nude polish as your base. Once dry, use the nail art pens to draw delicate feather designs on one or two accent nails. The key is light strokes to achieve a feather-like effect. Seal with a top coat to protect your artwork and enhance the finish.
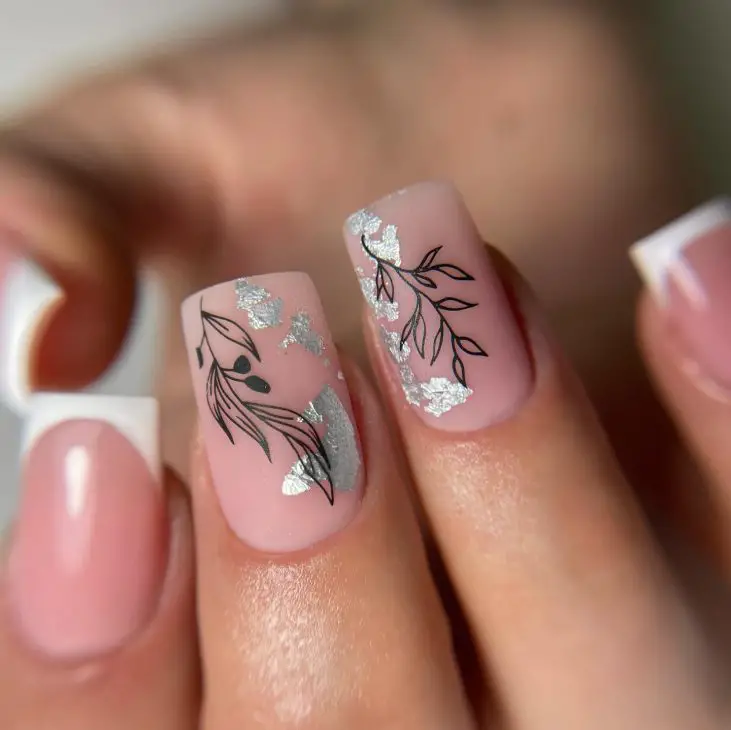
Silver Leaf and Botanicals on Nude Nails
Infusing nature with a touch of sparkle, this design features black botanical illustrations accented with real silver leaf pieces on a soft pink nude base. Ideal for those who appreciate an artistic nod to nature combined with a bit of glamour.
Materials Needed:
- Soft pink nude polish
- Black nail art pen
- Silver leaf
- Top coat
DIY Instructions:
Paint your nails with the soft pink nude polish. Once that base is dry, apply small pieces of silver leaf and use a black nail art pen to add botanical designs. The contrast of the silver against the botanicals creates a captivating look. Finish with a top coat for lasting wear and shine.
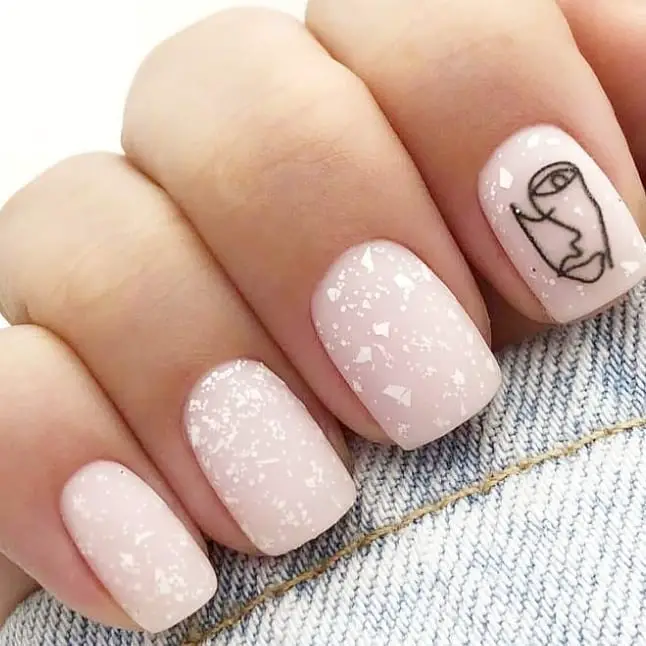
Subtle Shimmer: Glittery Snow on Nude Nails
Perfect for simulating a gentle snowfall, this manicure uses a light pink base with a sprinkling of white glitter to create a minimalist yet magical winter-themed look, even in the summer.
Materials Needed:
- Light pink nude polish
- White glitter polish or loose glitter
- Top coat
DIY Instructions:
Apply two coats of light pink nude polish as your base. While the second coat is still tacky, sprinkle white glitter towards the tip of the nail, allowing it to naturally gradient downwards. Seal with a top coat for a smooth finish and to keep the glitter in place.
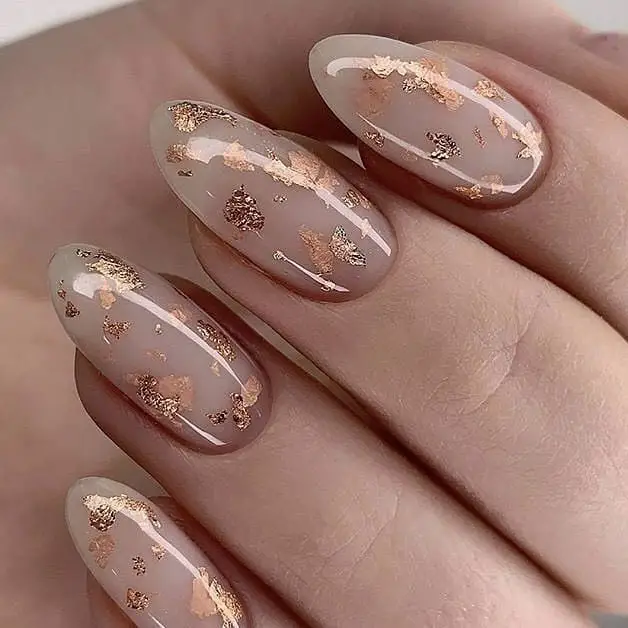
Elegant Gold Flake Overlay on Nude Nails
This luxurious design combines the natural elegance of nude polish with the opulent shimmer of gold flakes, creating a striking effect perfect for special occasions or an upscale everyday look.
Materials Needed:
- Nude polish
- Gold flake polish or loose gold flakes
- Top coat
DIY Instructions:
Begin with a base of nude polish. While the polish is still slightly wet, carefully place gold flakes over the nails, focusing on creating a dispersed pattern for a more natural gold flake distribution. Apply a top coat to seal the flakes in place and add a glossy finish.
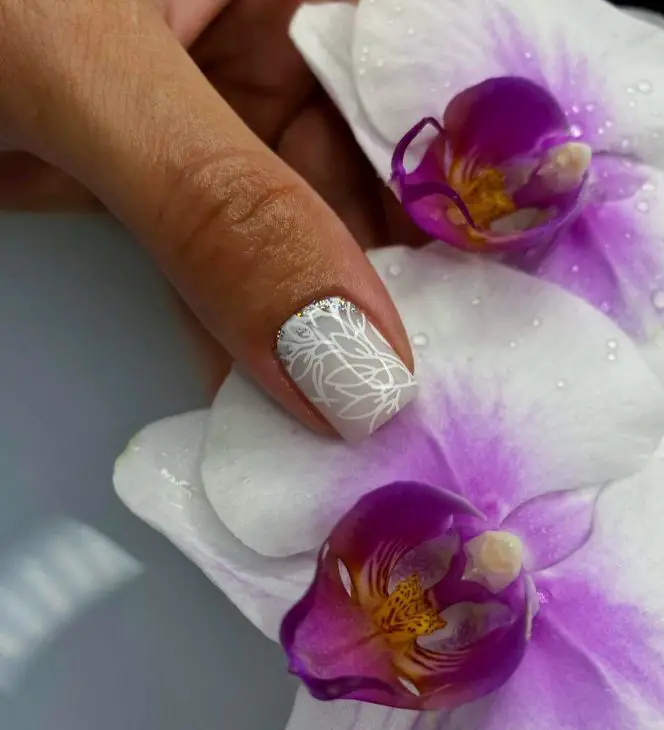
Intricate White Botanicals on Nude Nails
This design showcases beautifully detailed white botanical patterns on a classic nude base, perfect for those who prefer nude summer nails with design that combines elegance with artistic expression. The addition of a single golden stripe adds a luxurious touch.
Materials Needed:
- Nude polish
- White nail art pen
- Gold striping tape
- Top coat
DIY Instructions:
Apply a smooth layer of nude polish as your base. Once dry, use a white nail art pen to draw intricate botanical designs. Apply a thin strip of gold tape for an accent. Finish with a clear top coat to seal and protect the artwork.
Minimalist Jewel Accents on Nude Nails
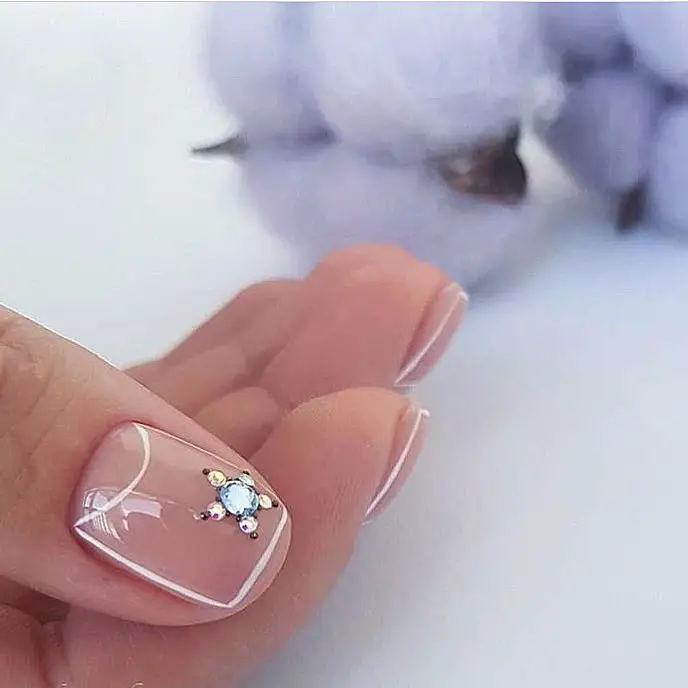
This minimalist design features a nude base with strategically placed jewel accents, providing a subtle yet glamorous look. It’s perfect for adding a touch of luxury to everyday nude summer nails acrylic without going over the top.
Materials Needed:
- Nude acrylic polish
- Small nail jewels
- Nail glue
- Top coat
DIY Instructions:
Start with a base of nude acrylic polish. Once dry, apply small jewels at the base or along the sides of the nails using nail glue. Keep the placement sparse to maintain the minimalist aesthetic. Seal with a top coat to ensure the jewels stay in place.
Modern Mixed Manicure on Nude Nails
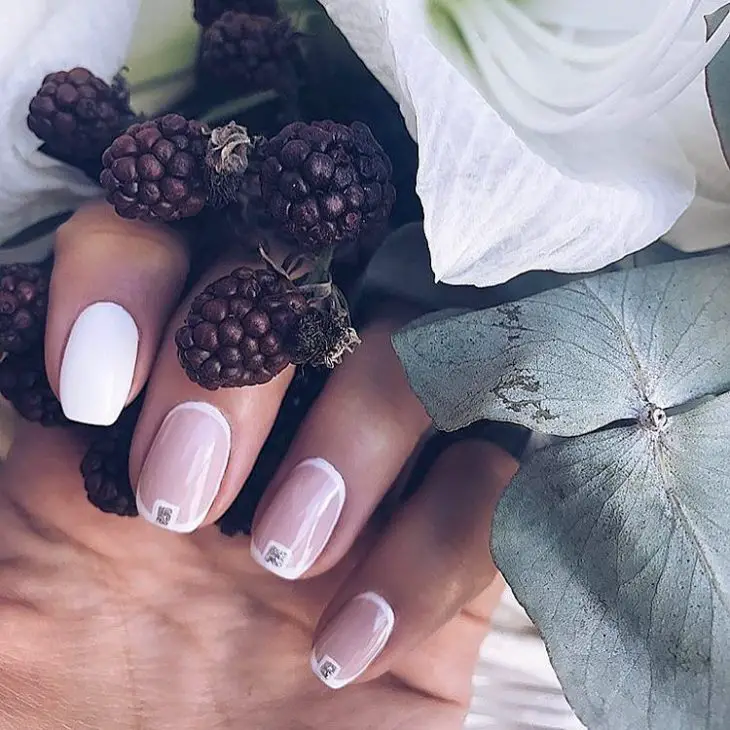
This design combines various elements for a modern look, featuring a mix of full nude polish, subtle geometric patterns, and a bold white accent nail. It’s an excellent choice for someone who loves a contemporary yet understated style in their nude summer nails designs.
Materials Needed:
- Nude polish
- White nail polish
- Tape for geometric designs
- Top coat
DIY Instructions:
Paint all your nails nude except for one accent nail, which will be white. For the geometric designs, use tape to create clean lines on one or two nails and apply a contrasting polish. Remove the tape carefully and finish with a top coat for a sleek look.
Floral Elegance with Jewel Accents on Nude Nails
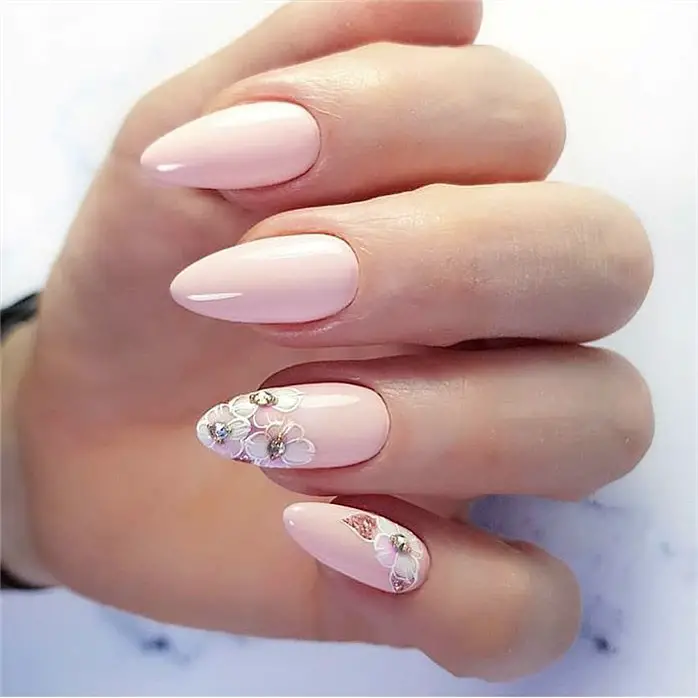
This elegant design combines soft floral patterns with delicate jewel accents on a nude base, creating a sophisticated and romantic look ideal for special occasions or everyday elegance.
Materials Needed:
- Nude polish
- White nail art pen for floral designs
- Small nail jewels
- Top coat
DIY Instructions:
Apply your nude polish as a base. Use a white nail art pen to delicately draw floral patterns on one or two accent nails. Adorn the center of each flower with a tiny jewel for a touch of sparkle. Finish with a top coat to protect your design and add a glossy sheen.
Minimalist Dot on Nude Almond Nails
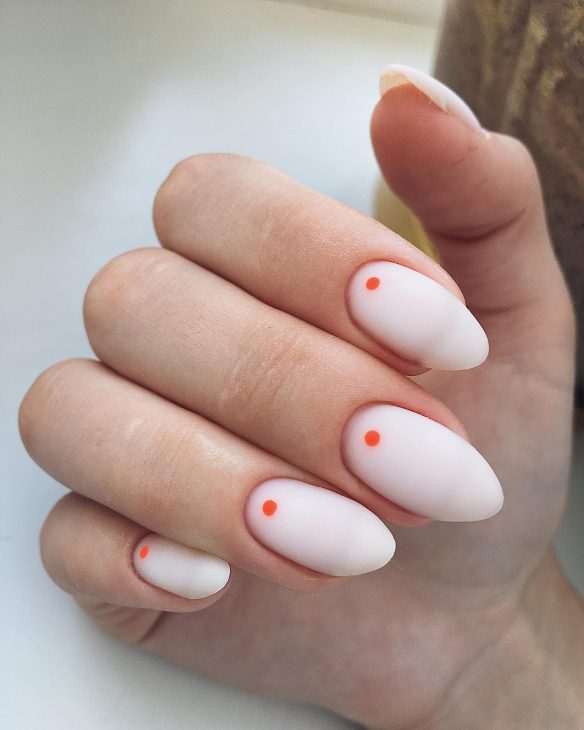
This design is a perfect embodiment of minimalism with a single vibrant orange dot placed on a flawless matte nude base. It’s an excellent example of nude summer nails almond, where less truly is more, making it ideal for anyone seeking simplicity with a pop of color.
Materials Needed:
- Matte nude polish
- Orange nail polish
- Dotting tool or a small brush
- Matte top coat
DIY Instructions:
Begin by applying a matte nude polish as the base. Once dry, use a dotting tool or the tip of a small brush to carefully place a single orange dot near the cuticle of each nail. This should be done with precision to keep the look clean and intentional. Finish with a matte top coat to maintain the matte appearance and ensure the longevity of your design.
Save Pin
