20 Ideas Early Fall Nail Colors: Your Ultimate Guide to Trendy Tips
Early fall is the perfect time to transition your nail colors from the bright and bold shades of summer to the more subdued, earthy tones of autumn. With the right palette, you can create stunning nail designs that capture the essence of the season. In this article, we’ll explore some of the best early fall nail colors and ideas, featuring dip, gel, matte, and acrylic options. Let’s dive into the trends that will keep your nails looking fabulous as the leaves start to change.
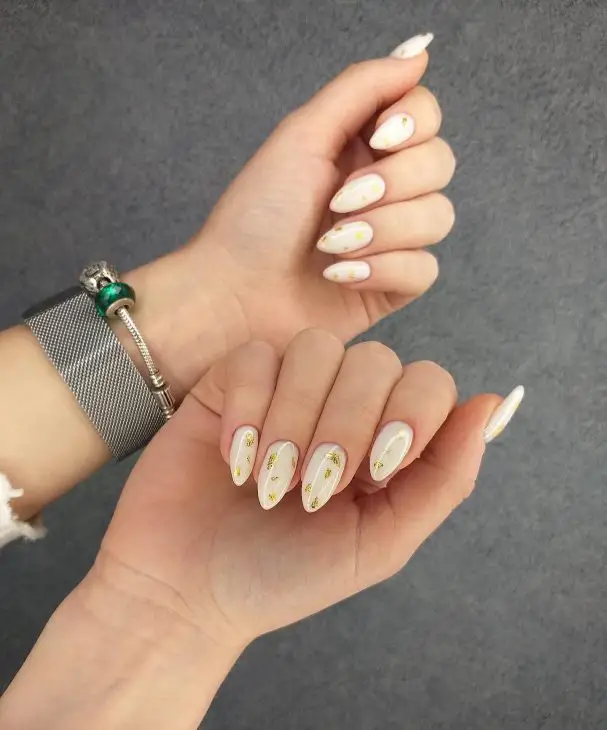
Elegant Gold Leaf Accents
When it comes to early fall nail colors, this design featuring delicate gold leaf accents on a creamy white base is both sophisticated and stylish. The gold leaf adds a touch of luxury, making this manicure perfect for any occasion. The almond shape enhances the elegance of the nails, while the subtle gold accents reflect the warm hues of fall.
Consumables:
- Creamy white nail polish (e.g., OPI Alpine Snow)
- Gold leaf flakes
- Clear top coat (e.g., Seche Vite Dry Fast Top Coat)
- Nail glue or foil adhesive
- Fine detail brush
How to Create:
- Start with a base coat to protect your nails.
- Apply two coats of creamy white nail polish, allowing each coat to dry completely.
- Using nail glue or foil adhesive, carefully place the gold leaf flakes onto the nails.
- Use a fine detail brush to press the gold leaf into place and remove any excess.
- Finish with a clear top coat to seal the design and add shine.
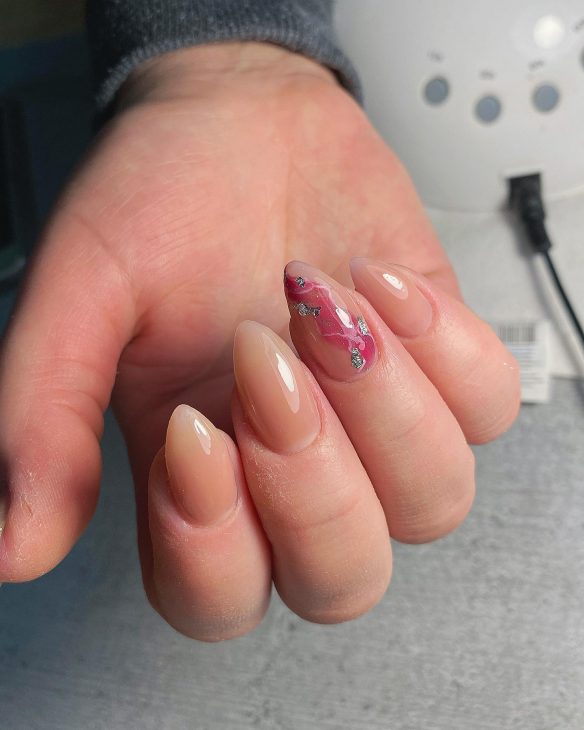
Subtle Floral Accent
This design is a beautiful representation of early fall nail colors. The nude base provides a clean canvas for the subtle floral accent on the ring finger. The combination of soft pink and green hues with delicate silver details creates a charming and feminine look, ideal for the transition from late summer to early fall.
Consumables:
- Nude nail polish (e.g., DND Nude Pink)
- Pink and green nail polish for floral accents
- Silver nail polish for details
- Thin nail art brush
- Clear top coat
How to Create:
- Apply a base coat to your nails.
- Paint all nails with two coats of nude polish.
- Using a thin nail art brush, create small floral patterns on the ring finger with pink and green polishes.
- Add silver details to the flowers for extra dimension.
- Seal the design with a clear top coat.
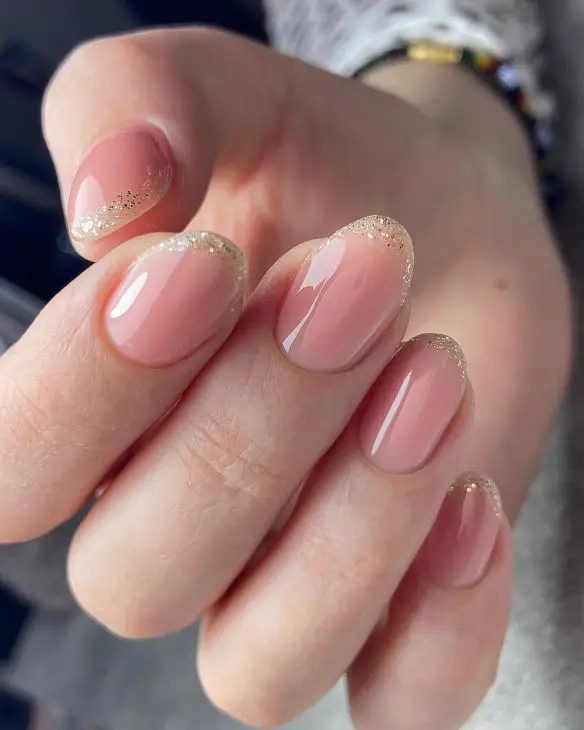
Glitter French Tips
French tips are a classic look, and adding a touch of glitter makes them perfect for early fall. This design features a nude base with glittery gold tips, blending traditional elegance with a hint of sparkle. It’s a chic and easy-to-wear option for any fall event.
Consumables:
- Nude nail polish (e.g., OPI Samoan Sand)
- Gold glitter polish (e.g., Essie Summit of Style)
- Clear top coat
- Nail tape or stickers for precise lines
How to Create:
- Start with a base coat.
- Apply two coats of nude polish and let it dry completely.
- Use nail tape or stickers to create a clean line for the French tips.
- Apply gold glitter polish to the tips.
- Remove the tape and finish with a clear top coat.
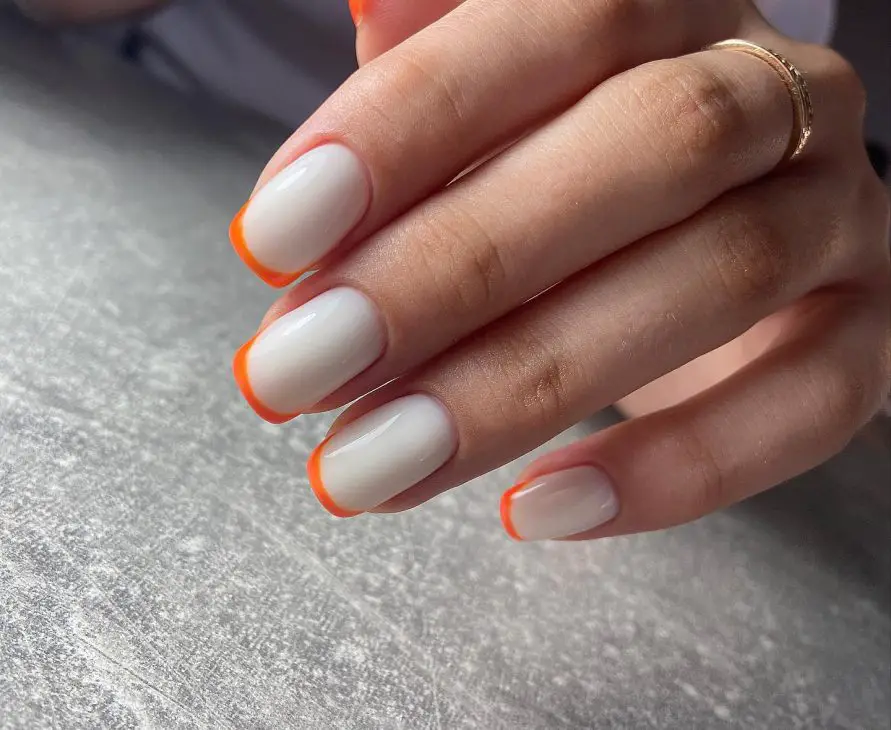
Bold Orange Tips
Orange is a quintessential fall color, and these bold orange tips are a fresh take on the classic French manicure. The vibrant orange stands out against the neutral base, making it a trendy choice for early fall nail colors. This look is perfect for those who want a pop of color without overwhelming the entire nail.
Consumables:
- Neutral base coat (e.g., Essie Ballet Slippers)
- Bright orange polish (e.g., OPI A Good Man-darin is Hard to Find)
- Clear top coat
- Nail tape or stickers for precision
How to Create:
- Apply a base coat to your nails.
- Paint all nails with two coats of the neutral base color.
- Use nail tape to mark off the tips of your nails.
- Apply the bright orange polish to the tips.
- Remove the tape and seal with a clear top coat.
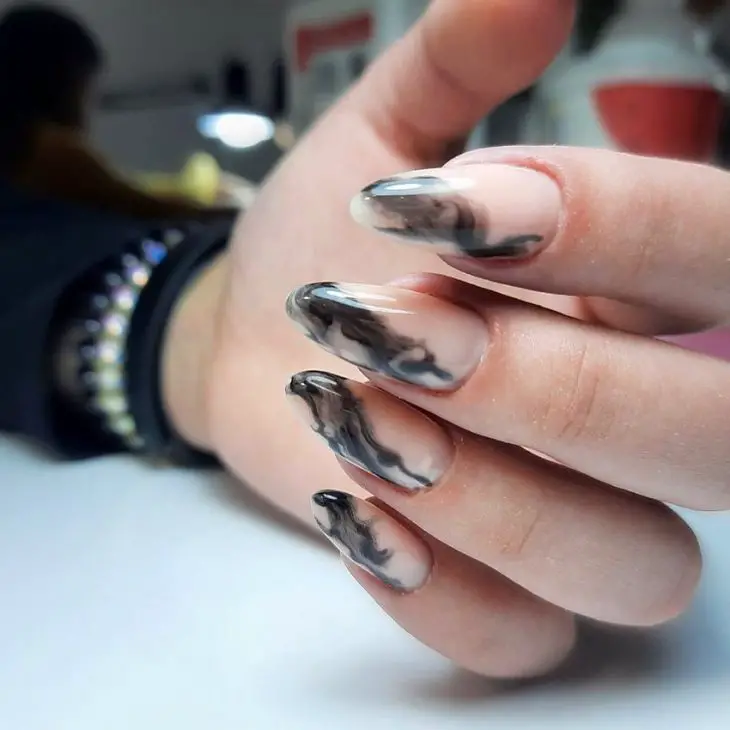
Smoky Marble Design
This smoky marble design is a dramatic and sophisticated choice for early fall. The mix of black and white creates a marble effect that is both modern and elegant. This design is ideal for those who prefer a bold yet classy look.
Consumables:
- Sheer nude base polish (e.g., Essie Topless & Barefoot)
- Black and white nail polish
- Fine detail brush or nail art brush
- Clear top coat
How to Create:
- Start with a base coat.
- Apply two coats of the sheer nude polish.
- Use a fine detail brush to swirl black and white polishes together on the nail, creating a marble effect.
- Finish with a clear top coat to protect the design.
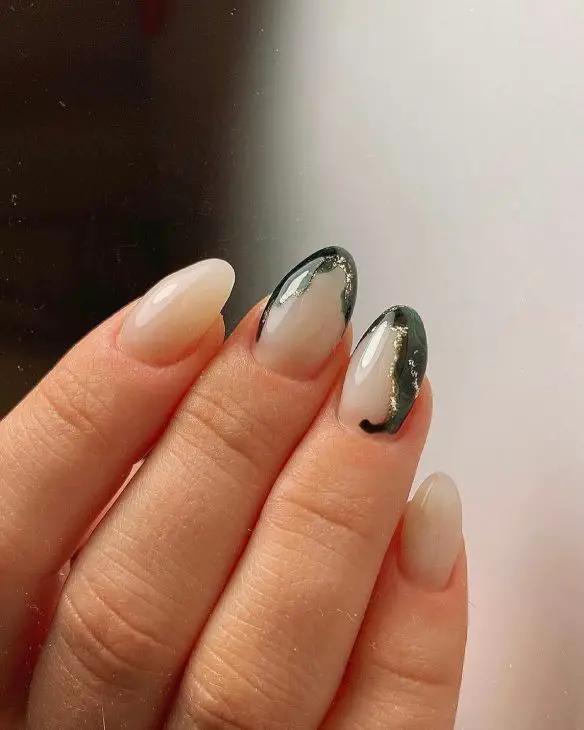
Chic Green and Gold Accents
This manicure beautifully combines the elegance of nude nails with the sophistication of green and gold accents. The dark green tips, highlighted with a touch of gold, provide a subtle yet striking contrast to the neutral base. This design is perfect for early fall, reflecting the rich and warm tones of the season while maintaining a chic and modern look.
Consumables:
- Nude base coat (e.g., OPI Bubble Bath)
- Dark green polish (e.g., Essie Off Tropic)
- Gold leaf or glitter
- Clear top coat (e.g., Seche Vite Dry Fast Top Coat)
- Fine detail brush
How to Create:
- Start with a base coat to protect your nails.
- Apply two coats of the nude polish, allowing each coat to dry completely.
- Use a fine detail brush to apply the dark green polish to the tips of your nails.
- Add a touch of gold leaf or glitter along the green edges for a luxurious accent.
- Seal the design with a clear top coat to ensure longevity and shine.
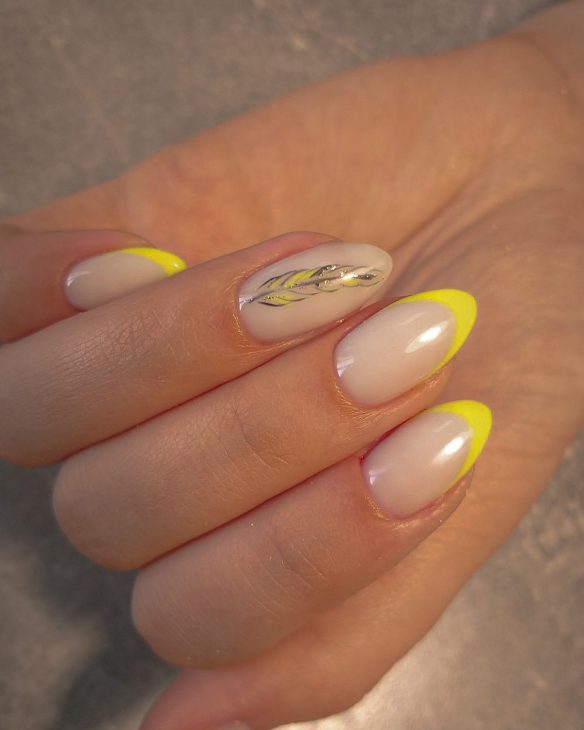
Bright Yellow French Tips
For a cheerful and vibrant early fall nail color, consider these bright yellow French tips. The combination of a neutral base with striking yellow tips and a delicate silver feather accent creates a playful and unique design. This manicure is perfect for those who want to hold onto a bit of summer’s brightness while embracing the new season.
Consumables:
- Neutral base polish (e.g., Essie Ballet Slippers)
- Bright yellow polish (e.g., OPI Sun, Sea, and Sand in My Pants)
- Silver nail art pen or polish
- Clear top coat
- Nail tape for precision
How to Create:
- Apply a base coat to your nails.
- Paint all nails with two coats of the neutral base color.
- Use nail tape to create a clean line for the French tips.
- Apply the bright yellow polish to the tips.
- Use a silver nail art pen or polish to draw a feather accent on one nail.
- Finish with a clear top coat to protect your design.
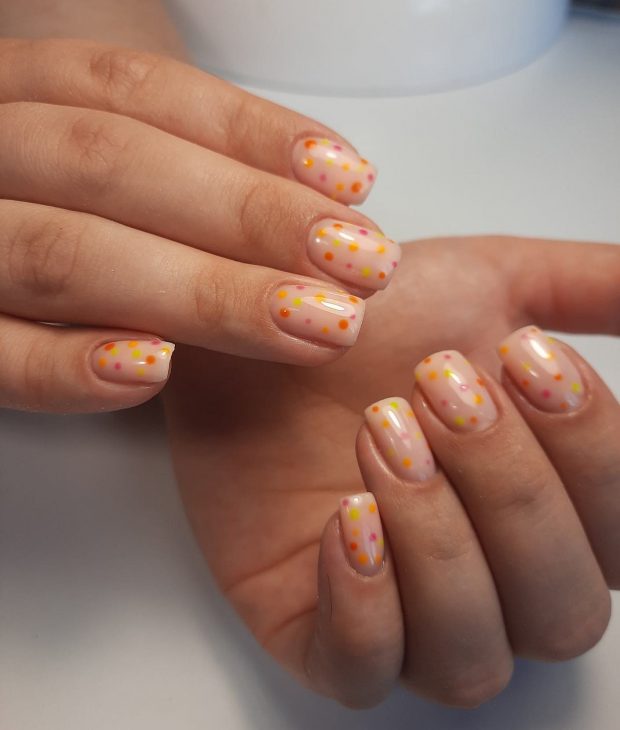
Fun Polka Dot Design
Polka dots are a fun and playful way to incorporate early fall nail colors into your manicure. This design features a nude base with colorful dots in shades of orange, yellow, and pink. It’s a lively and whimsical look that’s perfect for the transition from late summer to early fall.
Consumables:
- Nude base coat (e.g., DND Nude Pink)
- Orange, yellow, and pink polishes for dots (e.g., Essie Roarrrrange, OPI I Just Can’t Cope-acabana, OPI Shorts Story)
- Dotting tool or bobby pin
- Clear top coat
How to Create:
- Apply a base coat to your nails.
- Paint all nails with two coats of the nude polish.
- Use a dotting tool or the end of a bobby pin to create small dots in various colors on each nail.
- Allow the dots to dry completely before finishing with a clear top coat.
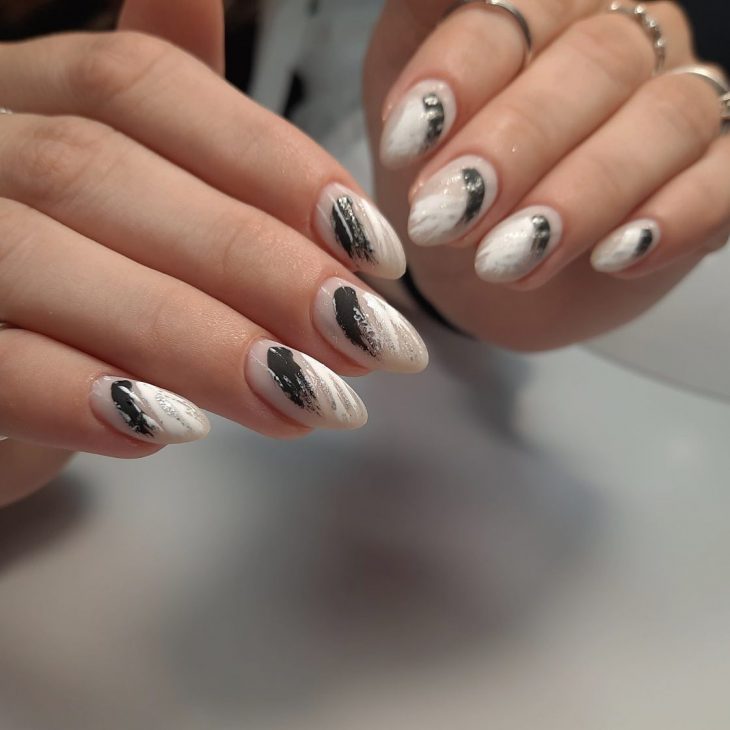
Elegant Black and White Abstract
This abstract black and white design is both elegant and modern, making it an excellent choice for early fall. The combination of crisp white with bold black accents creates a striking contrast that’s sure to turn heads. This look is sophisticated and versatile, suitable for any occasion.
Consumables:
- White base coat (e.g., OPI Alpine Snow)
- Black polish (e.g., Essie Licorice)
- Thin nail art brush
- Clear top coat
How to Create:
- Start with a base coat.
- Apply two coats of white polish and let it dry completely.
- Use a thin nail art brush to create abstract black lines and shapes on each nail.
- Seal the design with a clear top coat to ensure it lasts.
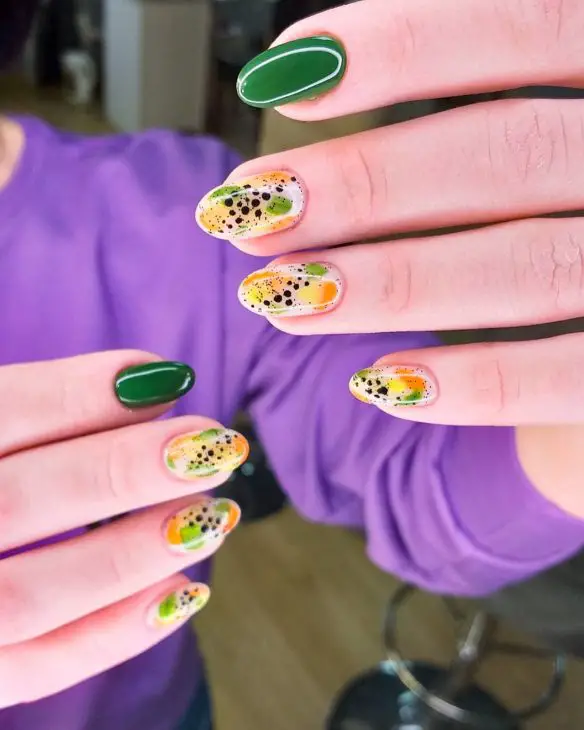
Vibrant Green and Orange Splash
This vibrant design features a mix of green and orange shades, perfect for capturing the lively spirit of early fall. The splatter effect adds a dynamic and artistic touch to the nails, making this design both eye-catching and unique. It’s a fun way to experiment with bold colors and creative patterns.
Consumables:
- Green base polish (e.g., OPI I’m Sooo Swamped!)
- Orange polish (e.g., Essie Meet Me at Sunset)
- Clear polish for splatter effect
- Toothbrush or splatter tool
- Clear top coat
How to Create:
- Apply a base coat to protect your nails.
- Paint a few nails with green polish and a few with orange polish.
- Dip a toothbrush into the clear polish and flick it onto the nails to create a splatter effect.
- Allow the design to dry completely before sealing with a clear top coat.
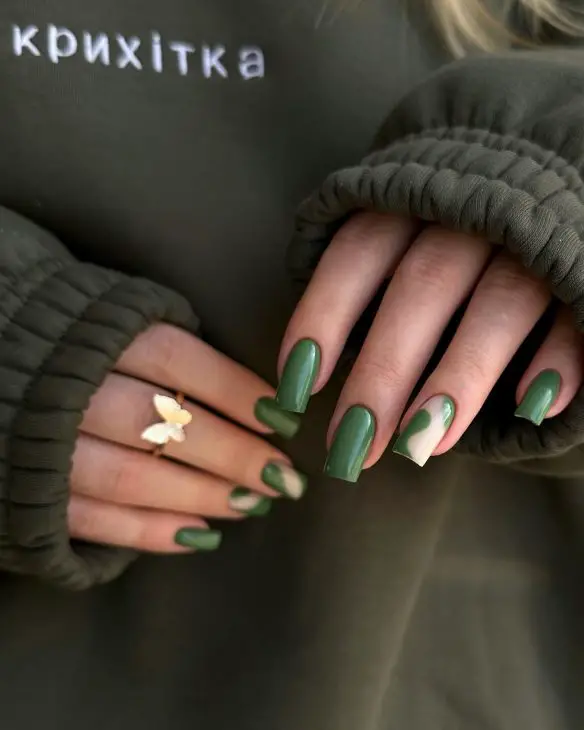
Earthy Green Elegance
This nail design captures the essence of early fall with its earthy green tones. The deep, rich green polish is complemented by a minimalist wave pattern on an accent nail, adding a touch of artistic flair. This look is perfect for those who want a sophisticated yet understated manicure.
Consumables:
- Deep green polish (e.g., OPI I’m Sooo Swamped!)
- Nude polish for the accent nail (e.g., Essie Ballet Slippers)
- Clear top coat (e.g., Seche Vite Dry Fast Top Coat)
- Fine detail brush for the wave pattern
How to Create:
- Start with a base coat to protect your nails.
- Apply two coats of deep green polish to most of your nails.
- Paint the accent nail with two coats of nude polish.
- Use a fine detail brush to create a wave pattern on the accent nail with the green polish.
- Finish with a clear top coat to seal the design and add shine.
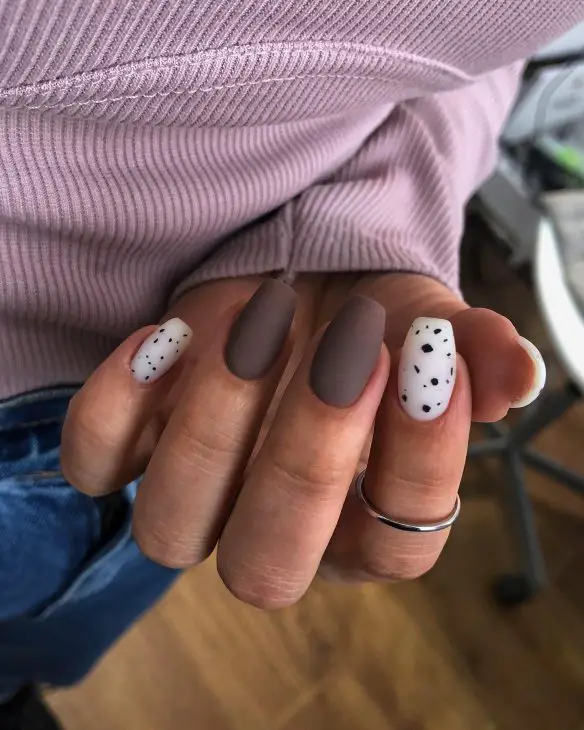
Matte Brown and Speckled White
Matte nails are a great switch-up from the usual glossy finish. This design combines a matte brown polish with a speckled white accent nail, creating a chic and modern look. The matte finish adds a touch of sophistication, while the speckled design keeps it fun and interesting.
Consumables:
- Matte brown polish (e.g., OPI Over the Taupe)
- White polish (e.g., Essie Blanc)
- Black speckle polish (e.g., China Glaze There’s Snow One Like You)
- Matte top coat (e.g., Essie Matte About You)
How to Create:
- Apply a base coat to your nails.
- Paint most of your nails with two coats of matte brown polish.
- Paint the accent nail with two coats of white polish.
- Apply black speckle polish to the accent nail.
- Seal with a matte top coat to achieve the desired finish.
Sage Green and Gold Flakes
Sage green is a beautiful, muted color that is perfect for early fall. This design pairs sage green nails with accent nails featuring delicate gold flakes on a nude base. The combination of colors and textures creates a serene and elegant look that is both modern and timeless.
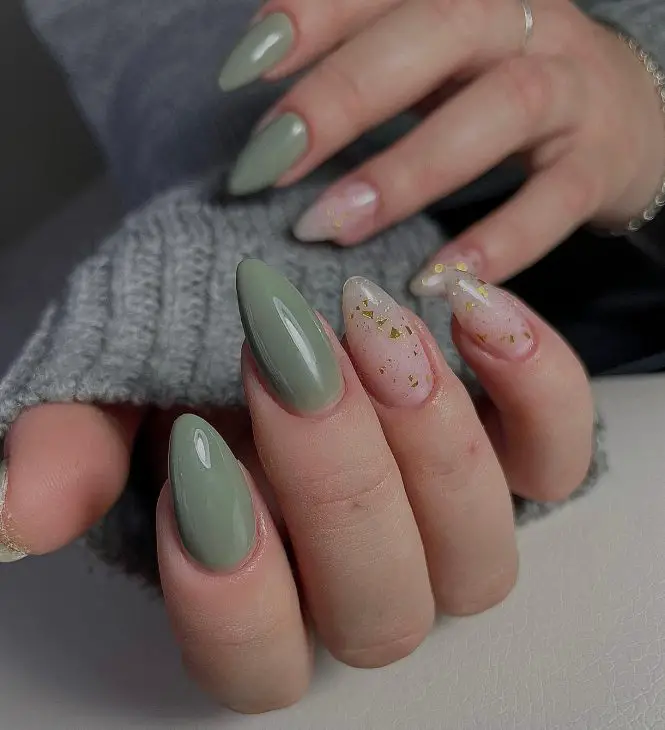
Consumables:
- Sage green polish (e.g., Essie Going Incognito)
- Nude polish (e.g., OPI Bubble Bath)
- Gold flakes
- Clear top coat
- Nail glue or foil adhesive
How to Create:
- Start with a base coat.
- Apply two coats of sage green polish to most of your nails.
- Paint the accent nails with two coats of nude polish.
- Use nail glue or foil adhesive to apply gold flakes to the accent nails.
- Finish with a clear top coat to protect the design.
Bold Orange and Glitter
Bold and bright, this orange nail design is perfect for making a statement in early fall. The combination of a vibrant orange polish with glitter accents and a unique wave design on an accent nail creates a fun and eye-catching look. This design is perfect for those who love to stand out.
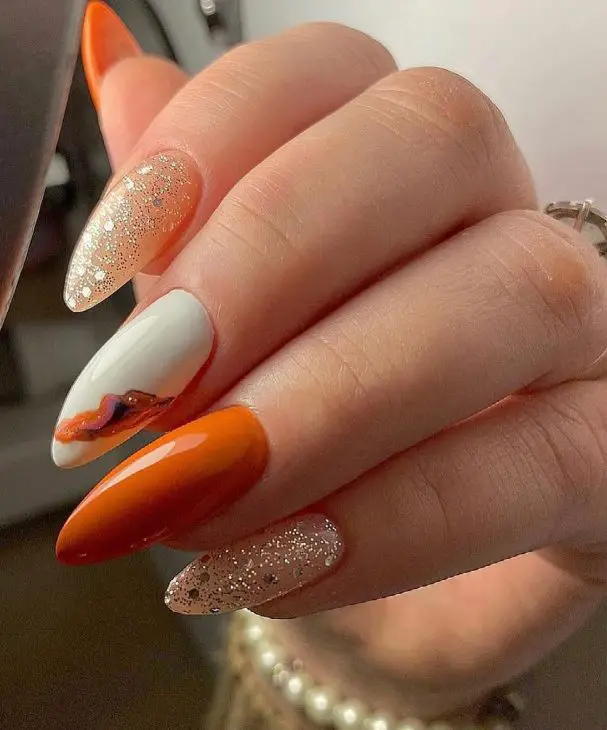
Consumables:
- Bright orange polish (e.g., OPI A Good Man-darin is Hard to Find)
- White polish for the accent nail (e.g., Essie Blanc)
- Glitter polish (e.g., China Glaze Fairy Dust)
- Fine detail brush
- Clear top coat
How to Create:
- Apply a base coat to your nails.
- Paint most of your nails with two coats of bright orange polish.
- Paint the accent nail with two coats of white polish.
- Use a fine detail brush to create a wave design on the accent nail with the orange polish.
- Apply glitter polish to a few nails for extra sparkle.
- Seal the design with a clear top coat.
Vibrant Yellow and Botanical Accents
Yellow is a surprisingly versatile color for early fall. This design features vibrant yellow nails with delicate botanical accents on a couple of accent nails. The combination of bright yellow and intricate leaf designs creates a fresh and lively look that is perfect for the transition from summer to fall.
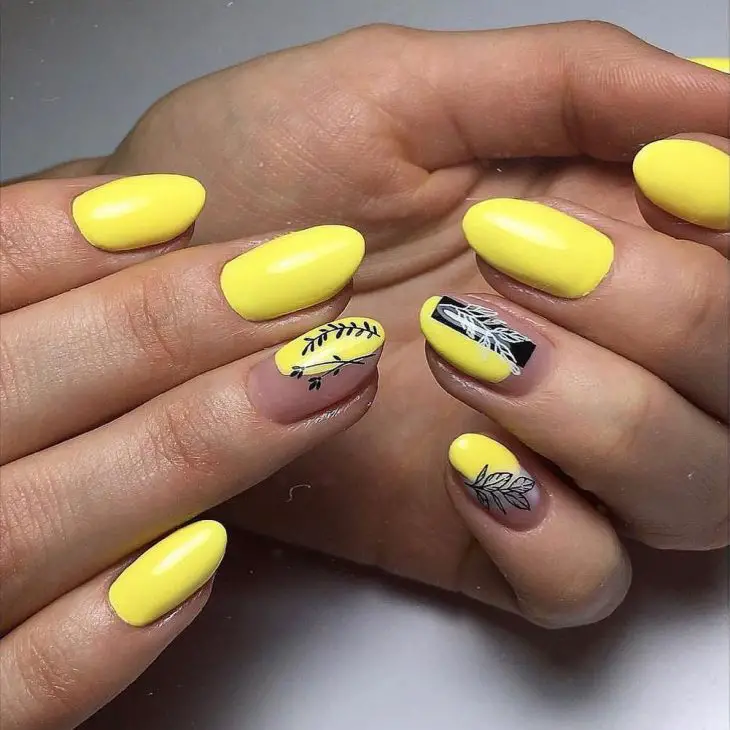
Consumables:
- Bright yellow polish (e.g., OPI Sun, Sea, and Sand in My Pants)
- Nude polish for the accent nails (e.g., Essie Ballet Slippers)
- Black polish for the leaf designs (e.g., Essie Licorice)
- Fine detail brush or nail art pen
- Clear top coat
How to Create:
- Start with a base coat.
- Apply two coats of bright yellow polish to most of your nails.
- Paint the accent nails with two coats of nude polish.
- Use a fine detail brush or nail art pen to draw leaf designs on the accent nails with black polish.
- Seal the design with a clear top coat.
Bold Autumn Colors with Speckles
This manicure embraces the vibrant hues of early fall with bold orange and yellow shades, accented by subtle black speckles. The combination of these colors reflects the changing leaves and adds a playful touch to the design. This look is perfect for those who want to make a statement with their nails.
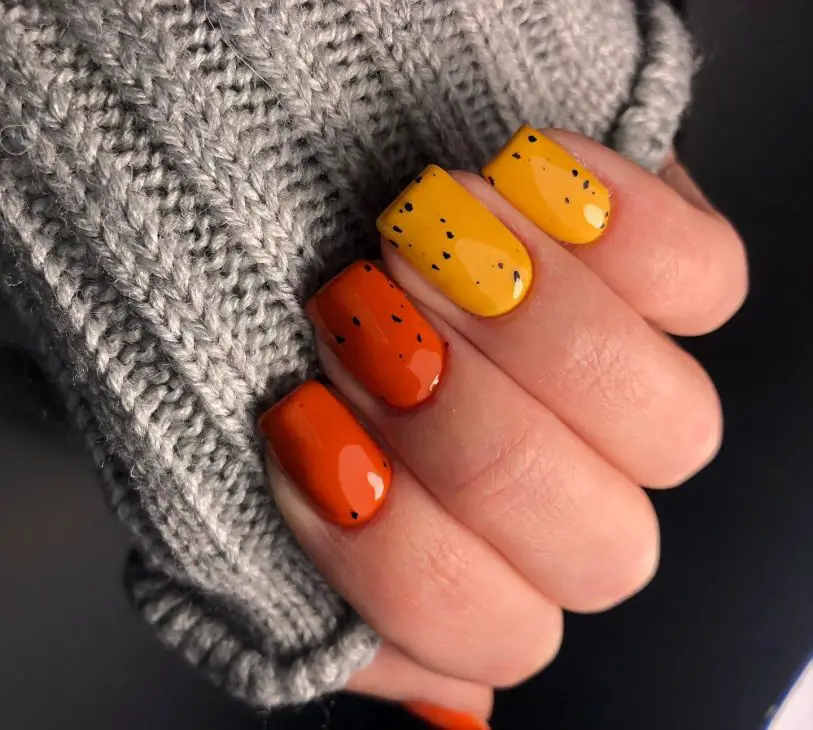
Consumables:
- Bright orange polish (e.g., OPI A Good Man-darin is Hard to Find)
- Vibrant yellow polish (e.g., Essie Aim to Misbehave)
- Black speckle polish
- Clear top coat
How to Create:
- Start with a base coat to protect your nails.
- Apply two coats of bright orange polish to some nails and vibrant yellow polish to others.
- Add a layer of black speckle polish to each nail for a playful effect.
- Finish with a clear top coat to seal the design and add shine.
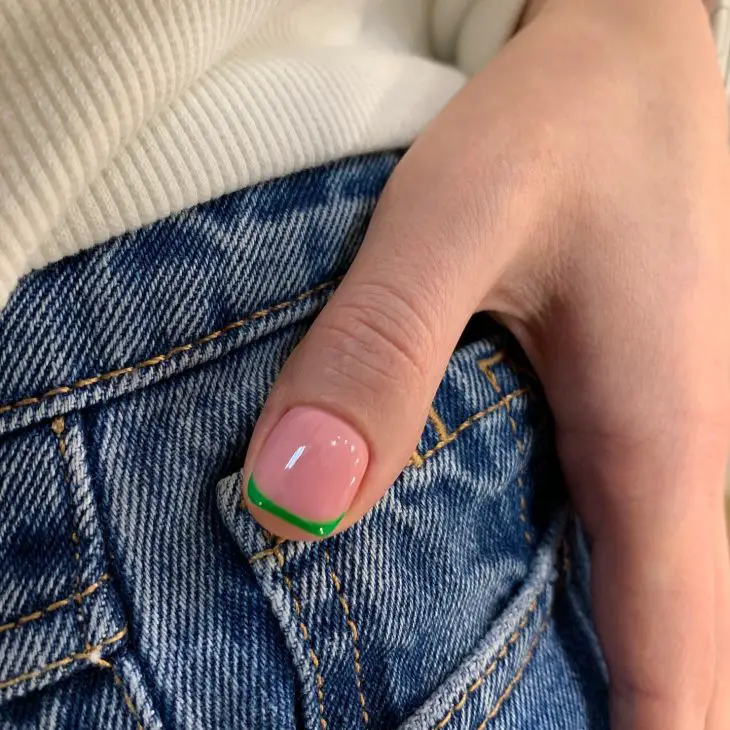
Minimalist Green French Tips
For a subtle yet sophisticated look, consider these minimalist green French tips. The natural base color is complemented by a thin green line along the tips, creating a clean and modern design. This manicure is ideal for those who prefer a more understated style while still incorporating early fall nail colors.
Consumables:
- Natural base polish (e.g., Essie Ballet Slippers)
- Green polish for tips (e.g., OPI I’m Sooo Swamped!)
- Clear top coat
- Nail tape for precision
How to Create:
- Apply a base coat to your nails.
- Paint all nails with two coats of natural base polish.
- Use nail tape to create a clean line for the French tips.
- Apply the green polish to the tips.
- Remove the tape and finish with a clear top coat.
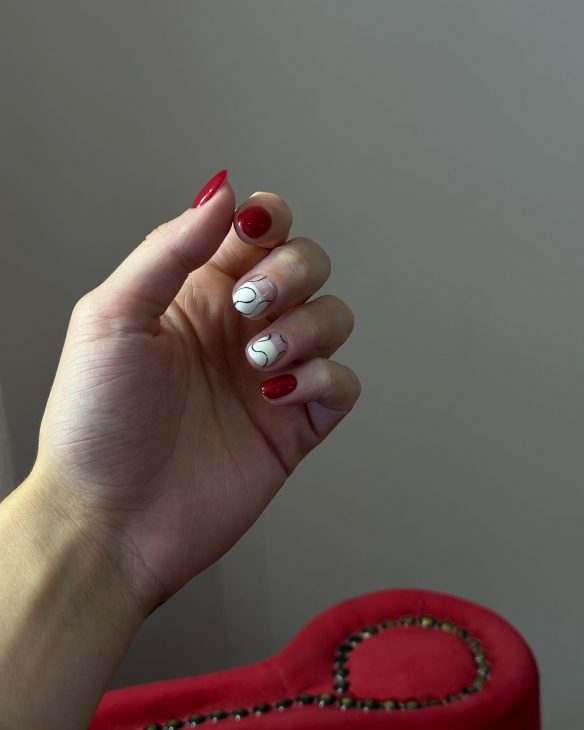
Elegant Red and White with Abstract Lines
This design features a striking combination of deep red nails and white accent nails with abstract black lines. The contrast between the colors and the simplicity of the abstract design make this manicure both bold and elegant. It’s perfect for early fall and any formal occasion.
Consumables:
- Deep red polish (e.g., OPI Malaga Wine)
- White polish for accent nails (e.g., Essie Blanc)
- Black nail art pen or thin brush
- Clear top coat
How to Create:
- Start with a base coat.
- Apply two coats of deep red polish to most of your nails.
- Paint the accent nails with two coats of white polish.
- Use a black nail art pen or thin brush to draw abstract lines on the accent nails.
- Seal the design with a clear top coat.
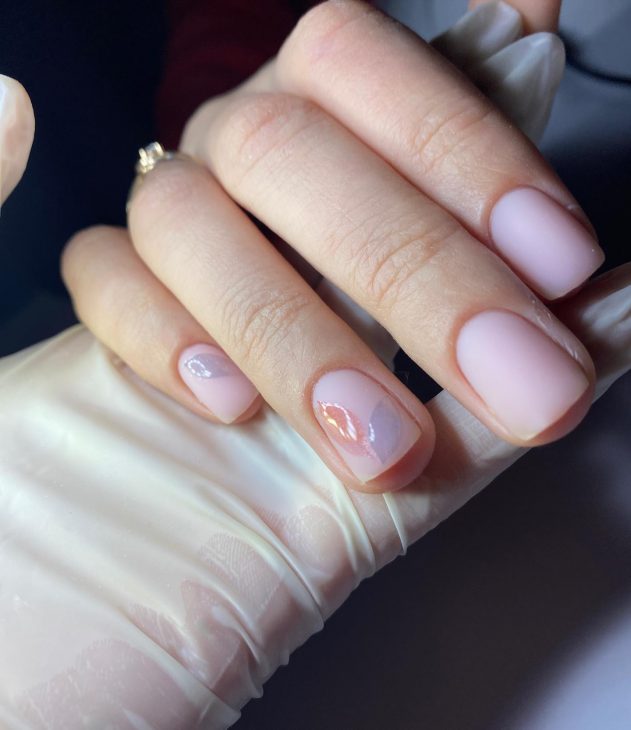
Soft Pink and Purple with Glossy Finish
This manicure combines soft pink and purple shades with a glossy finish for a delicate and feminine look. The subtle color gradient and high-shine top coat make this design perfect for a refined early fall style. It’s ideal for both everyday wear and special occasions.
Consumables:
- Soft pink polish (e.g., OPI Mod About You)
- Light purple polish (e.g., Essie Lilacism)
- Clear top coat
- Sponge for gradient effect
How to Create:
- Apply a base coat to your nails.
- Paint all nails with a base layer of soft pink polish.
- Use a sponge to apply light purple polish to the tips, creating a gradient effect.
- Finish with a clear top coat for a glossy finish.
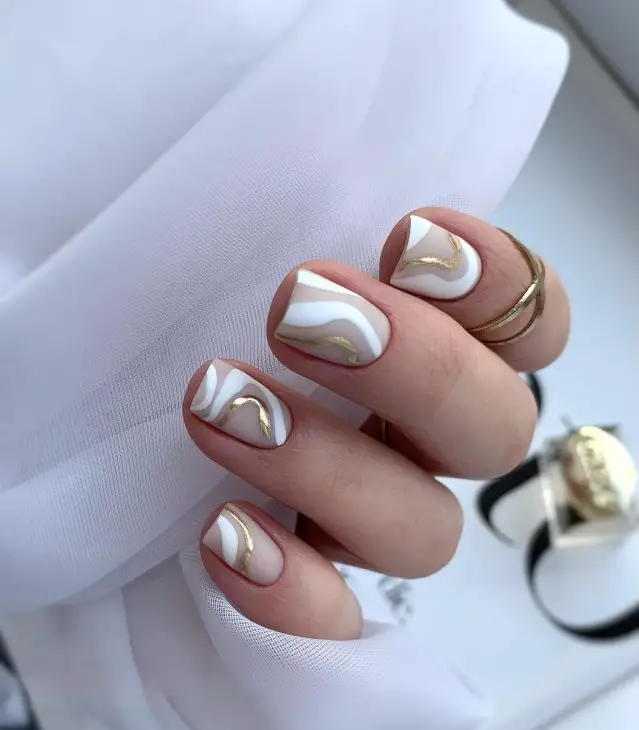
Classy White and Gold Waves
White and gold is a classic combination that exudes elegance and sophistication. This design features white nails with delicate gold wave patterns, making it perfect for early fall. The gold accents add a touch of luxury, making this manicure suitable for any upscale event.
Consumables:
- White polish (e.g., OPI Alpine Snow)
- Gold polish for waves (e.g., Essie Good as Gold)
- Thin nail art brush
- Clear top coat
How to Create:
- Start with a base coat.
- Apply two coats of white polish to your nails.
- Use a thin nail art brush to create gold wave patterns on each nail.
- Seal the design with a clear top coat to ensure longevity and shine.
Save Pin
