Fall Almond Nails 2024: Elegant and Trendy Ideas
As the leaves begin to change, so do the trends in nail design. This fall, almond nails are stealing the spotlight with their elegant shape and endless design possibilities. Whether you’re into subtle shades or bold patterns, there’s a fall almond nail style that’s perfect for you. In this article, we’ll explore various fall almond nails ideas, from simple and understated to vibrant and bold. Let’s dive into these beautiful nail designs that will inspire your next manicure!
Elegant Leopard Print
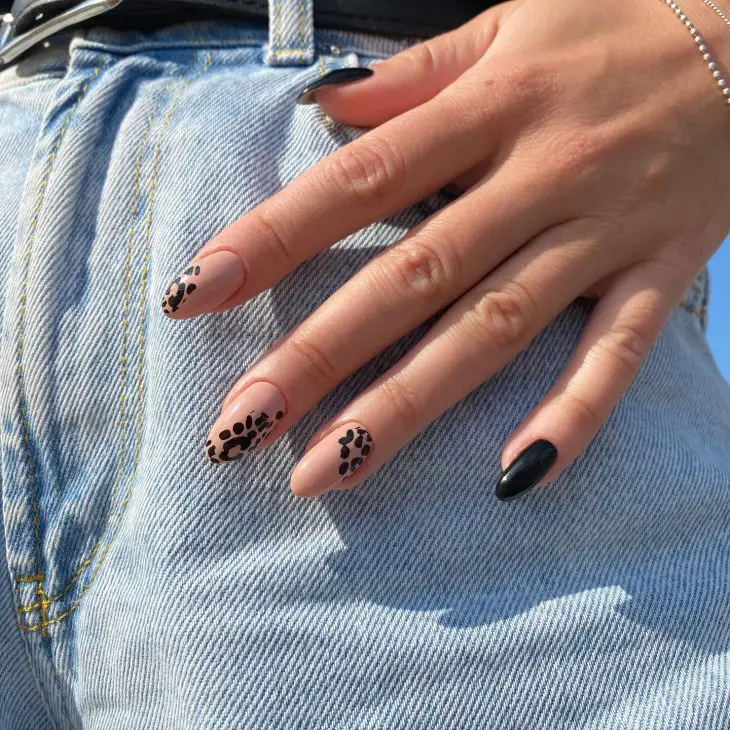
Leopard print never goes out of style, and it looks particularly stunning on almond-shaped nails. This design combines a soft nude base with delicate black leopard spots, creating a chic and sophisticated look perfect for any occasion. The subtle transition from natural nails to the leopard print adds a touch of elegance, making it a great choice for both casual and formal settings.
Consumables List:
- Nude base polish (e.g., OPI Nail Lacquer in ‘Bare My Soul’)
- Black nail polish for leopard spots (e.g., Sally Hansen Insta-Dri in ‘Black to Black’)
- Fine detail brush for precise application
- Top coat for a glossy finish (e.g., Essie Gel Couture Top Coat)
DIY Instructions:
- Apply a nude base polish to all nails and let it dry completely.
- Using a fine detail brush, create random leopard spots with black polish. Start with small, irregular shapes and add tiny dots around them to mimic a leopard print.
- Finish with a top coat to seal the design and add a glossy shine.
French Almond Nails with Gold Accents
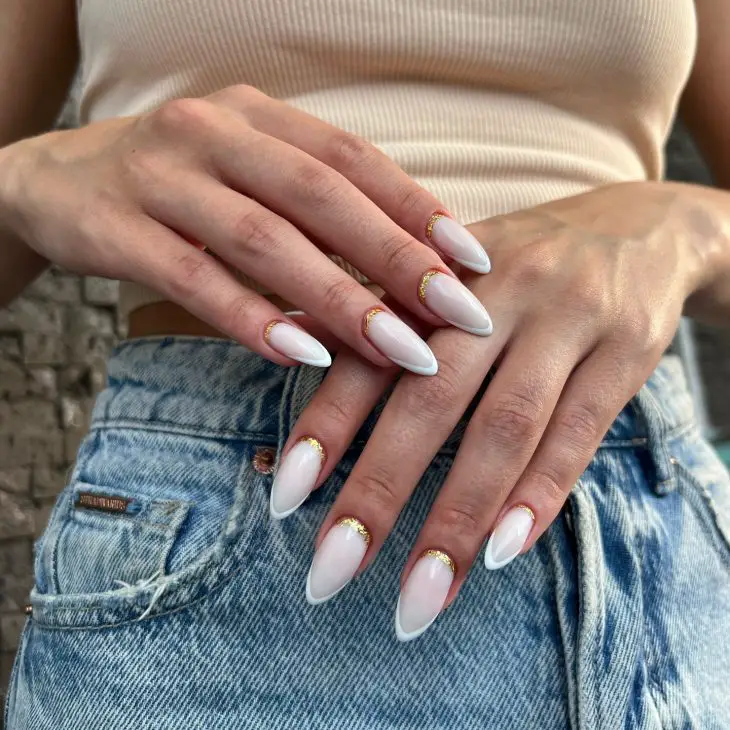
For a sophisticated and timeless look, these French almond nails with gold accents are a must-try. The classic white tips are complemented by a delicate gold stripe at the base, adding a touch of luxury to this elegant design. Perfect for formal occasions or daily wear, this design combines classic and modern elements beautifully.
Consumables List:
- White nail polish for tips (e.g., OPI Nail Lacquer in ‘Alpine Snow’)
- Gold striping tape or gold polish (e.g., Zoya Nail Lacquer in ‘Goldie’)
- Clear base coat and top coat (e.g., Essie Gel Couture Top Coat)
- Nail guides for precision
DIY Instructions:
- Apply a clear base coat to all nails.
- Use nail guides to paint white tips, then remove the guides carefully.
- Add a gold stripe at the base of each nail using gold striping tape or a thin brush with gold polish.
- Seal the design with a top coat.
Matte Nude Almond Nails with Botanical Design
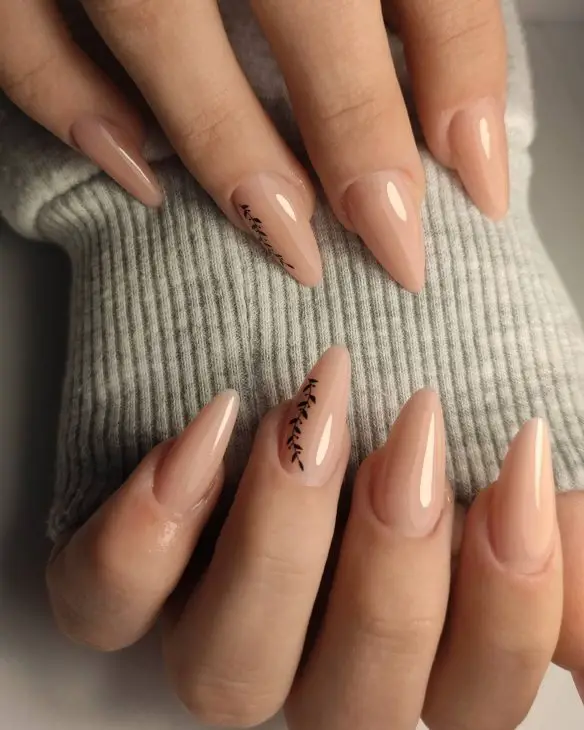
These matte nude almond nails are a perfect canvas for a minimalist botanical design. The soft matte finish gives the nails a velvety texture, while the delicate black botanical accents add a touch of nature-inspired elegance. This design is ideal for those who prefer subtle and understated nail art that still makes a statement.
Consumables List:
- Matte nude polish (e.g., Essie Matte About You Top Coat over a nude base)
- Black polish for botanical accents (e.g., OPI Nail Lacquer in ‘Black Onyx’)
- Fine detail brush for drawing
DIY Instructions:
- Apply a matte nude polish to all nails and let it dry.
- Using a fine detail brush, draw simple botanical elements, like leaves or branches, with black polish.
- Let the design dry completely. Since it’s a matte look, skip the glossy top coat or use a matte top coat to seal the design.
Glittery Fall Leaves on Almond Nails
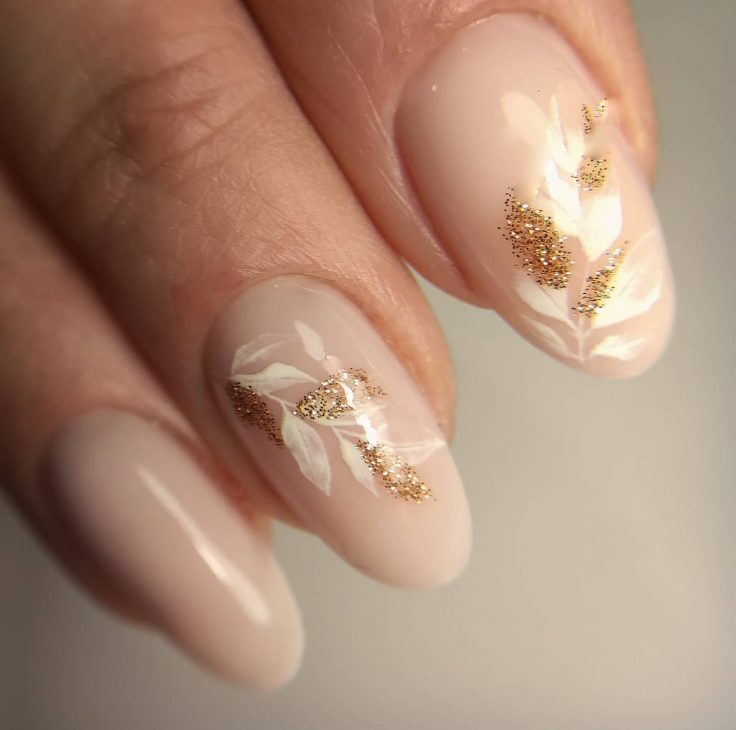
Celebrate the beauty of fall with this glittery leaves design on almond nails. The soft beige base is adorned with delicate white and gold leaf motifs, enhanced with a touch of glitter. This design captures the essence of autumn, making it perfect for the season’s festivities and gatherings.
Consumables List:
- Beige base polish (e.g., Essie Nail Polish in ‘Sand Tropez’)
- White and gold polishes for leaf motifs (e.g., OPI Nail Lacquer in ‘Snowfalling for You’ and ‘Glimmer More’)
- Fine detail brush
- Gold glitter for accents
DIY Instructions:
- Apply a beige base polish to all nails and let it dry.
- Draw leaf motifs using white and gold polishes with a fine detail brush.
- Add a touch of gold glitter to highlight the leaves.
- Seal the design with a top coat.
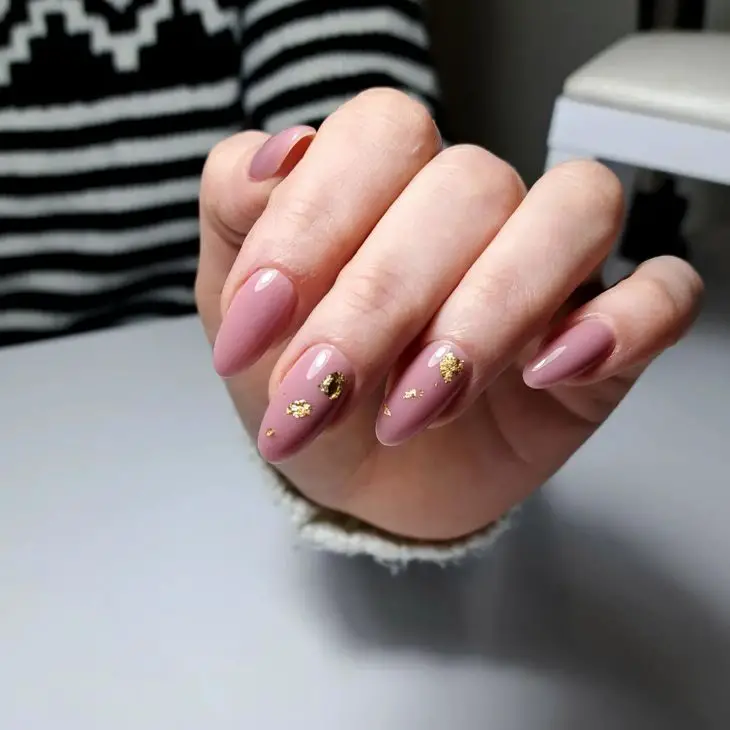
Soft Pink Almond Nails with Gold Foil
For a delicate and feminine look, these soft pink almond nails with gold foil are an excellent choice. The pink base is gentle and calming, while the scattered gold foil adds a luxurious and trendy touch. This design is perfect for those who love understated elegance with a hint of glamour.
Consumables List:
- Soft pink polish (e.g., OPI Nail Lacquer in ‘Mod About You’)
- Gold foil pieces
- Clear top coat
DIY Instructions:
- Apply a soft pink polish to all nails and let it dry.
- Apply a thin layer of top coat and, while still wet, place gold foil pieces randomly on the nails.
- Gently press the foil pieces to adhere them to the nails.
- Seal the design with a top coat to secure the foil and add shine.
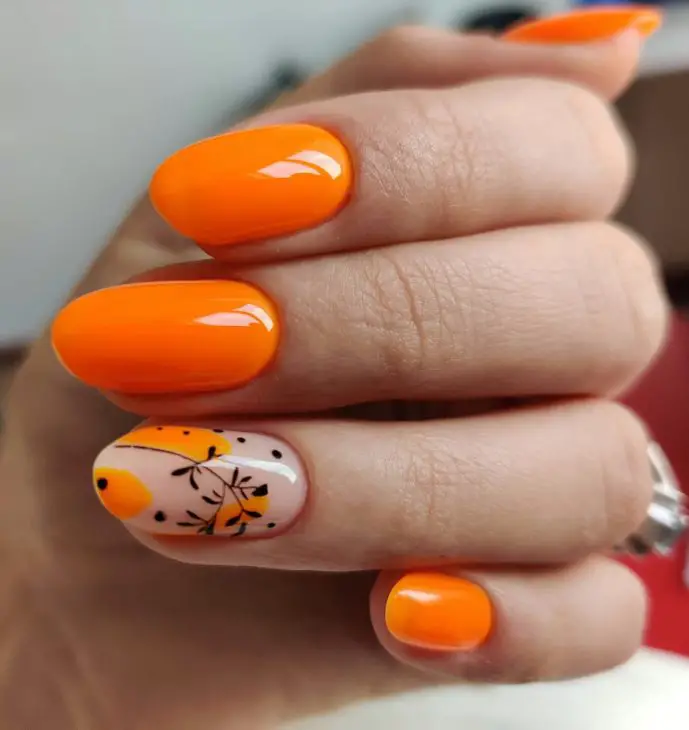
Bold Orange Nails with Butterfly Accent
This vibrant orange manicure is a true showstopper, perfect for those who love bold colors. The rich, glossy orange base is paired with a delicate butterfly accent on the ring finger, creating a playful yet elegant look. The contrast between the solid color and the detailed artwork makes this design stand out, making it a great choice for anyone looking to make a statement this fall.
Consumables List:
- Bright orange nail polish (e.g., Essie Nail Polish in ‘Orange You Glad’)
- Black and yellow polish for butterfly design (e.g., OPI Nail Lacquer in ‘Black Onyx’ and ‘Sun, Sea, and Sand in My Pants’)
- Fine detail brush for butterfly design
- Top coat for a glossy finish
DIY Instructions:
- Apply a bright orange polish to all nails and let it dry.
- On the ring finger, use a fine detail brush to paint a butterfly design using black and yellow polish.
- Add details to the butterfly, like the body and antennae, for a realistic effect.
- Finish with a top coat to seal the design and add shine.
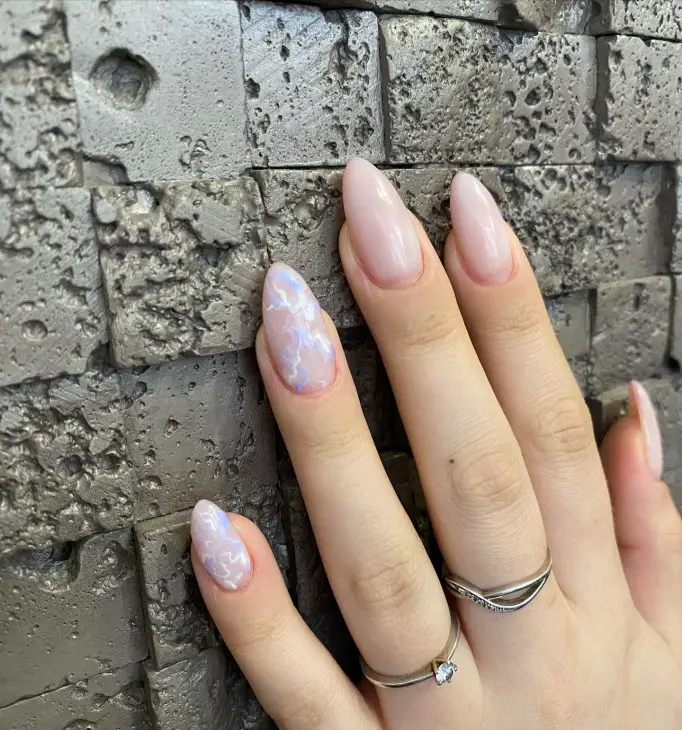
Soft Pink Marble Almond Nails
Marble designs are a timeless trend that adds a touch of sophistication to any manicure. This soft pink marble design is subtle yet striking, perfect for those who appreciate understated elegance. The blend of soft pink and white creates a delicate marble effect, giving the nails a luxurious and polished appearance.
Consumables List:
- Soft pink base polish (e.g., Zoya Nail Lacquer in ‘Jordan’)
- White polish for marble effect (e.g., Sally Hansen Insta-Dri in ‘White on Time’)
- Thin brush or a nail art pen for creating the marble veins
- Top coat for a smooth finish
DIY Instructions:
- Apply a soft pink base polish to all nails and let it dry.
- Using a thin brush or nail art pen, draw thin, irregular white lines across the nails to create a marble effect.
- Blend the white lines slightly to soften the look, using a fine brush.
- Seal the design with a top coat for a smooth, glossy finish.
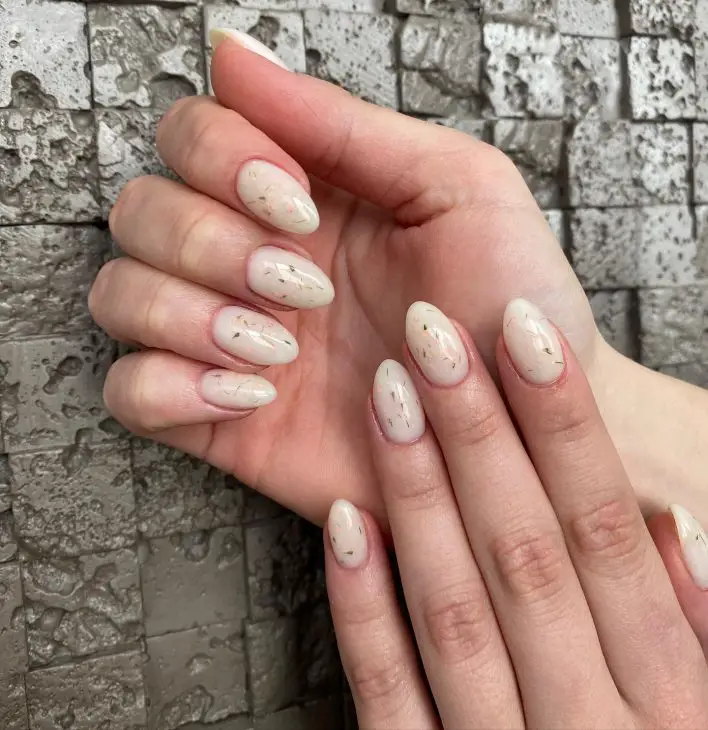
Elegant Nude Almond Nails with Gold Flakes
Nude nails are a classic choice that never goes out of style, and adding gold flakes brings a luxurious twist. This design features a nude base with subtle gold flakes, creating a sophisticated and refined look. It’s perfect for those who prefer a minimalist style with a touch of glam.
Consumables List:
- Nude base polish (e.g., Essie Nail Polish in ‘Ballet Slippers’)
- Gold foil flakes for accent (available at nail art stores or online)
- Top coat for sealing the design
DIY Instructions:
- Apply a nude base polish to all nails and let it dry.
- Gently place gold foil flakes on the nails while the polish is still slightly tacky.
- Press the flakes lightly to adhere them to the nails.
- Finish with a top coat to seal the design and add a glossy finish.
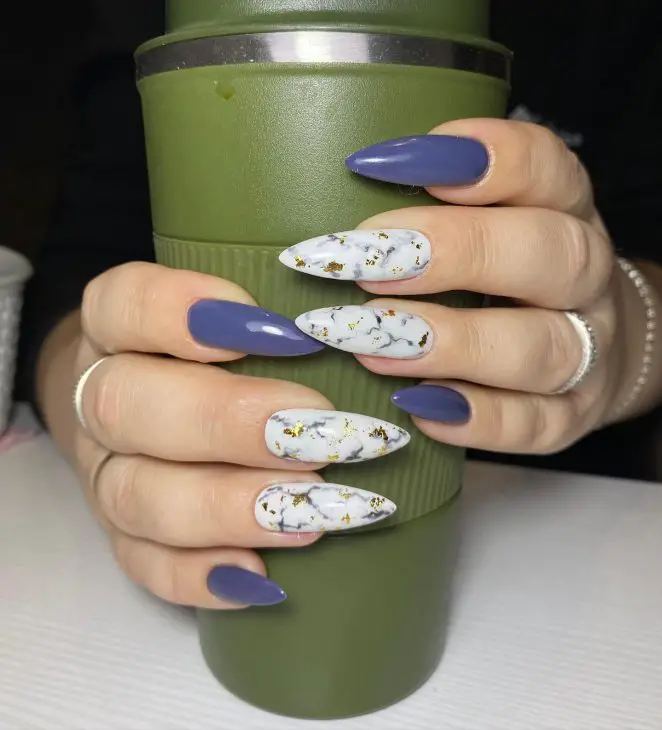
Marble and Purple Almond Nails
This chic design combines a bold purple with marble accents, creating a modern and stylish look. The deep purple adds depth and richness, while the marble nails, accented with gold flakes, offer a sophisticated contrast. It’s a perfect choice for those who want a striking yet elegant nail design.
Consumables List:
- Deep purple nail polish (e.g., OPI Nail Lacquer in ‘Lincoln Park After Dark’)
- White polish for marble effect (e.g., OPI Nail Lacquer in ‘Alpine Snow’)
- Gold flakes for accent
- Top coat for a polished finish
DIY Instructions:
- Apply a deep purple polish to selected nails and let it dry.
- On the remaining nails, apply a white polish base and let it dry.
- Create a marble effect using a fine brush with grey or black polish, adding veins of color.
- Place gold flakes on the marble nails for added luxury.
- Seal the design with a top coat.
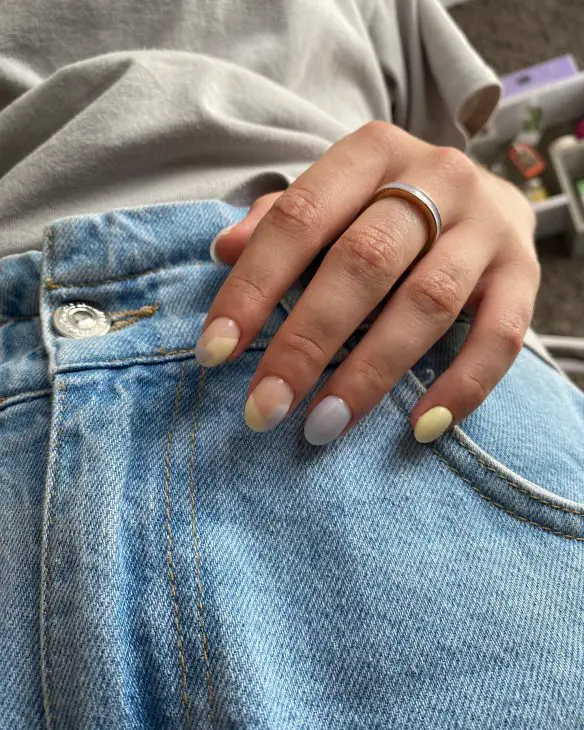
Pastel Almond Nails with Subtle Gradient
Pastel shades are not just for spring; they can be a refreshing choice for fall as well. This design features a soft gradient of pastel colors, creating a gentle and soothing effect. The subtle transition between shades makes it a versatile and elegant choice, perfect for any occasion.
Consumables List:
- Pastel polishes in soft hues (e.g., Essie Nail Polish in ‘Lilacism’, ‘Mint Candy Apple’, ‘Fiji’)
- Makeup sponge for creating the gradient effect
- Top coat for a glossy finish
DIY Instructions:
- Apply a light base coat to protect your nails.
- Dab pastel colors onto a makeup sponge in a gradient pattern, then press the sponge onto your nails to transfer the colors.
- Repeat the sponging until the desired gradient effect is achieved.
- Finish with a top coat to smooth the gradient and add shine
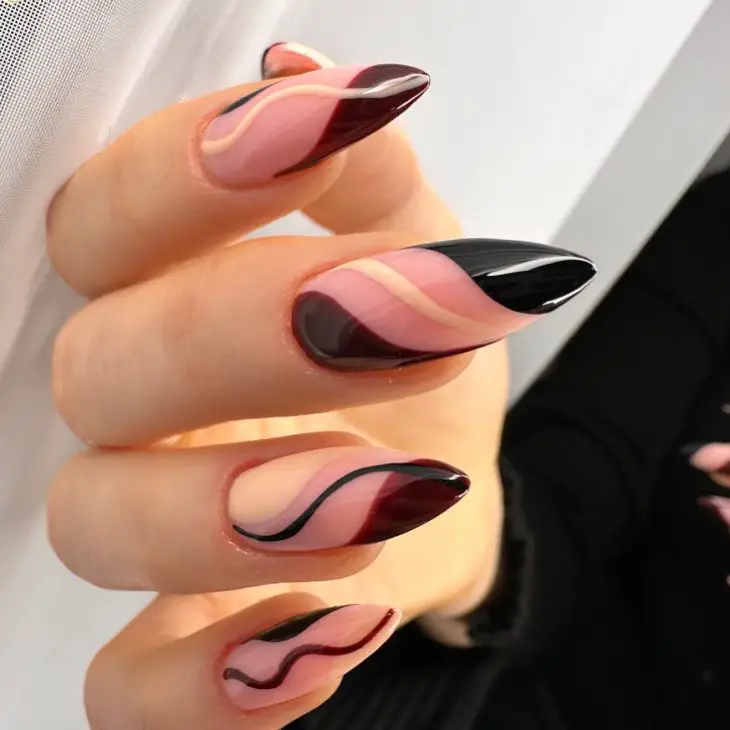
Chic Wave Design
This stunning wave design blends deep burgundy, black, and nude shades to create a bold yet sophisticated look. The fluid lines mimic the movement of waves, giving the nails a dynamic and stylish appearance. This design is perfect for those who enjoy a modern and artistic touch on their nails.
Consumables List:
- Nude base polish (e.g., Essie Nail Polish in ‘Bare With Me’)
- Burgundy polish for waves (e.g., OPI Nail Lacquer in ‘Malaga Wine’)
- Black polish for additional wave accents (e.g., Sally Hansen Insta-Dri in ‘Black to Black’)
- Fine detail brush for wave design
- Top coat for a glossy finish
DIY Instructions:
- Apply a nude base polish to all nails and let it dry.
- Using a fine detail brush, create wave-like patterns with burgundy polish on each nail.
- Add additional wave accents with black polish for contrast.
- Finish with a top coat to seal the design and add shine.
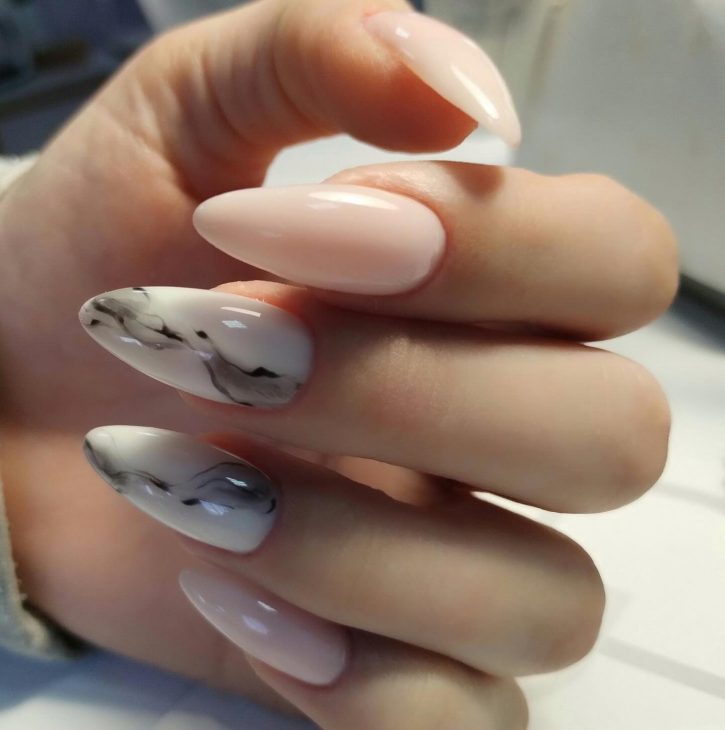
Soft Pink and Marble Almond Nails
This soft pink and marble combination is an epitome of elegance and simplicity. The gentle pink shade provides a delicate backdrop, while the marble accent adds a touch of luxury. This design is perfect for a subtle yet sophisticated look, ideal for both everyday wear and special occasions.
Consumables List:
- Soft pink base polish (e.g., Zoya Nail Lacquer in ‘Jordan’)
- White and grey polishes for marble effect (e.g., Essie Nail Polish in ‘Blanc’ and ‘Maximillian Strasse Her’)
- Thin brush or nail art pen for marble detailing
- Top coat for a glossy finish
DIY Instructions:
- Apply a soft pink base polish to all nails and let it dry.
- Create marble accents on selected nails using white and grey polishes, blending them with a thin brush for a realistic effect.
- Seal the design with a top coat.
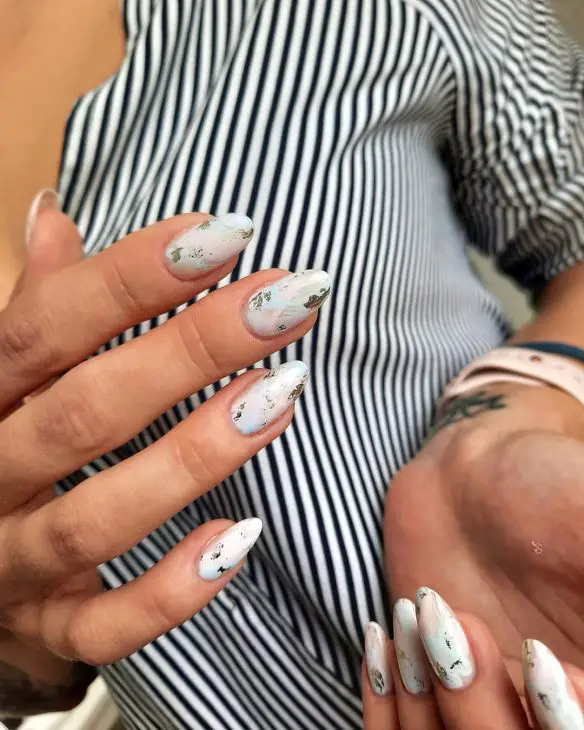
Delicate Floral Almond Nails
These delicate floral nails capture the essence of fall with subtle gold leaf accents. The white base provides a clean canvas for the floral design, which is enhanced with gold leaf detailing. This design is perfect for those who love intricate and refined nail art.
Consumables List:
- White base polish (e.g., OPI Nail Lacquer in ‘Alpine Snow’)
- Green and gold polishes for floral details (e.g., Sally Hansen Insta-Dri in ‘Green Thumb’ and ‘Golden-I’)
- Fine detail brush for painting flowers and leaves
- Gold leaf pieces for accents
- Top coat for protection and shine
DIY Instructions:
- Apply a white base polish to all nails and let it dry.
- Paint small flowers and leaves using green and gold polishes with a fine detail brush.
- Add gold leaf pieces for extra elegance.
- Finish with a top coat.
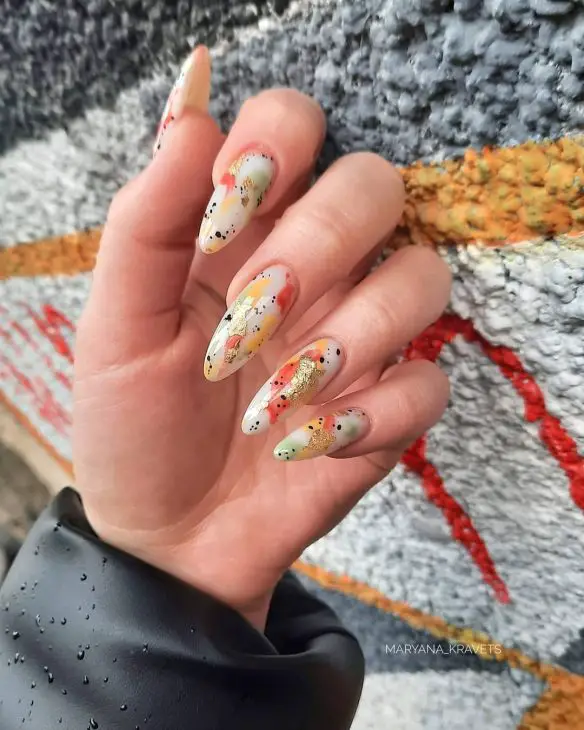
Abstract Autumn Almond Nails
This abstract autumn design features a mix of earthy tones and gold accents, perfect for the fall season. The use of warm oranges, greens, and reds creates a vibrant and artistic look, while the gold foil adds a touch of glamour. This design is ideal for those who want to embrace the colors of autumn.
Consumables List:
- Nude base polish (e.g., Essie Nail Polish in ‘Ballet Slippers’)
- Orange, green, and red polishes for abstract details (e.g., OPI Nail Lacquer in ‘Cajun Shrimp’, ‘Stay Off the Lawn’, and ‘Big Apple Red’)
- Gold foil for accents
- Fine detail brush for precise application
- Top coat for a glossy finish
DIY Instructions:
- Apply a nude base polish to all nails and let it dry.
- Use a fine detail brush to add abstract patterns with orange, green, and red polishes.
- Apply gold foil pieces to enhance the design.
- Seal with a top coat for a polished look.
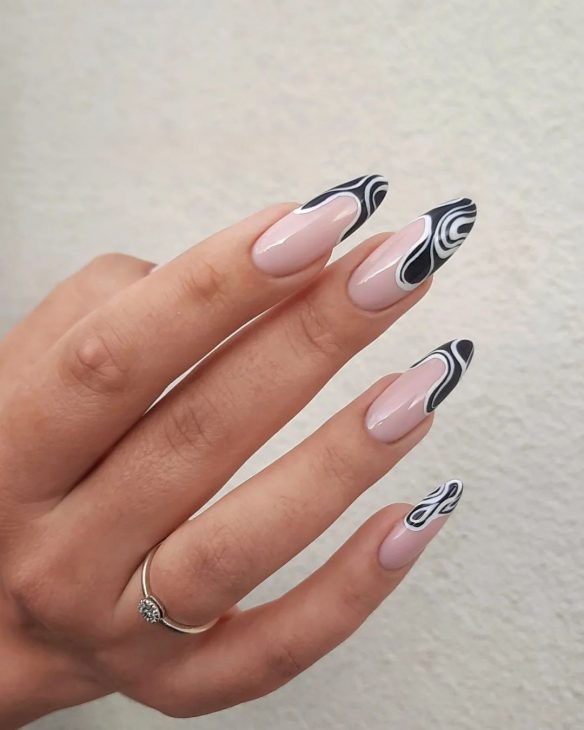
Monochrome Swirl Almond Nails
This monochrome swirl design is sleek and modern, featuring intricate black and white patterns. The swirls create a mesmerizing effect, making the nails look both stylish and sophisticated. This design is perfect for those who love a classic black-and-white aesthetic with a twist.
Consumables List:
- Nude base polish (e.g., Essie Nail Polish in ‘Ballet Slippers’)
- Black and white polishes for swirl design (e.g., OPI Nail Lacquer in ‘Black Onyx’ and ‘Alpine Snow’)
- Fine detail brush for painting swirls
- Top coat for sealing the design
DIY Instructions:
- Apply a nude base polish to all nails and let it dry.
- Using a fine detail brush, create intricate swirl patterns with black and white polishes.
- Finish with a top coat to protect the design and add shine.
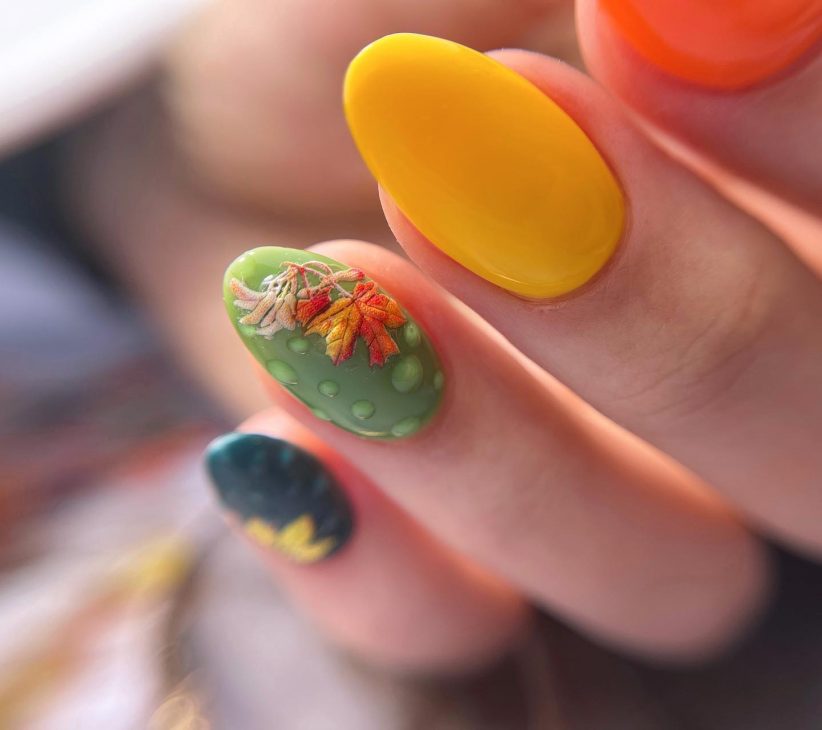
Autumn Leaves and Green Accent
This design beautifully captures the essence of fall with intricate leaf art against a green backdrop. The leaves are meticulously detailed in shades of red, yellow, and brown, creating a stunning contrast with the rich green base. The addition of a yellow accent nail adds a pop of brightness, making this design perfect for those who want to embrace the vibrant colors of fall.
Consumables List:
- Green base polish (e.g., Essie Nail Polish in ‘Mojito Madness’)
- Yellow polish for accent nail (e.g., OPI Nail Lacquer in ‘Sun, Sea, and Sand in My Pants’)
- Assorted red, yellow, and brown polishes for leaf details (e.g., Sally Hansen Insta-Dri in ‘Cinna-Snap’, ‘Pumpkin Queen’, and ‘Mochachino’)
- Fine detail brush for painting leaves
- Top coat for sealing the design
DIY Instructions:
- Apply the green base polish to all nails except one, which will be painted yellow.
- Using a fine detail brush, paint fall leaves on the green nails with red, yellow, and brown polishes.
- Add fine details to the leaves for a realistic effect.
- Finish with a top coat to protect the design.
White Swirl on Nude Base
This minimalist design features delicate white swirls over a nude base, creating an ethereal and elegant look. The soft, flowing lines add a touch of sophistication, making it a perfect choice for those who prefer understated elegance. This design is versatile and can be worn for both casual and formal occasions.
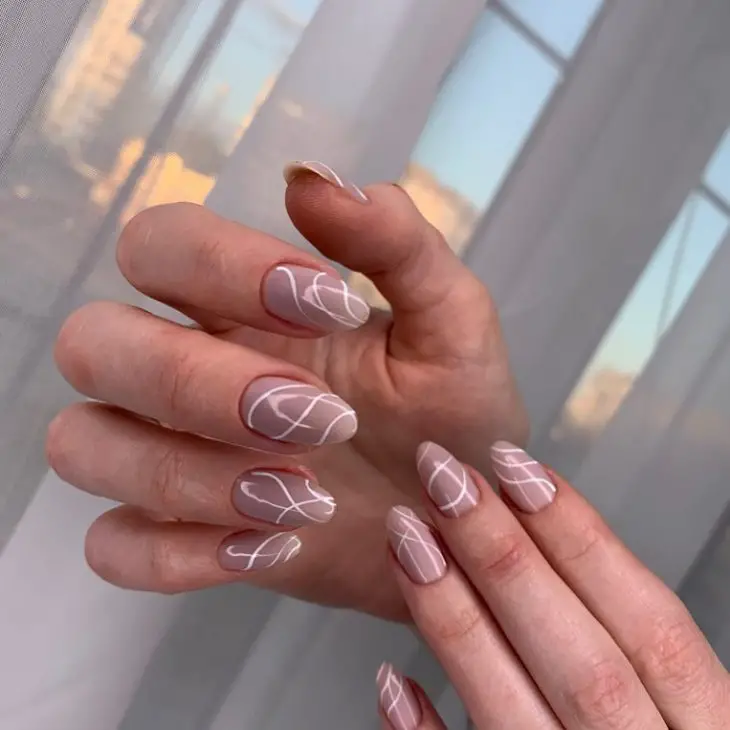
Consumables List:
- Nude base polish (e.g., OPI Nail Lacquer in ‘Dulce de Leche’)
- White polish for swirl design (e.g., Essie Nail Polish in ‘Blanc’)
- Fine detail brush for creating swirls
- Top coat for a glossy finish
DIY Instructions:
- Apply a nude base polish to all nails and let it dry.
- Use a fine detail brush to paint delicate white swirls on each nail.
- Seal the design with a top coat for a smooth and shiny finish.
Marble Pink Almond Nails
Marble designs are timeless and add a touch of luxury to any manicure. This soft pink marble effect is both subtle and chic, making it ideal for those who want a sophisticated yet understated look. The delicate veining in white and grey enhances the elegant appearance of the nails.
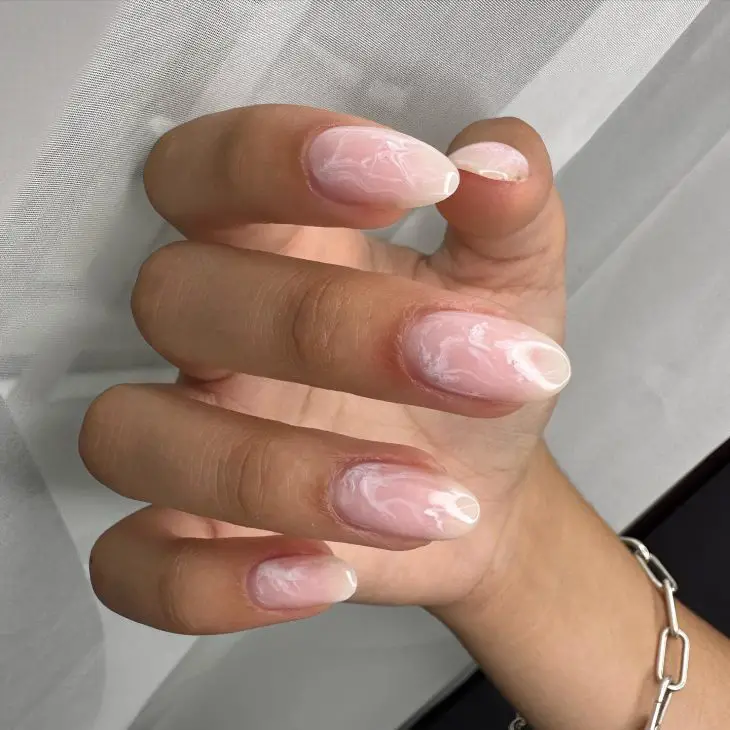
Consumables List:
- Soft pink base polish (e.g., Zoya Nail Lacquer in ‘Joey’)
- White and grey polishes for marble effect (e.g., OPI Nail Lacquer in ‘Alpine Snow’ and ‘Suzi & the Arctic Fox’)
- Thin brush or nail art pen for creating the marble design
- Top coat for protection and shine
DIY Instructions:
- Apply a soft pink base polish to all nails and let it dry.
- Use a thin brush to draw fine veins with white and grey polishes, blending slightly to create a marble effect.
- Finish with a top coat to seal the design.
Orange Leaves on White Base
This design is a celebration of fall, featuring vibrant orange leaves delicately painted on a white base. The leaves’ detailed shading gives them a lifelike appearance, while the bright orange accent nails add a bold touch. This design is perfect for those who love the crisp, colorful nature of fall.
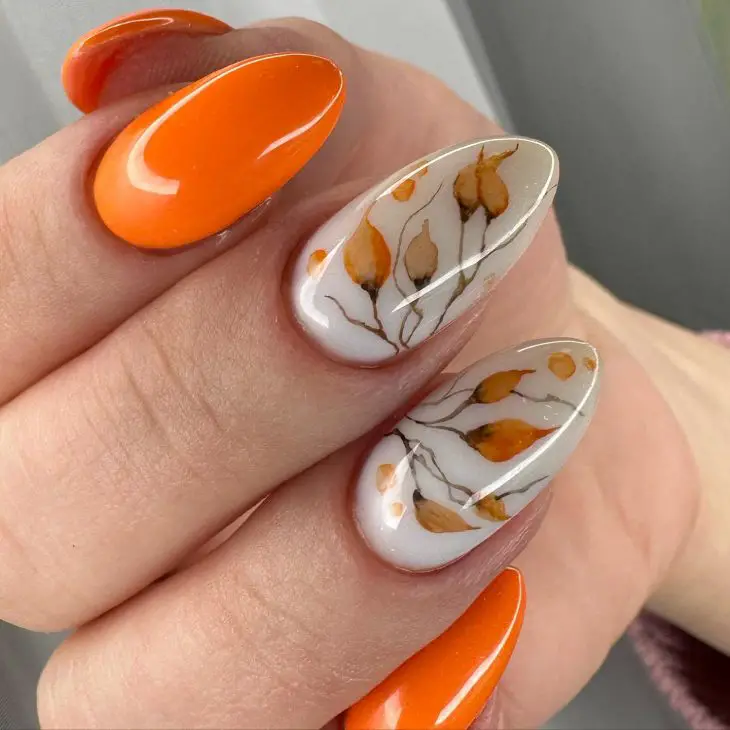
Consumables List:
- White base polish (e.g., Essie Nail Polish in ‘Blanc’)
- Orange polish for leaves and accent nails (e.g., OPI Nail Lacquer in ‘A Good Man-darin is Hard to Find’)
- Fine detail brush for leaf detailing
- Top coat for a smooth finish
DIY Instructions:
- Apply a white base polish to the majority of the nails and an orange polish to a few accent nails.
- Paint detailed leaves on the white base nails using an orange polish and a fine detail brush.
- Seal the design with a top coat.
Burgundy and Floral Accent
Burgundy is a quintessential fall color, and this design pairs it beautifully with floral accents. The deep burgundy nails are complemented by a stunning floral design featuring rich reds, yellows, and a hint of gold. The combination of these elements creates a warm and inviting look, perfect for the season.
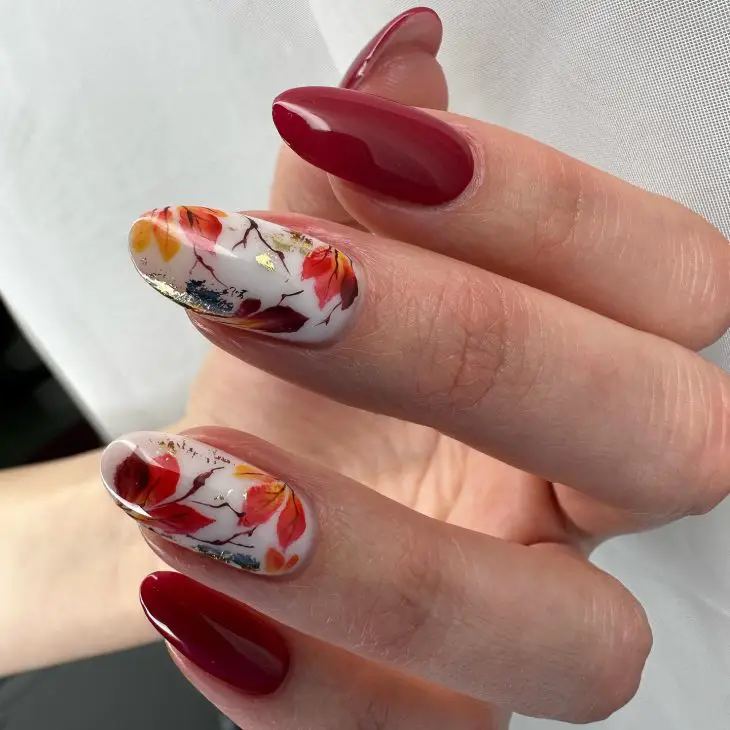
Consumables List:
- Burgundy polish (e.g., OPI Nail Lacquer in ‘Malaga Wine’)
- White base polish for floral accent nails (e.g., Essie Nail Polish in ‘Blanc’)
- Assorted red and yellow polishes for flowers (e.g., Sally Hansen Insta-Dri in ‘Rapid Red’ and ‘Yellow Cab’)
- Gold foil for accents
- Fine detail brush for painting flowers
- Top coat for a glossy finish
DIY Instructions:
- Apply a burgundy polish to all nails except the accent nails, which should be painted with a white base polish.
- On the accent nails, paint detailed floral designs using red and yellow polishes, adding gold foil for extra elegance.
- Finish with a top coat to protect the design.
Save Pin

