
Fall marble nails are all about blending autumnal colors into mesmerizing patterns. Whether you prefer short or almond shapes, acrylic or natural nails, there’s a marble design to suit every preference. Below, I will detail several fall marble nail ideas, each highlighted by a specific image.
Fall Marble Nails: Deep Green Elegance
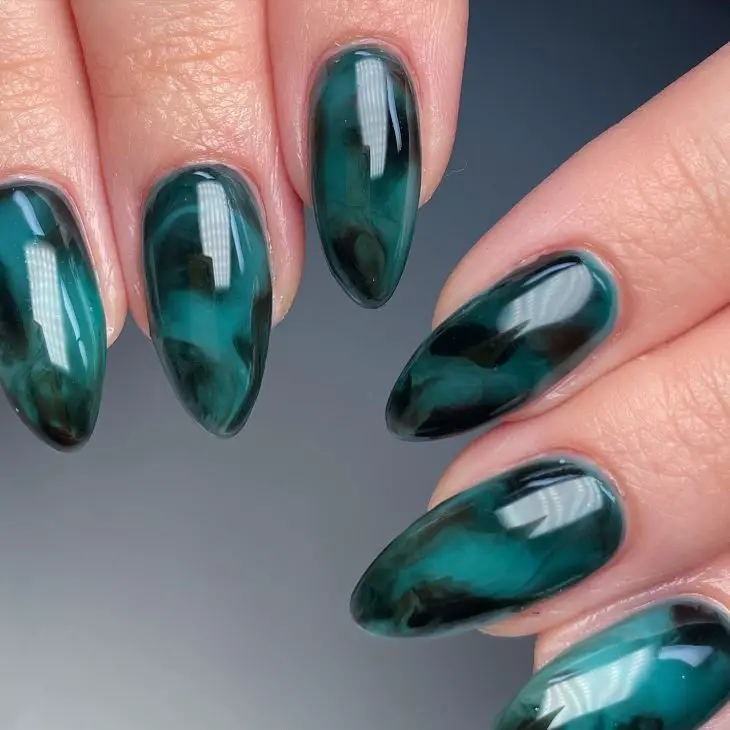
As a professional manicurist, I adore the depth and sophistication that deep green marble nails bring to fall aesthetics. This design features a blend of dark green with subtle black swirls, creating an almost gem-like appearance on almond-shaped nails. The glossy finish adds an extra touch of elegance, making these nails perfect for both casual and formal occasions.
Consumables:
- Dark green nail polish (e.g., OPI “Stay Off the Lawn”)
- Black nail polish (e.g., Essie “Licorice”)
- Clear top coat (e.g., Seche Vite Dry Fast Top Coat)
- Fine detail brush for swirling
DIY Instructions:
- Start with a base coat to protect your nails.
- Apply two coats of dark green nail polish.
- While the polish is still wet, add small dots of black polish.
- Use a fine detail brush to gently swirl the black into the green, creating a marble effect.
- Seal with a clear top coat for a glossy finish.
Fall Marble Nails: Crisp White Sophistication
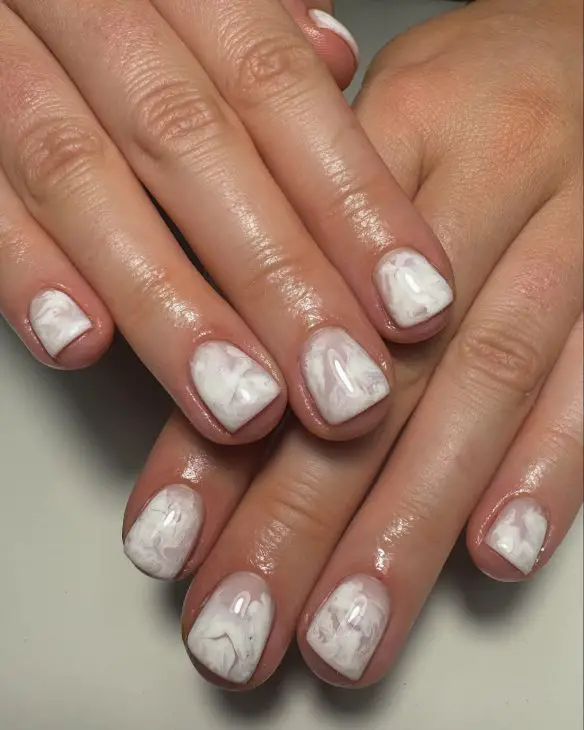
This crisp white marble design is perfect for those who prefer a minimalist yet stylish look. The short square shape makes it practical while still maintaining a chic appearance. The white base with subtle gray veining adds a touch of sophistication that is ideal for any fall event.
Consumables:
- White nail polish (e.g., Essie “Blanc”)
- Light gray nail polish (e.g., OPI “Cement the Deal”)
- Clear top coat
- Fine detail brush for veining
DIY Instructions:
- Apply a base coat to prepare your nails.
- Paint your nails with two coats of white polish.
- Dab small amounts of gray polish and use a fine brush to create vein-like patterns.
- Finish with a clear top coat for shine and durability.
Fall Marble Nails: Subtle Pink and Gray
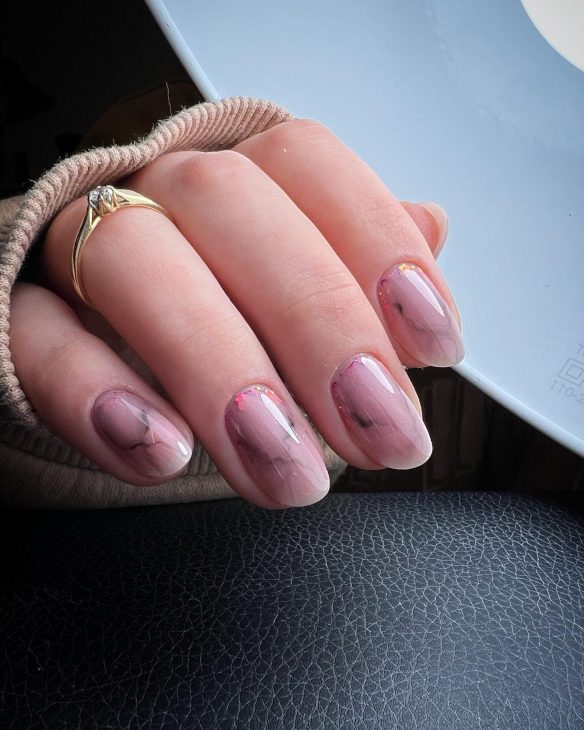
For a more muted and sophisticated fall look, these pink and gray marble nails are perfect. The soft, translucent pink base combined with gray swirls creates an understated yet elegant effect. This design works well with short to medium-length nails and is great for a polished everyday look.
Consumables:
- Soft pink nail polish (e.g., Essie “Ballet Slippers”)
- Gray nail polish (e.g., China Glaze “Recycle”)
- Clear top coat
- Fine detail brush for marbling
DIY Instructions:
- Start with a base coat.
- Apply two coats of soft pink polish.
- While the polish is still tacky, add dots of gray polish.
- Use a fine detail brush to swirl the gray into the pink for a marble effect.
- Seal with a clear top coat.
Fall Marble Nails: Bold Red and Black
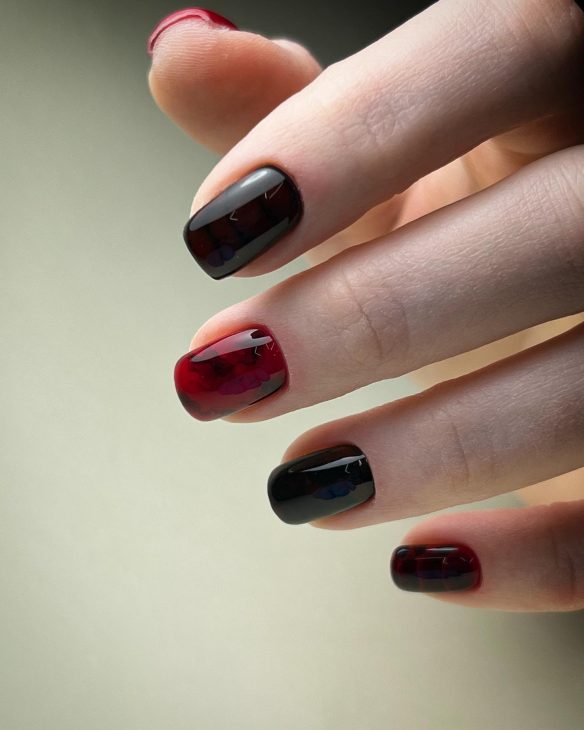
These bold red and black marble nails are a statement piece for fall. The combination of vibrant red and deep black swirls on a short square shape adds a dramatic flair to any outfit. Perfect for those who love a bold and edgy look.
Consumables:
- Red nail polish (e.g., OPI “Big Apple Red”)
- Black nail polish
- Clear top coat
- Fine detail brush for marbling
DIY Instructions:
- Apply a base coat.
- Paint your nails with two coats of red polish.
- Add small dots of black polish while the red is still wet.
- Swirl the black into the red with a fine detail brush.
- Finish with a clear top coat.
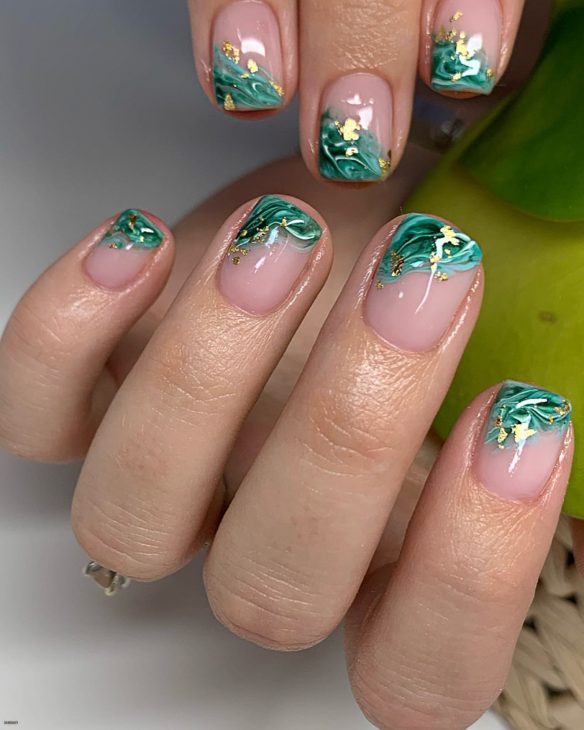
Fall Marble Nails: Green with Gold Accents
For a luxurious fall marble nail look, try these green nails with gold accents. The combination of deep green marbling and delicate gold flakes creates an opulent appearance. This design is perfect for special occasions and adds a touch of glam to any outfit.
Consumables:
- Dark green nail polish
- Gold leaf or foil
- Clear top coat
- Fine detail brush for marbling
DIY Instructions:
- Start with a base coat.
- Apply two coats of dark green polish.
- Add small pieces of gold leaf while the polish is still tacky.
- Use a fine detail brush to create marble patterns around the gold accents.
- Seal with a clear top coat.
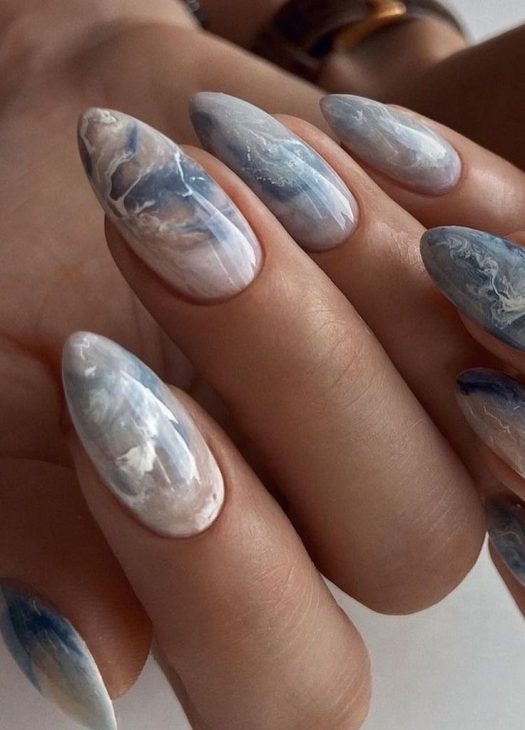
Fall Marble Nails: Blue and White Serenity
These blue and white marble nails exude a serene and calming vibe, reminiscent of a cloudy fall sky. The almond shape elongates the fingers, while the glossy finish adds a touch of elegance. The subtle blend of blues and whites creates a soft, dreamy look that is perfect for those who prefer a more understated style.
Consumables:
- Light blue nail polish (e.g., Essie “Blue La La”)
- White nail polish (e.g., OPI “Alpine Snow”)
- Clear top coat (e.g., Seche Vite Dry Fast Top Coat)
- Fine detail brush for swirling
DIY Instructions:
- Apply a base coat to protect your nails.
- Paint your nails with two coats of light blue polish.
- While the polish is still wet, add small dots of white polish.
- Use a fine detail brush to swirl the white into the blue, creating a marble effect.
- Seal with a clear top coat for a glossy finish.
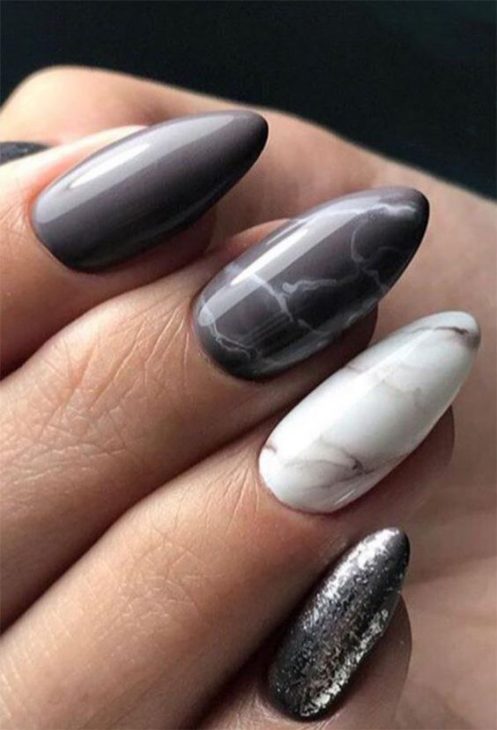
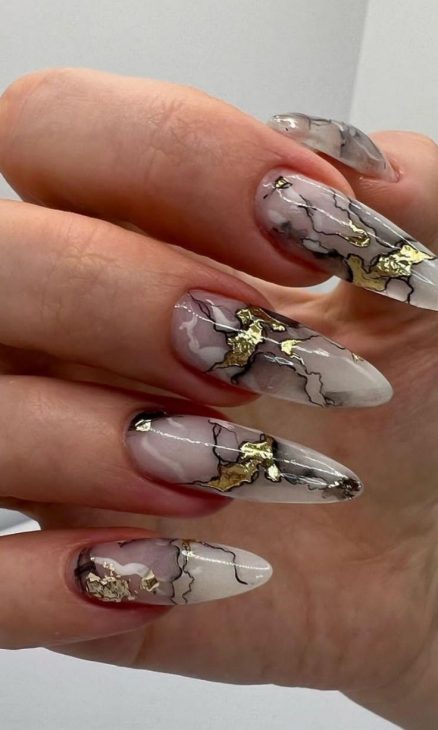
Fall Marble Nails: Monochrome Chic
Monochrome marble nails are a timeless classic. This design features shades of black, gray, and white, creating a sophisticated and versatile look. The almond shape is flattering for most hand types, and the combination of matte and glossy finishes adds depth and interest to the design.
Consumables:
- Black nail polish (e.g., Essie “Licorice”)
- Gray nail polish (e.g., OPI “Cement the Deal”)
- White nail polish (e.g., Zoya “Purity”)
- Silver glitter polish (e.g., China Glaze “Glistening Snow”)
- Clear top coat
- Fine detail brush for swirling
DIY Instructions:
- Start with a base coat.
- Apply two coats of black polish on some nails, gray on others, and white on one or two nails.
- For the marble effect, add small dots of contrasting colors on each nail and swirl with a fine detail brush.
- Add a touch of silver glitter on one nail for extra sparkle.
- Finish with a clear top coat.
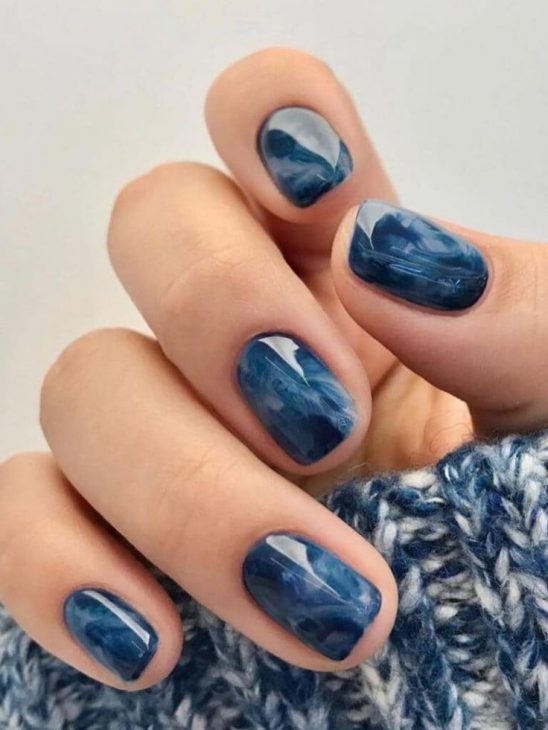
Fall Marble Nails: Deep Blue Marble
These deep blue marble nails are perfect for adding a pop of color to your fall wardrobe. The short square shape is practical yet stylish, making this design suitable for everyday wear. The rich blue hues with subtle white marbling create a striking contrast that stands out beautifully.
Consumables:
- Deep blue nail polish (e.g., Essie “Midnight Cami”)
- White nail polish
- Clear top coat
- Fine detail brush for marbling
DIY Instructions:
- Apply a base coat.
- Paint your nails with two coats of deep blue polish.
- While the polish is still wet, add small dots of white polish.
- Use a fine detail brush to swirl the white into the blue for a marble effect.
- Seal with a clear top coat for durability.
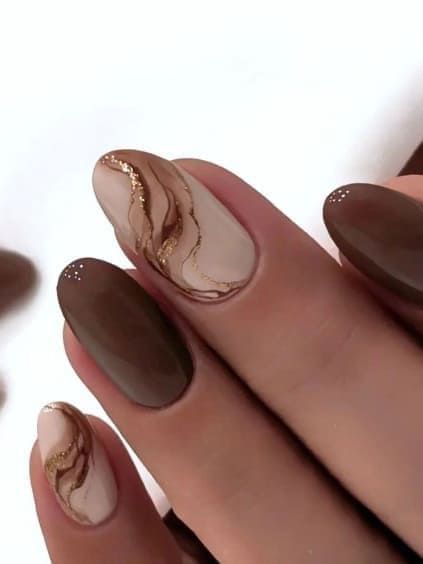
Fall Marble Nails: Earthy Tones with Gold Accents
These earthy tone marble nails are a perfect match for the fall season. The combination of brown and beige with delicate gold accents adds a touch of luxury to this natural look. The almond shape enhances the elegance of the design, making it ideal for both casual and formal settings.
Consumables:
- Brown nail polish (e.g., OPI “You Don’t Know Jacques!”)
- Beige nail polish (e.g., Essie “Sand Tropez”)
- Gold glitter or foil
- Clear top coat
- Fine detail brush for marbling
DIY Instructions:
- Start with a base coat.
- Apply two coats of brown polish on some nails and beige on others.
- Add small pieces of gold foil while the polish is still tacky.
- Use a fine detail brush to create marble patterns around the gold accents.
- Finish with a clear top coat.
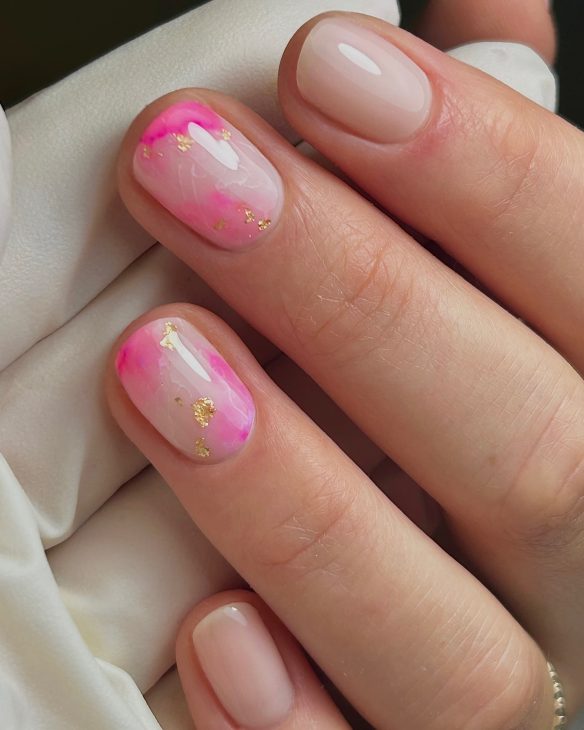
Fall Marble Nails: Pink with Gold Flecks
These pink marble nails with gold flecks are a delightful twist on the classic marble design. The soft pink base is perfect for those who prefer a more feminine look, while the gold flecks add a touch of glamour. This design works well with short nails, making it practical and chic.
Consumables:
- Soft pink nail polish (e.g., Essie “Ballet Slippers”)
- White nail polish
- Gold glitter or foil
- Clear top coat
- Fine detail brush for marbling
DIY Instructions:
- Apply a base coat.
- Paint your nails with two coats of soft pink polish.
- Add small dots of white polish and gold flecks while the pink is still wet.
- Use a fine detail brush to swirl the colors together for a marble effect.
- Seal with a clear top coat for a glossy finish.
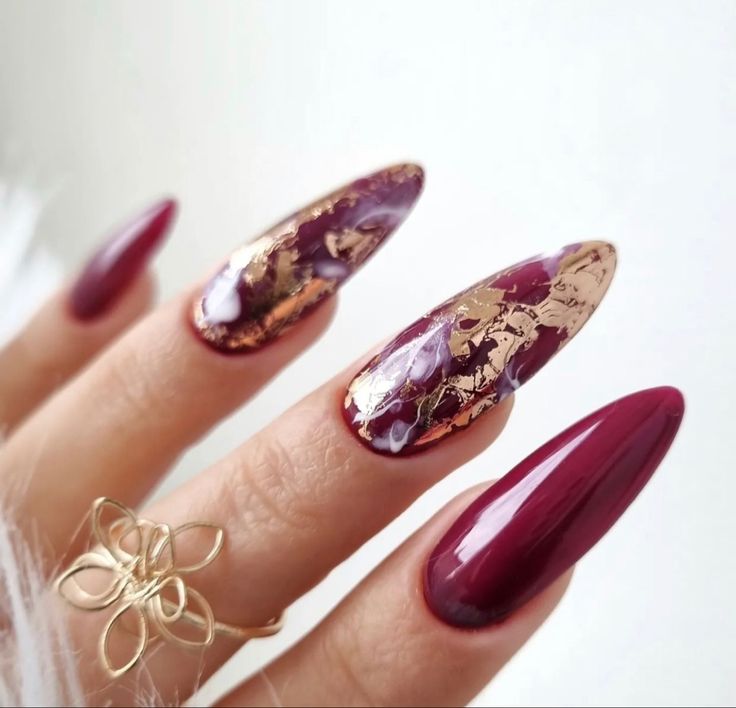
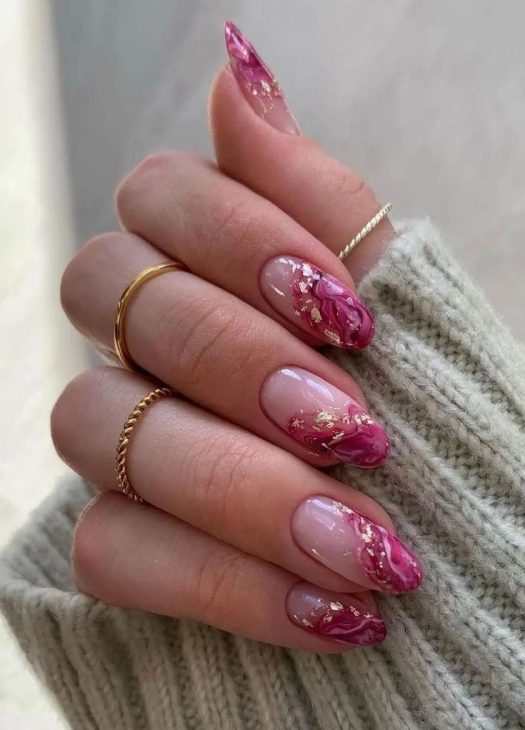
Burgundy and Gold Marble Nails
These striking almond-shaped nails feature a deep burgundy base with luxurious gold leaf accents, creating a stunning marble effect. The rich burgundy color is perfect for fall, and the gold adds a touch of elegance and glamour.
Consumables:
- Burgundy nail polish (e.g., OPI “Malaga Wine”)
- Gold leaf or foil
- White nail polish
- Clear top coat
- Fine detail brush for marbling
DIY Instructions:
- Start with a base coat.
- Apply two coats of burgundy polish.
- While the polish is still tacky, add small pieces of gold leaf.
- Use a fine detail brush to add white polish and create a marble effect by swirling the colors together.
- Seal with a clear top coat.
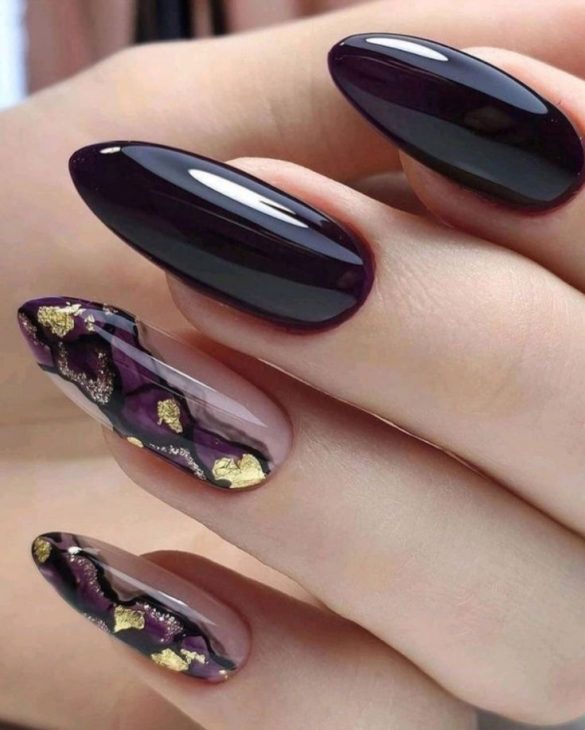
Deep Purple and Gold Marble Nails
These nails feature a deep purple base with dramatic black and gold marble accents, perfect for a bold fall look. The combination of dark colors with metallic gold creates a luxurious and sophisticated design.
Consumables:
- Deep purple nail polish (e.g., Essie “Sole Mate”)
- Black nail polish
- Gold leaf or foil
- Clear top coat
- Fine detail brush for marbling
DIY Instructions:
- Apply a base coat.
- Paint your nails with two coats of deep purple polish.
- Add small pieces of gold leaf and black polish while the purple is still wet.
- Use a fine detail brush to swirl the colors, creating a marble effect.
- Finish with a clear top coat.
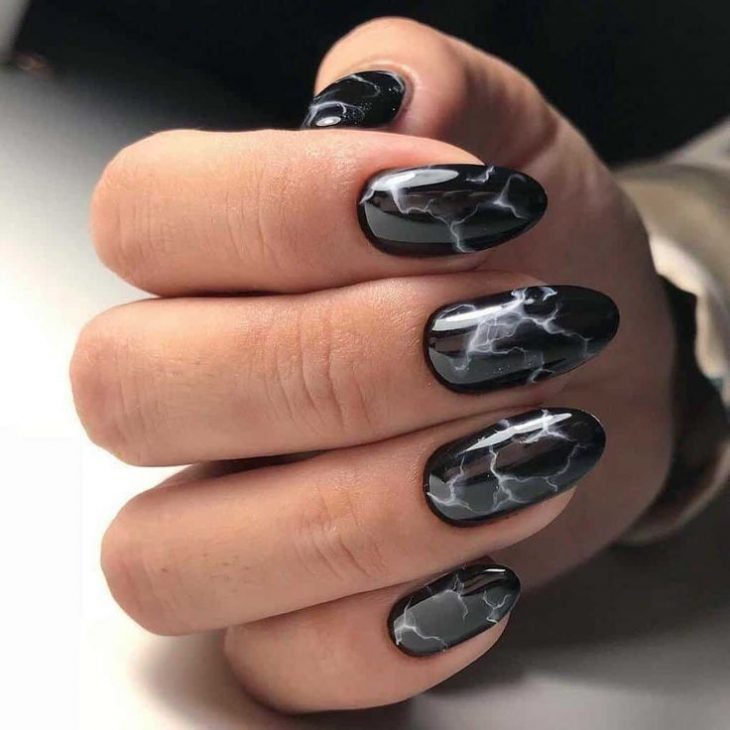
Black and White Marble Nails
For a classic and timeless look, these black and white marble nails are perfect. The short oval shape keeps the design elegant and understated, while the marble pattern adds a touch of sophistication.
Consumables:
- Black nail polish (e.g., OPI “Black Onyx”)
- White nail polish
- Clear top coat
- Fine detail brush for marbling
DIY Instructions:
- Start with a base coat.
- Apply two coats of black polish.
- Add small drops of white polish while the black is still wet.
- Use a fine detail brush to swirl the white into the black, creating a marble effect.
- Seal with a clear top coat.
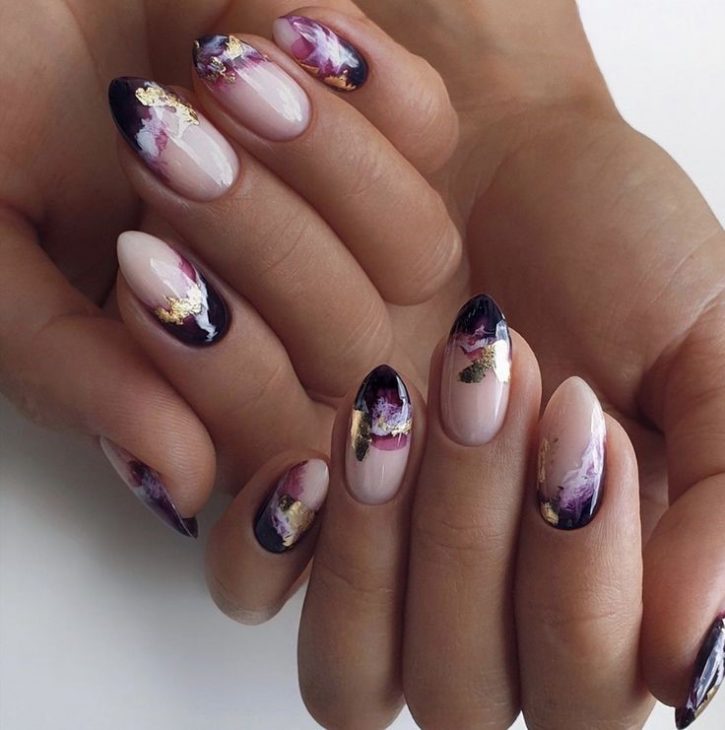
Nude and Purple Marble Nails
These almond-shaped nails feature a nude base with stunning purple and gold marble accents. The combination of nude and purple creates a soft yet eye-catching design, perfect for any fall occasion.
Consumables:
- Nude nail polish (e.g., Essie “Sand Tropez”)
- Purple nail polish (e.g., OPI “Lincoln Park After Dark”)
- Gold leaf or foil
- Clear top coat
- Fine detail brush for marbling
DIY Instructions:
- Apply a base coat.
- Paint your nails with two coats of nude polish.
- Add small drops of purple polish and pieces of gold leaf while the nude is still wet.
- Use a fine detail brush to create a marble effect by swirling the colors together.
- Finish with a clear top coat.
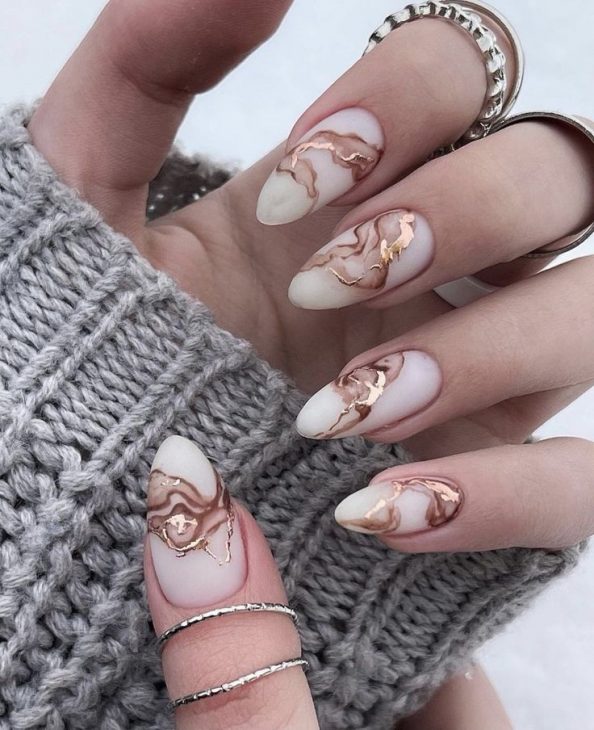
Rose Gold and White Marble Nails
These nails feature a delicate rose gold and white marble design, perfect for a chic and elegant fall look. The combination of rose gold and white creates a soft and sophisticated appearance, ideal for any occasion.
Consumables:
- White nail polish (e.g., OPI “Alpine Snow”)
- Rose gold polish (e.g., Essie “Penny Talk”)
- Clear top coat
- Fine detail brush for marbling
DIY Instructions:
- Start with a base coat.
- Apply two coats of white polish.
- Add small drops of rose gold polish while the white is still wet.
- Use a fine detail brush to swirl the rose gold into the white, creating a marble effect.
- Seal with a clear top coat.
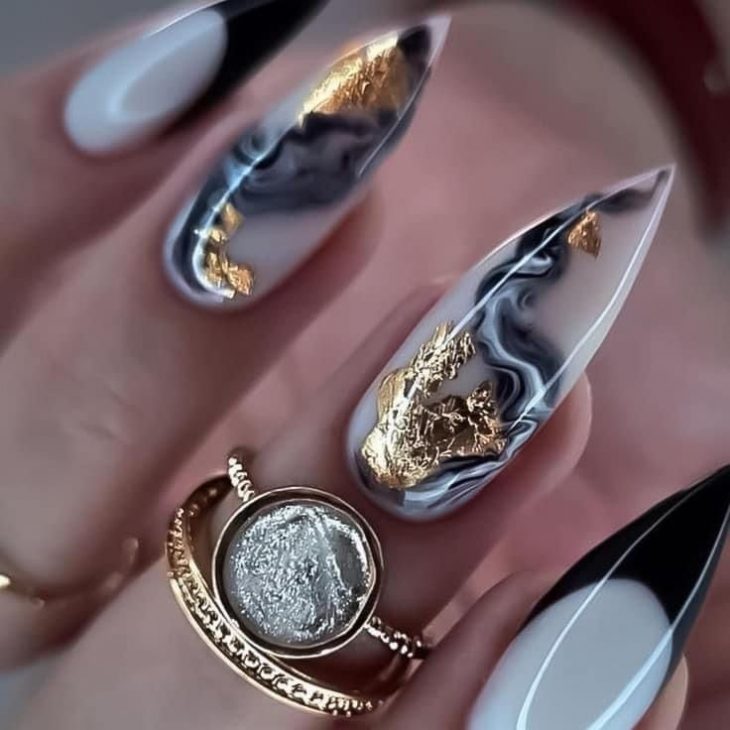
Black and Gold Marble Nails
These black and gold marble nails exude sophistication and luxury. The almond shape adds elegance, while the gold leaf accents elevate the design to a new level of glamour. Perfect for evening events or a bold daytime look.
Consumables:
- Black nail polish (e.g., OPI “Black Onyx”)
- White nail polish
- Gold leaf or foil
- Clear top coat
- Fine detail brush for marbling
DIY Instructions:
- Start with a base coat.
- Apply two coats of black polish.
- Add small pieces of gold leaf and white polish while the black is still wet.
- Use a fine detail brush to create a marble effect by swirling the colors together.
- Seal with a clear top coat.
Pink and Gold Marble Nails
These pink and gold marble nails offer a feminine and sophisticated look. The combination of soft pink and gold creates a delicate yet eye-catching design, perfect for any fall occasion.
Consumables:
- Light pink nail polish (e.g., Essie “Ballet Slippers”)
- White nail polish
- Gold leaf or foil
- Clear top coat
- Fine detail brush for marbling
DIY Instructions:
- Apply a base coat.
- Paint your nails with two coats of light pink polish.
- Add small drops of white polish and pieces of gold leaf while the pink is still wet.
- Use a fine detail brush to create a marble effect by swirling the colors together.
- Finish with a clear top coat.
Neutral and Gold Marble Nails
These nails feature a neutral base with dramatic black and gold marble accents, creating a chic and modern look. The long almond shape enhances the sophisticated vibe, making these nails perfect for any fall event.
Consumables:
- Nude nail polish (e.g., Essie “Sand Tropez”)
- Black nail polish
- Gold leaf or foil
- Clear top coat
- Fine detail brush for marbling
DIY Instructions:
- Apply a base coat.
- Paint your nails with two coats of nude polish.
- Add small pieces of gold leaf and black polish while the nude is still wet.
- Use a fine detail brush to swirl the colors, creating a marble effect.
- Finish with a clear top coat.
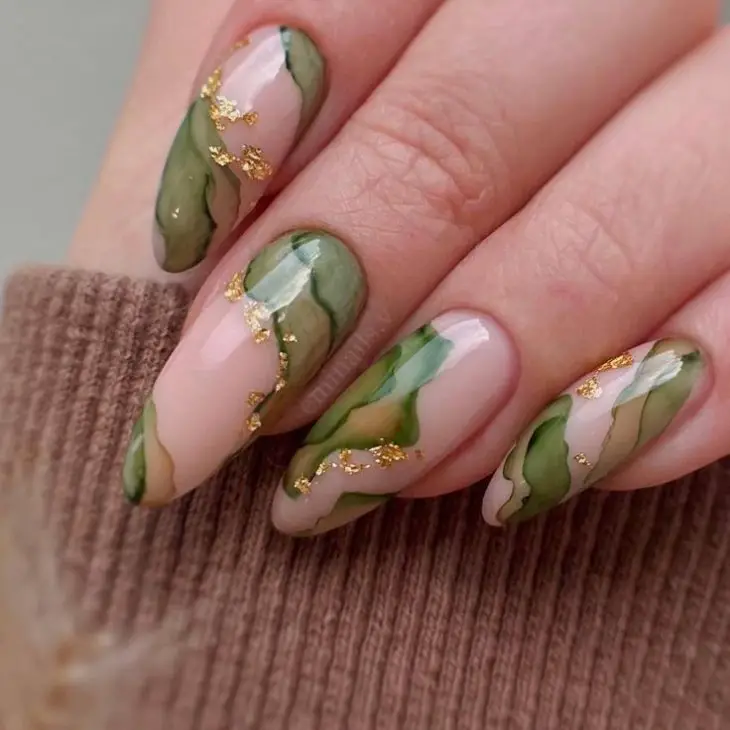
Green and Gold Marble Nails
These green and gold marble nails bring a touch of nature into your fall look. The combination of green and gold creates a luxurious and earthy design, perfect for embracing the season’s colors.
Consumables:
- Green nail polish (e.g., OPI “Stay Off the Lawn”)
- Nude nail polish
- Gold leaf or foil
- Clear top coat
- Fine detail brush for marbling
DIY Instructions:
- Start with a base coat.
- Apply two coats of green polish.
- Add small pieces of gold leaf and nude polish while the green is still wet.
- Use a fine detail brush to create a marble effect by swirling the colors together.
- Seal with a clear top coat.
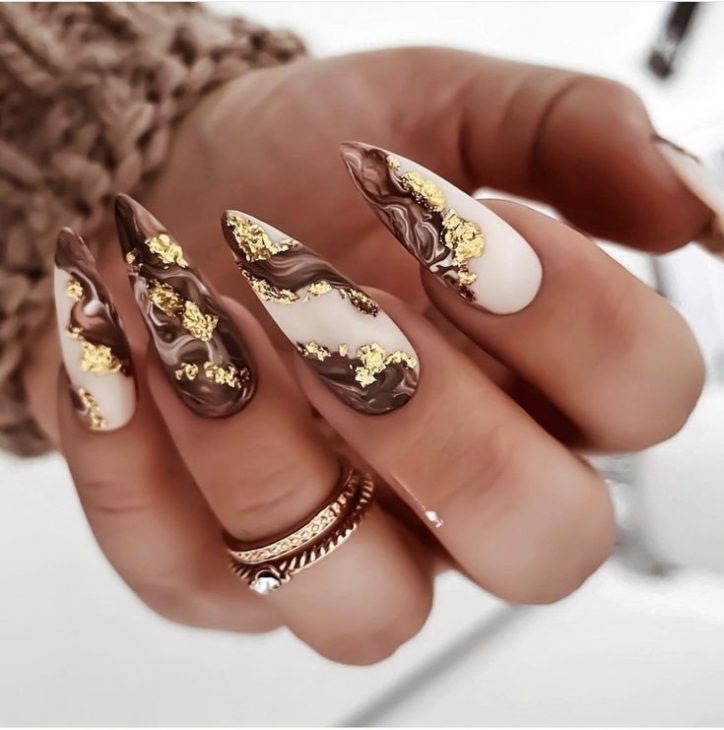
Brown and Gold Marble Nails
For a warm and luxurious fall look, these brown and gold marble nails are perfect. The rich brown tones combined with gold leaf accents create a sophisticated and elegant design.
Consumables:
- Brown nail polish (e.g., OPI “Chocolate Moose”)
- White nail polish
- Gold leaf or foil
- Clear top coat
- Fine detail brush for marbling
DIY Instructions:
- Apply a base coat.
- Paint your nails with two coats of brown polish.
- Add small pieces of gold leaf and white polish while the brown is still wet.
- Use a fine detail brush to create a marble effect by swirling the colors together.
- Finish with a clear top coat.
Save Pin