Fall Nails Glitter: Stunning Ideas to Sparkle This Season
When it comes to autumn, our nails should reflect the season’s warmth, coziness, and a hint of festive sparkle. From glitter accents to ombre designs, there’s no limit to how creative you can get with your fall nail looks. Let’s dive into some of the most dazzling fall nails glitter designs that you can try this season.
Glamorous White and Gold Glitter Nails
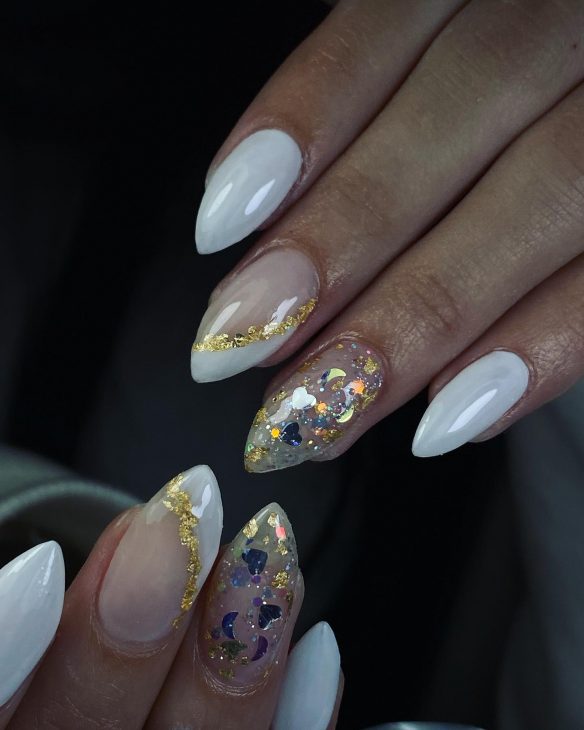
The first design we’re looking at is a perfect blend of elegance and sparkle. These nails feature a stunning white base with gold glitter accents, creating a sophisticated yet glamorous look. The gold glitter is carefully placed to accentuate the tips and ring finger, adding a touch of opulence.
Consumables:
- White nail polish (e.g., OPI Alpine Snow)
- Gold glitter polish (e.g., Essie Rock at the Top)
- Base coat (e.g., Seche Clear Base Coat)
- Top coat (e.g., Seche Vite Top Coat)
- Nail art brush
- Nail adhesive
DIY Instructions:
- Preparation: Start with clean, shaped nails. Apply a base coat to protect your natural nails.
- Base Color: Apply two coats of white nail polish and let them dry completely.
- Glitter Accents: Using a nail art brush, apply gold glitter polish to the tips and ring finger. You can also use nail adhesive to place loose gold glitter.
- Top Coat: Seal the design with a top coat to add shine and protect your manicure.
Chic French Manicure with Glitter Accents
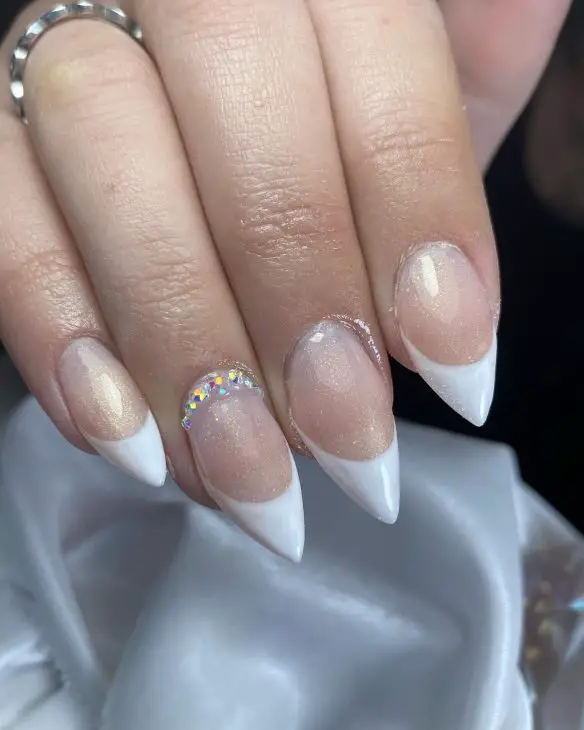
French manicures are timeless, but adding glitter takes them to a whole new level. This design features a traditional French tip with a glittery twist on the ring finger. It’s simple yet trendy, perfect for those who love a classic look with a hint of sparkle.
Consumables:
- Nude nail polish (e.g., Essie Ballet Slippers)
- White nail polish (e.g., OPI Alpine Snow)
- Silver glitter polish (e.g., Sally Hansen Disco Ball)
- Base coat (e.g., Orly Bonder Base Coat)
- Top coat (e.g., Sally Hansen Miracle Gel Top Coat)
- Nail art tape
DIY Instructions:
- Base Color: Apply a base coat, followed by two coats of nude polish.
- French Tips: Use nail art tape to create a clean line for the white tips. Apply white polish to the tips and let dry.
- Glitter Accent: Apply silver glitter polish to the ring finger. You can layer it for more sparkle.
- Finish: Apply a top coat to seal and shine.
Elegant Marble and Gold Accent Nails
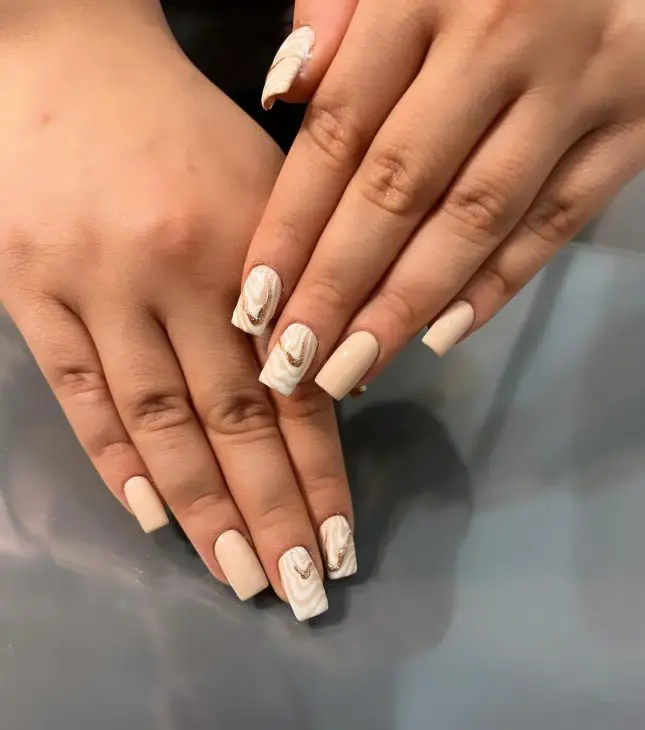
Marble nails with gold accents are the epitome of luxury. This design uses a neutral color palette with intricate marble effects and subtle gold details, making it perfect for fall. The gold accents add just the right amount of sparkle without being overwhelming.
Consumables:
- Nude nail polish (e.g., Zoya Avery)
- White nail polish (e.g., Essie Blanc)
- Gold foil (e.g., Born Pretty Gold Foil)
- Base coat (e.g., CND Stickey Base Coat)
- Top coat (e.g., Essie Gel Setter)
- Nail art brush
- Toothpick or fine brush for marbling
DIY Instructions:
- Base Color: Apply a base coat and two coats of nude polish.
- Marbling: Dab white polish onto the nail using a toothpick or fine brush to create a marble effect. Drag through the white with a toothpick to create veins.
- Gold Accents: Apply small pieces of gold foil onto the wet polish for accents.
- Top Coat: Finish with a top coat to secure the design.
Gold Leaf Glitter Nails
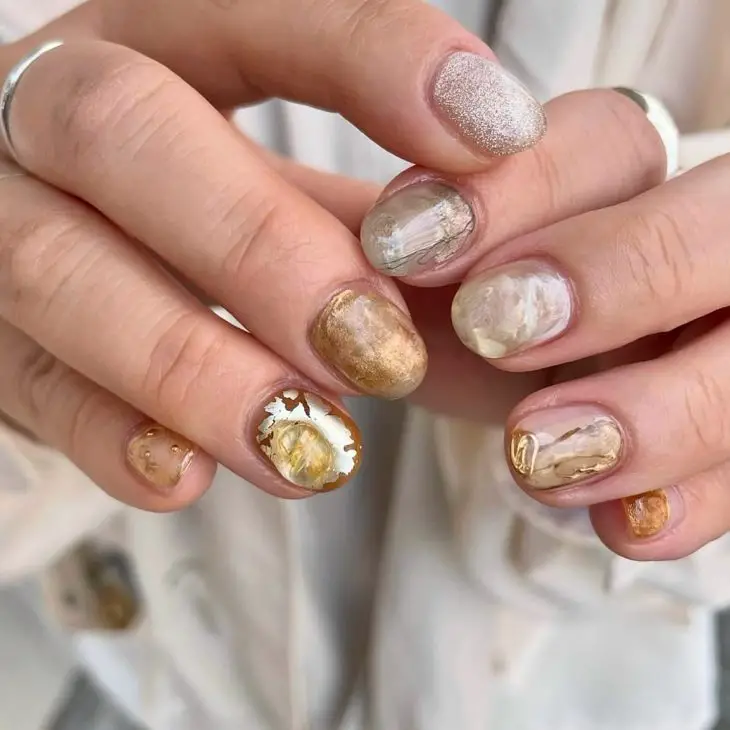
These nails are all about luxurious gold leaf accents. With a clear or nude base, the gold leaf pieces create a stunning, artistic look. This design is perfect for anyone wanting to make a bold statement.
Consumables:
- Clear or nude nail polish (e.g., OPI Bubble Bath)
- Gold leaf flakes (e.g., Holo Taco Gold Leaf Flakie Topper)
- Base coat (e.g., Essie First Base)
- Top coat (e.g., Gelish Top It Off)
- Tweezers
DIY Instructions:
- Base Layer: Apply a base coat and let it dry. Follow with two coats of clear or nude polish.
- Gold Leaf: Using tweezers, carefully place gold leaf flakes onto the wet polish.
- Seal: Apply a top coat to seal the gold leaf and add shine.
Speckled Glitter Nails with Blue Accents
This unique design features a speckled glitter base with blue gemstone accents. It’s a playful and trendy look, perfect for adding a bit of fun to your fall nails.
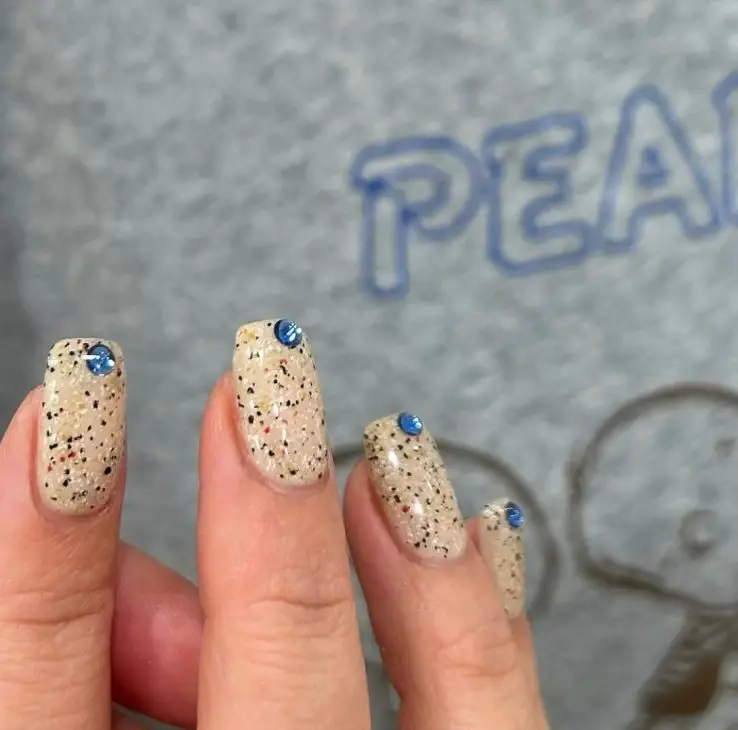
Consumables:
- Speckled glitter polish (e.g., KBShimmer Stonewashed)
- Blue rhinestones (e.g., Swarovski Blue Flatback Crystals)
- Base coat (e.g., Zoya Anchor Base Coat)
- Top coat (e.g., INM Out the Door)
- Nail glue
DIY Instructions:
- Base Coat: Start with a base coat to protect your nails.
- Speckled Polish: Apply two coats of speckled glitter polish and let dry.
- Gemstone Accents: Use nail glue to place blue rhinestones on each nail.
- Top Coat: Finish with a top coat to secure the rhinestones and add shine.
Fall Nails Glitter Ombre
This design features a beautiful blend of maroon and nude shades with a touch of glitter ombre. The glitter fades from the cuticle to the tip, creating a captivating gradient effect. It’s a perfect example of how fall nails glitter ombre can add sophistication to your look.
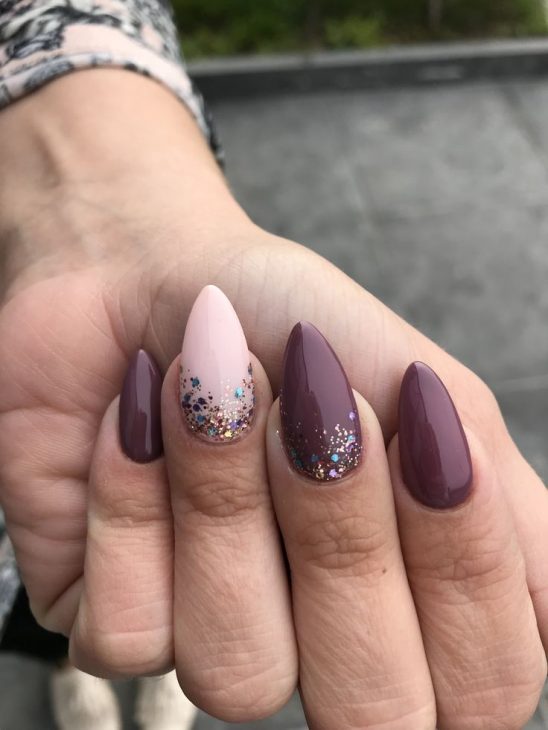
Consumables:
- Maroon nail polish (e.g., OPI Malaga Wine)
- Nude nail polish (e.g., Essie Ballet Slippers)
- Gold glitter polish (e.g., China Glaze Fairy Dust)
- Base coat (e.g., Orly Bonder Base Coat)
- Top coat (e.g., Seche Vite Top Coat)
- Nail sponge
DIY Instructions:
- Preparation: Start with clean, shaped nails. Apply a base coat.
- Base Color: Apply maroon polish to the nails except for one accent nail with nude polish.
- Glitter Ombre: Use a nail sponge to dab gold glitter from the cuticle towards the tip.
- Top Coat: Seal the design with a top coat.
Fall Nails Glitter Sparkle
This stunning design combines deep teal and burnt orange with glitter sparkle on an accent nail. The glitter’s multidimensional effect brings a unique touch to the bold colors, making it a trendy and eye-catching choice for fall nails glitter sparkle.
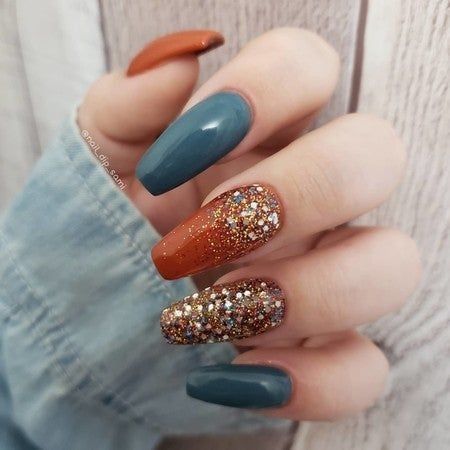
Consumables:
- Teal nail polish (e.g., Zoya Talia)
- Burnt orange nail polish (e.g., Essie Playing Koi)
- Multicolor glitter polish (e.g., OPI Rainbow Connection)
- Base coat (e.g., Essie First Base)
- Top coat (e.g., INM Out the Door)
- Nail brush
DIY Instructions:
- Base Coat: Apply a base coat to protect your nails.
- Base Color: Apply teal polish to most nails and burnt orange to one or two accent nails.
- Glitter Accent: Apply multicolor glitter polish to one accent nail.
- Top Coat: Finish with a top coat for shine and protection.
Fall Nails Glitter Brown
These nails feature a rich brown base with intricate gold glitter designs. The glitter creates an elegant pattern that stands out against the neutral base, making it ideal for fall nails glitter brown.
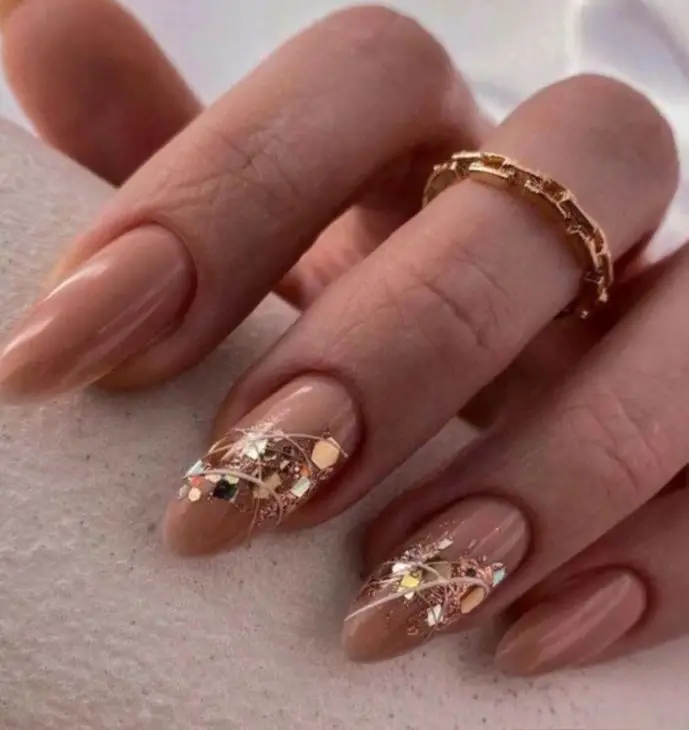
Consumables:
- Brown nail polish (e.g., OPI Espresso Your Inner Self)
- Gold glitter polish (e.g., Sally Hansen Big Glitter Top Coat)
- Base coat (e.g., CND Stickey Base Coat)
- Top coat (e.g., Essie Gel Setter)
- Nail art brush
DIY Instructions:
- Base Coat: Start with a base coat.
- Base Color: Apply two coats of brown nail polish.
- Glitter Design: Use a nail art brush to apply gold glitter in intricate patterns.
- Top Coat: Seal the design with a top coat.
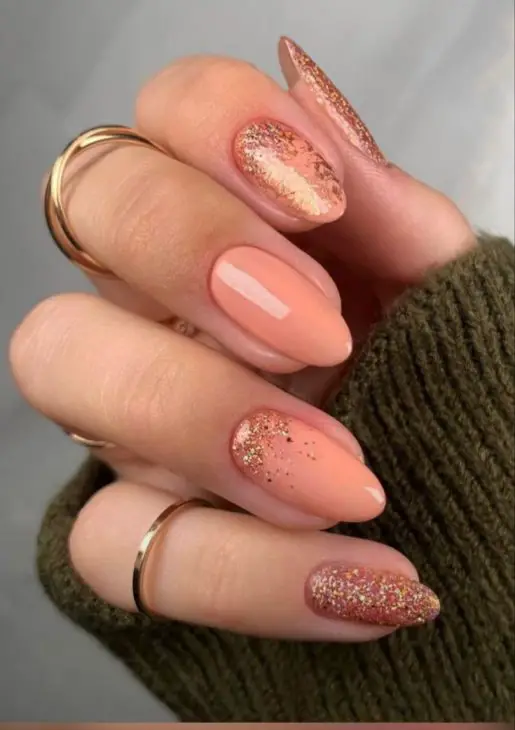
Fall Nails Glitter Tips
This design showcases a nude base with glitter tips, perfect for a subtle yet festive look. The glitter at the tips creates a sophisticated sparkle, ideal for fall nails glitter tips.
Consumables:
- Nude nail polish (e.g., OPI Bubble Bath)
- Silver glitter polish (e.g., China Glaze Silver Lining)
- Base coat (e.g., Seche Clear Base Coat)
- Top coat (e.g., Sally Hansen Miracle Gel Top Coat)
- Nail tape
DIY Instructions:
- Base Coat: Apply a base coat.
- Base Color: Apply two coats of nude polish.
- Glitter Tips: Use nail tape to mark the tips and apply silver glitter polish.
- Top Coat: Finish with a top coat.
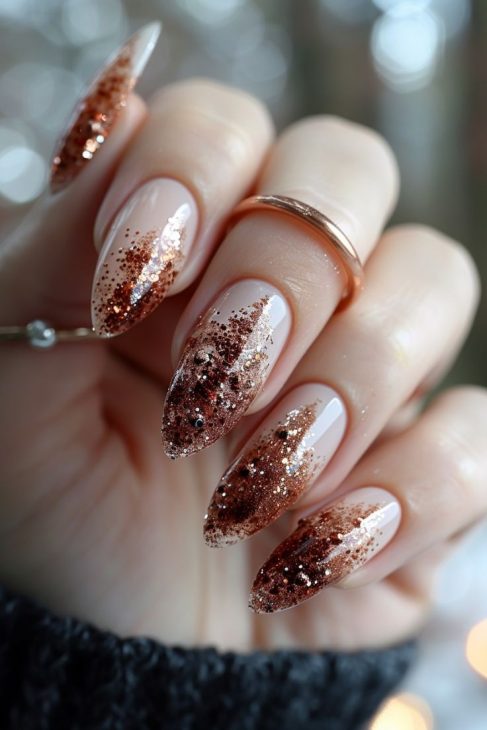
Fall Nails Glitter Pumpkin
This design features a warm orange base with pumpkin-inspired glitter accents. The glitter adds a festive touch to the seasonal color, making it perfect for fall nails glitter pumpkin.
Consumables:
- Orange nail polish (e.g., Essie Playing Koi)
- Gold and orange glitter polish (e.g., KBShimmer Rust No One)
- Base coat (e.g., Orly Bonder Base Coat)
- Top coat (e.g., Gelish Top It Off)
- Nail brush
DIY Instructions:
- Base Coat: Apply a base coat.
- Base Color: Apply two coats of orange polish.
- Glitter Accents: Use a nail brush to apply gold and orange glitter to the accent nails.
- Top Coat: Seal the design with a top coat.
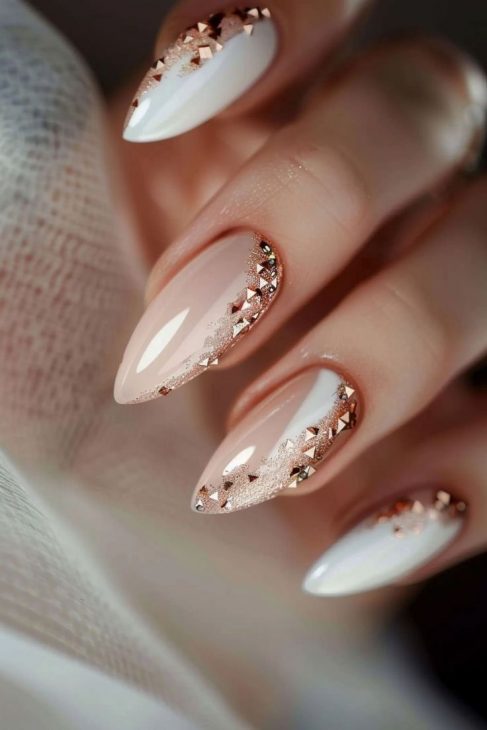
Elegant White and Gold Glitter Nails
These nails feature a beautiful combination of white and nude shades with intricate gold glitter accents. The glitter is meticulously placed along the tips and sides, creating a luxurious and festive look.
Consumables:
- White nail polish (e.g., Essie Blanc)
- Nude nail polish (e.g., OPI Bubble Bath)
- Gold glitter polish (e.g., China Glaze Blonde Bombshell)
- Base coat (e.g., Orly Bonder Base Coat)
- Top coat (e.g., Seche Vite Top Coat)
- Nail art brush
DIY Instructions:
- Preparation: Begin with clean, shaped nails. Apply a base coat.
- Base Color: Apply two coats of white polish on some nails and nude polish on others.
- Glitter Accents: Using a nail art brush, apply gold glitter polish to the tips and sides of the nails.
- Top Coat: Finish with a top coat to seal the design and add shine.
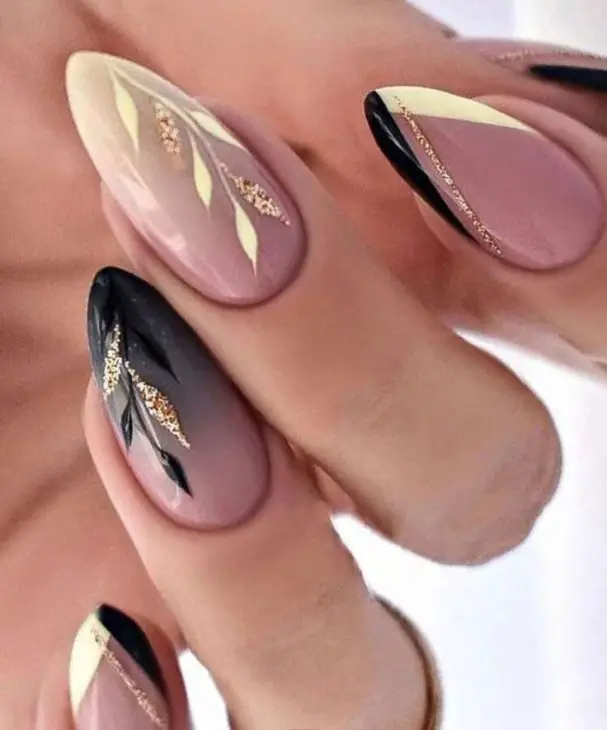
Autumn Leaves and Glitter Design
This design is inspired by autumn leaves, featuring a mix of beige, black, and pink with delicate glitter accents. The leaf patterns are enhanced by the glitter, making it a perfect choice for a trendy fall look.
Consumables:
- Beige nail polish (e.g., Zoya Avery)
- Pink nail polish (e.g., Essie Mademoiselle)
- Black nail polish (e.g., OPI Black Onyx)
- Gold glitter polish (e.g., Sally Hansen Big Glitter Top Coat)
- Base coat (e.g., CND Stickey Base Coat)
- Top coat (e.g., Essie Gel Setter)
- Nail art brush
DIY Instructions:
- Base Coat: Apply a base coat to protect your nails.
- Base Color: Apply beige, pink, and black polishes on different nails.
- Leaf Patterns: Use a nail art brush to draw leaf patterns and apply gold glitter accents.
- Top Coat: Seal the design with a top coat.
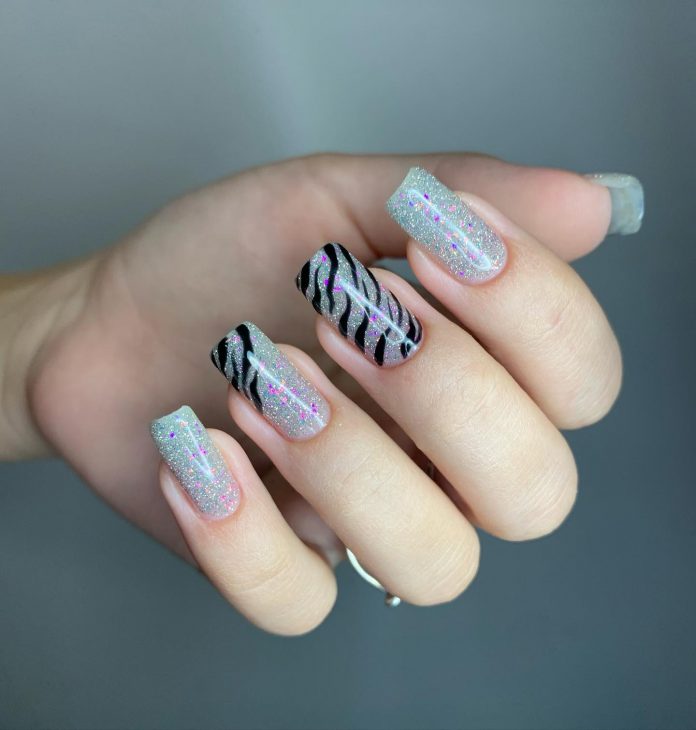
Silver Glitter and Zebra Stripes
For a bold and trendy look, these nails feature a silver glitter base with black zebra stripes. The glitter adds a sparkling effect, while the zebra stripes create a striking contrast.
Consumables:
- Silver glitter polish (e.g., KBShimmer Alloy Matey)
- Black nail polish (e.g., Essie Licorice)
- Base coat (e.g., Orly Bonder Base Coat)
- Top coat (e.g., Seche Vite Top Coat)
- Nail art brush or striping tape
DIY Instructions:
- Preparation: Start with clean, shaped nails. Apply a base coat.
- Base Color: Apply two coats of silver glitter polish.
- Zebra Stripes: Use a nail art brush or striping tape to create black zebra stripes.
- Top Coat: Finish with a top coat to seal and protect the design.
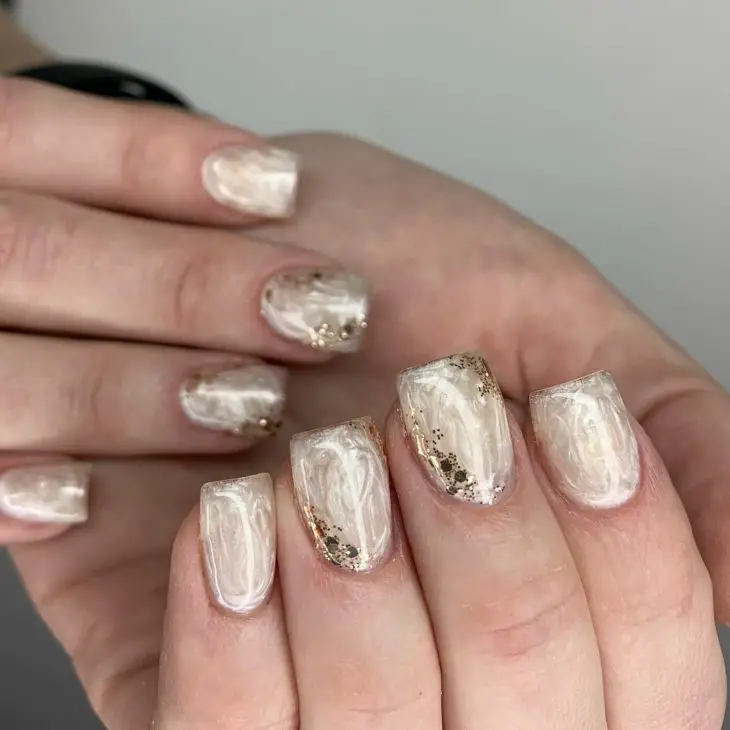
Marble and Gold Glitter Nails
These nails showcase a beautiful marble effect with gold glitter accents. The combination of soft white marble and glitter makes for an elegant and chic design.
Consumables:
- White nail polish (e.g., Essie Blanc)
- Gold glitter polish (e.g., China Glaze Gold Digger)
- Base coat (e.g., CND Stickey Base Coat)
- Top coat (e.g., Essie Gel Setter)
- Nail art brush
DIY Instructions:
- Base Coat: Apply a base coat.
- Marble Effect: Apply white polish and use a brush dipped in acetone to create a marble effect.
- Glitter Accents: Apply gold glitter polish on one or two accent nails.
- Top Coat: Seal with a top coat.
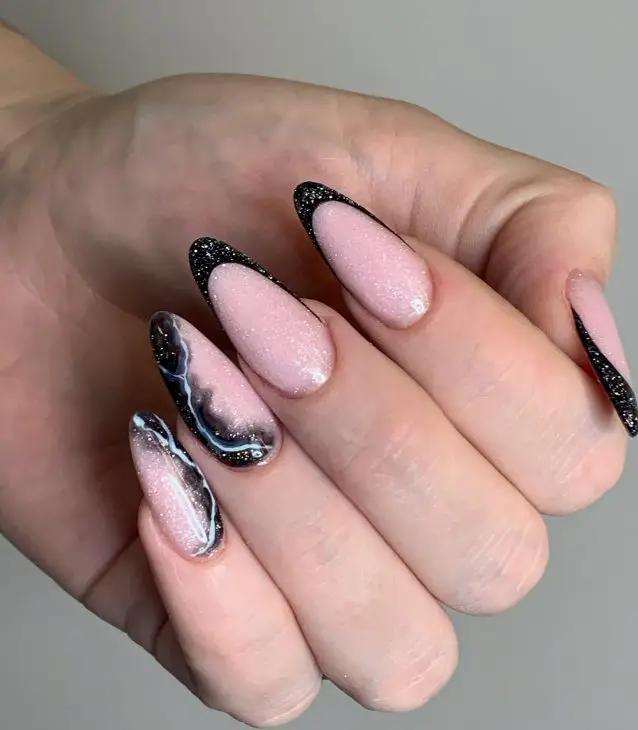
Pink and Black Glitter French Tips
This design features pink nails with black glitter French tips and an accent marble design. The glitter adds a touch of sparkle, while the black tips provide a bold contrast.
Consumables:
- Pink nail polish (e.g., OPI Bubble Bath)
- Black glitter polish (e.g., Sally Hansen Blacky O)
- Base coat (e.g., Orly Bonder Base Coat)
- Top coat (e.g., Seche Vite Top Coat)
- Nail art brush
DIY Instructions:
- Preparation: Begin with clean, shaped nails. Apply a base coat.
- Base Color: Apply two coats of pink polish.
- French Tips: Use a nail art brush to apply black glitter polish to the tips.
- Top Coat: Finish with a top coat to seal and add shine.
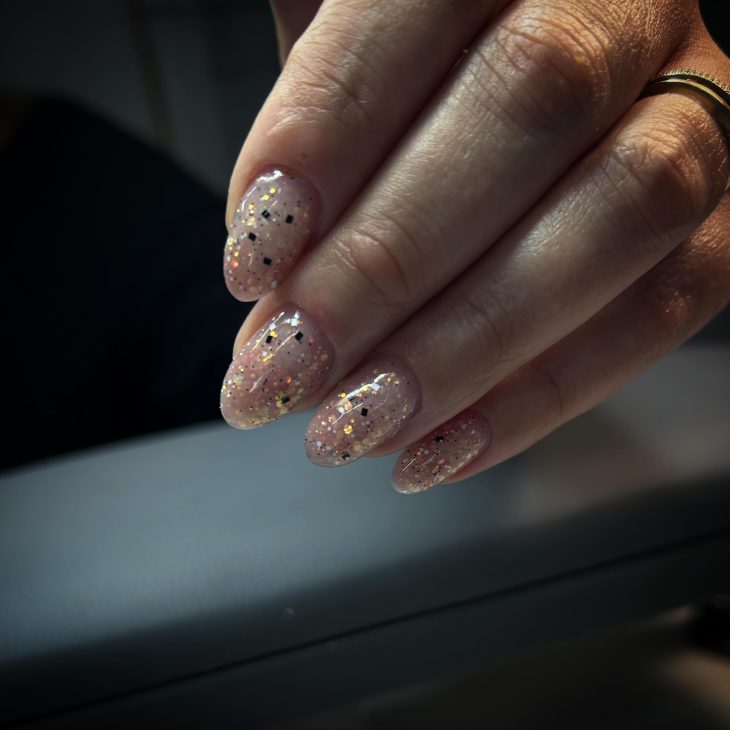
Glittery Neutral Elegance
Fall nails glitter is a must-have trend this season. The delicate balance of neutral tones with a splash of glitter creates a look that’s both sophisticated and festive. The almond shape of these nails enhances the elegant appeal, while the glitter adds a playful touch without being overwhelming.
Materials Needed:
- Base coat: OPI Nail Envy
- Nude polish: Essie ‘Ballet Slippers’
- Glitter polish: China Glaze ‘Fairy Dust’
- Top coat: Seche Vite Dry Fast
DIY Steps:
- Apply a base coat to protect your nails.
- Use two coats of the nude polish for an even base.
- Add a layer of glitter polish for sparkle.
- Finish with a top coat to seal and shine.
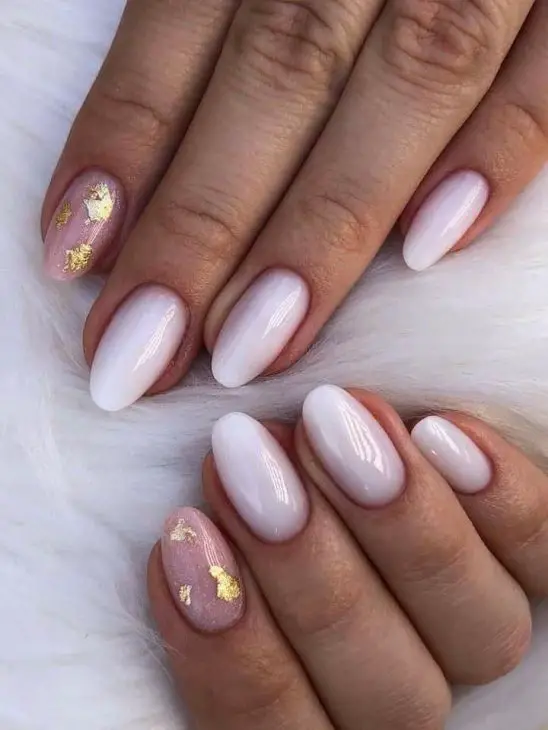
Subtle Glitter with Gold Flakes
This design features a soft pink base with gold flakes, perfect for a subtle fall nails glitter accent. The combination of the matte finish with glitter creates a unique texture that is both trendy and eye-catching.
Materials Needed:
- Base coat: Sally Hansen Hard as Nails
- Pink polish: Zoya ‘Dot’
- Gold flakes: Ciate London Gold Leaf Top Coat
- Matte top coat: Essie Matte About You
DIY Steps:
- Apply a base coat to your nails.
- Paint your nails with two coats of pink polish.
- Apply gold flakes while the polish is still wet.
- Seal with a matte top coat for a chic finish.
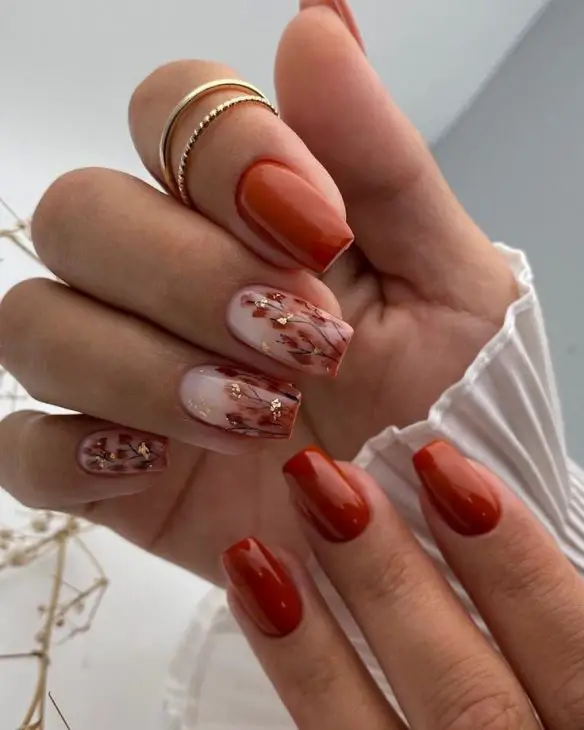
Autumn Leaves Glitter Nails
Fall nails glitter can also take inspiration from the autumn foliage. This design incorporates rich brown and orange hues with glitter tips, resembling falling leaves. The square shape adds a modern twist to this classic fall look.
Materials Needed:
- Base coat: Orly Bonder
- Brown polish: OPI ‘Chocolate Moose’
- Orange polish: Essie ‘Playing Koi’
- Glitter polish: Deborah Lippmann ‘Twinkle Twinkle’
- Top coat: CND Vinylux
DIY Steps:
- Start with a base coat to protect your nails.
- Apply the brown polish on half of your nails and the orange on the other half.
- Add glitter polish to the tips for a gradient effect.
- Finish with a top coat to ensure longevity.
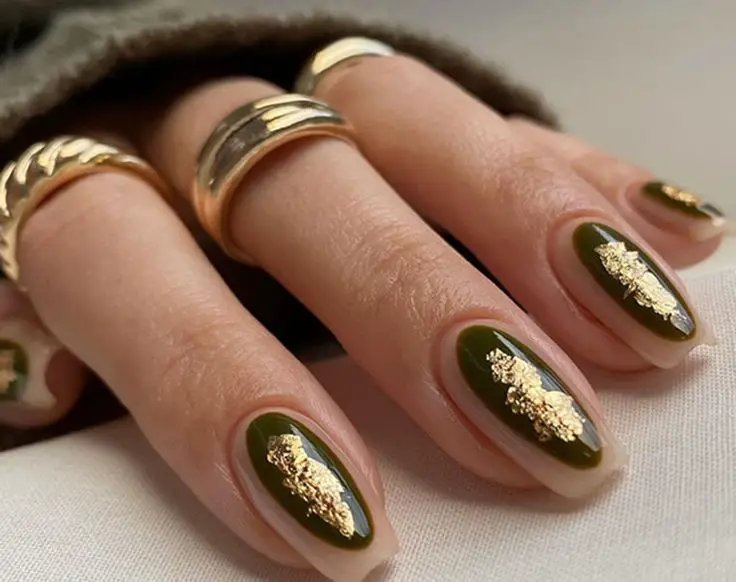
Olive Green and Gold Glitter Nails
For a more dramatic fall nails glitter look, try combining deep olive green with gold glitter accents. This design is perfect for those who love a bold and trendy nail look.
Materials Needed:
- Base coat: Butter London Horse Power
- Green polish: Essie ‘Sew Psyched’
- Gold glitter polish: OPI ‘Glitzerland’
- Top coat: INM Out The Door
DIY Steps:
- Apply a base coat to your nails.
- Paint your nails with two coats of green polish.
- Use the gold glitter polish to create accents on each nail.
- Seal with a top coat for a polished look.
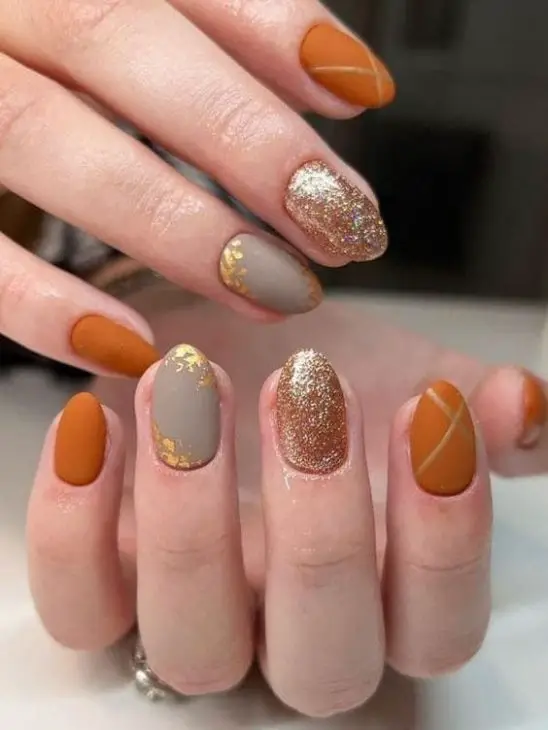
Matte and Glitter Mix
Mixing matte and glitter finishes can create a unique and trendy fall nails glitter design. This look combines matte brown and orange polishes with glitter accents for a fun and stylish manicure.
Materials Needed:
- Base coat: Zoya Anchor
- Matte brown polish: Essie ‘Clothing Optional’
- Matte orange polish: China Glaze ‘Desert Sun’
- Glitter polish: Zoya ‘Pixie Dust’
- Matte top coat: OPI Matte Top Coat
DIY Steps:
- Apply a base coat to your nails.
- Paint your nails with alternating matte brown and orange polishes.
- Add glitter polish accents to each nail.
- Finish with a matte top coat to blend the look.
Save Pin
