Fall Wedding Nails 2024: Unique Styles for a Memorable Day
When it comes to planning the perfect fall wedding, every detail matters, including your nails. Whether you’re the bride, bridesmaid, or a guest, having the right nail design can complete your look and make you feel special. Fall brings a beautiful palette of warm, rich colors that can inspire stunning nail art. Let’s explore some breathtaking fall wedding nail ideas that are perfect for every role and style.
Classic Elegance for the Bride
The first design features a timeless and elegant look, perfect for brides who prefer a classic style. The nails are adorned with a soft nude base, accented with delicate white lace patterns that exude sophistication and grace. The subtle shimmer adds a touch of glam without overpowering the simplicity.
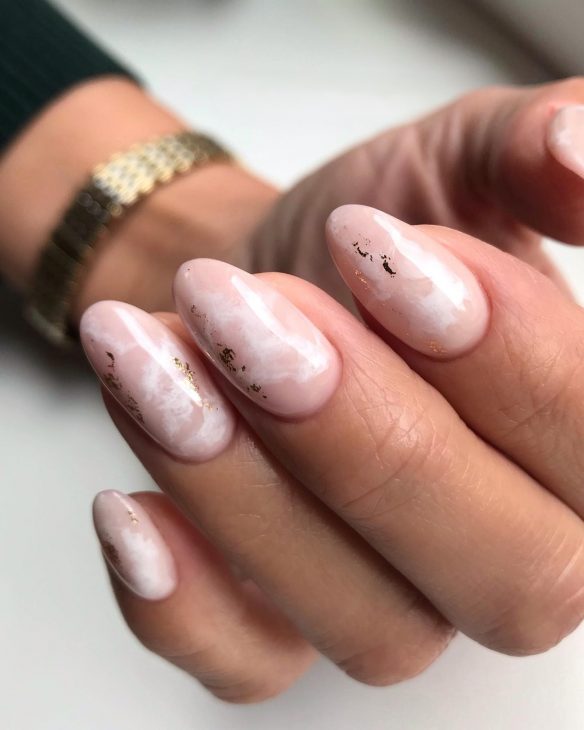
Consumables:
- Nude base polish: OPI “Samoan Sand”
- White nail art pen: Sally Hansen Nail Art Pen in “White”
- Shimmer top coat: Essie “Pure Pearlfection”
- Nail art brush
DIY Instructions:
- Start with clean, filed nails. Apply a base coat to protect your natural nails.
- Apply two coats of the nude base polish, allowing each coat to dry thoroughly.
- Use the white nail art pen to draw delicate lace patterns on each nail. For a steadier hand, practice the design on paper first.
- Finish with a shimmer top coat to add a subtle sparkle and seal in your design.
Rich Burgundy for the Bride
For brides who want to make a bold statement, these burgundy nails are a showstopper. The deep, rich color symbolizes the beauty of the fall season and adds a luxurious touch to any bridal look. Accents of gold foil elevate the design, making it perfect for the bride who wants something unique.
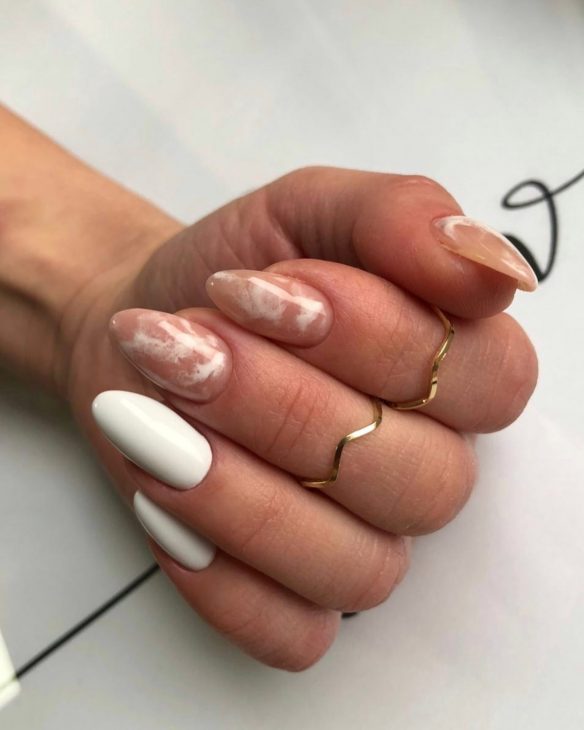
Consumables:
- Burgundy polish: OPI “Malaga Wine”
- Gold foil flakes: INM Gold Foil
- Top coat: Seche Vite Fast Dry Top Coat
- Tweezers for applying foil
DIY Instructions:
- Begin with a base coat to protect your nails.
- Apply two coats of burgundy polish, ensuring an even and smooth finish.
- Once the polish is dry, use tweezers to place gold foil flakes onto the nails. Arrange them as desired for a unique look.
- Seal the design with a generous layer of top coat to ensure the foil stays in place.
Subtle Rust for Bridesmaids
This design showcases a subtle rust shade, perfect for bridesmaids looking to complement a fall wedding theme. The rust color is both trendy and versatile, providing a warm, inviting look. A matte finish gives the nails a modern, sophisticated edge.
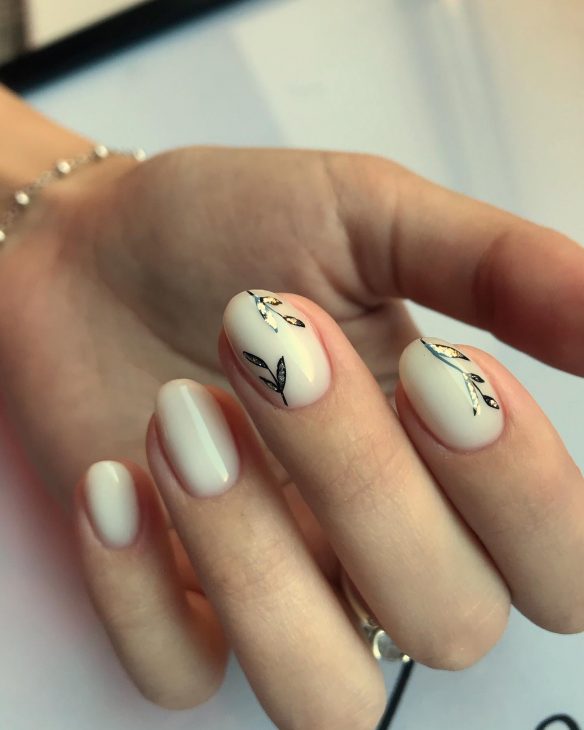
Consumables:
- Rust polish: Essie “Playing Koi”
- Matte top coat: OPI Matte Top Coat
- Nail file and buffer
DIY Instructions:
- Prepare your nails with a base coat to prevent staining.
- Apply two coats of rust polish, allowing each coat to dry completely.
- Finish with a matte top coat to achieve the modern matte effect.
- For extra longevity, avoid using hand lotions or oils that can add shine.
Chic Short Nails for Guests
Guests can also get in on the fall wedding fun with chic, short nails. This design features a neutral base with delicate gold accents, perfect for adding a touch of elegance without stealing the spotlight. It’s ideal for those who prefer shorter nails but still want a stylish look.
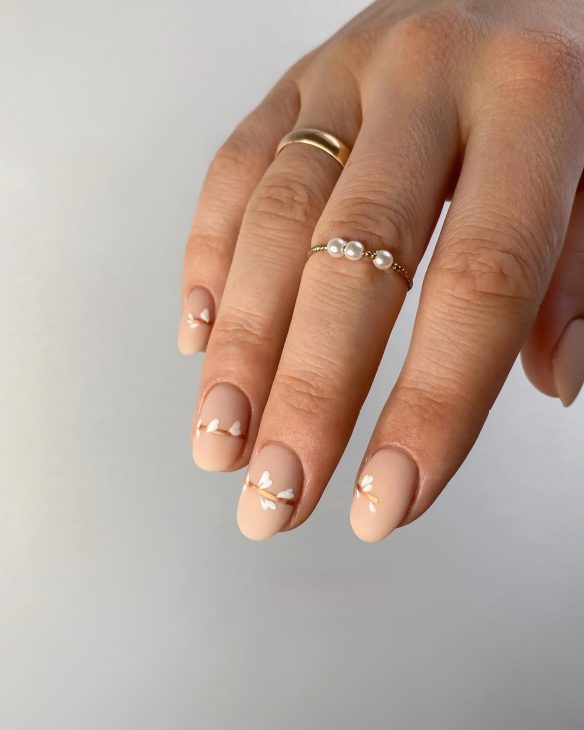
Consumables:
- Neutral polish: Essie “Ballet Slippers”
- Gold nail art stickers: Kiss Nail Art Stickers in “Gold”
- Top coat: Sally Hansen Miracle Gel Top Coat
DIY Instructions:
- Start with a base coat to protect your nails.
- Apply two coats of the neutral polish, allowing each layer to dry.
- Apply the gold nail art stickers to each nail, positioning them carefully for a consistent look.
- Seal the stickers with a top coat to ensure they stay in place.
Delicate Fall Leaves for Bridesmaids
This design captures the essence of fall with delicate leaf patterns. The soft beige base is perfect for any bridesmaid looking for a subtle yet stylish design. The leaves are hand-painted, adding a personal touch to the nails.
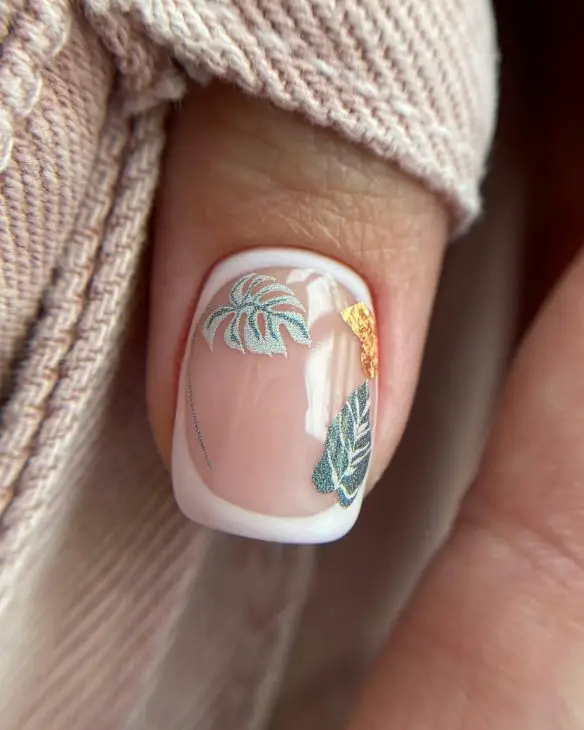
Consumables:
- Beige polish: OPI “Be There in a Prosecco”
- Nail art brush and detailer
- Green and orange acrylic paints
- Top coat: Essie Gel Couture Top Coat
DIY Instructions:
- Apply a base coat, followed by two coats of beige polish.
- Using a fine nail art brush, paint delicate leaves on each nail with green and orange acrylic paints.
- Allow the design to dry completely before applying a top coat to protect the artwork.
Soft Floral Accents
This design features a soft pink base with delicate floral accents, perfect for bridesmaids or guests who prefer a subtle yet elegant look. The tiny flowers in shades of white and pink are accented with small gold beads, adding a touch of sparkle.
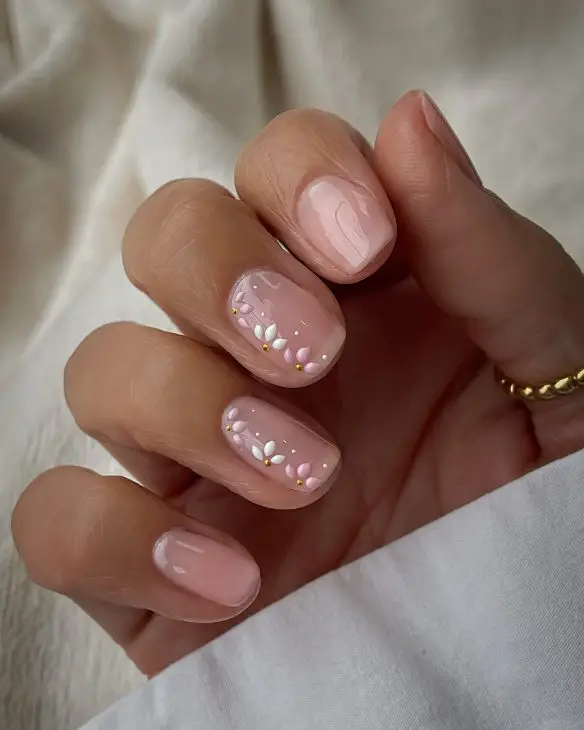
Consumables:
- Soft pink polish: Essie “Fiji”
- White and pink nail art pens: Sally Hansen Nail Art Pens
- Gold beads: Kiss Nail Art Beads in “Gold”
- Top coat: Seche Vite Fast Dry Top Coat
DIY Instructions:
- Apply a base coat to your nails.
- Paint your nails with two coats of the soft pink polish, ensuring each layer dries completely.
- Use the nail art pens to create small flowers on each nail, placing the gold beads in the center of each flower.
- Seal the design with a top coat for a smooth, glossy finish.
Burgundy Glamour
For a more glamorous look, these burgundy nails are adorned with glitter and gold chains, making them perfect for the bride or a bold bridesmaid. The combination of matte and glossy finishes adds depth to the design.
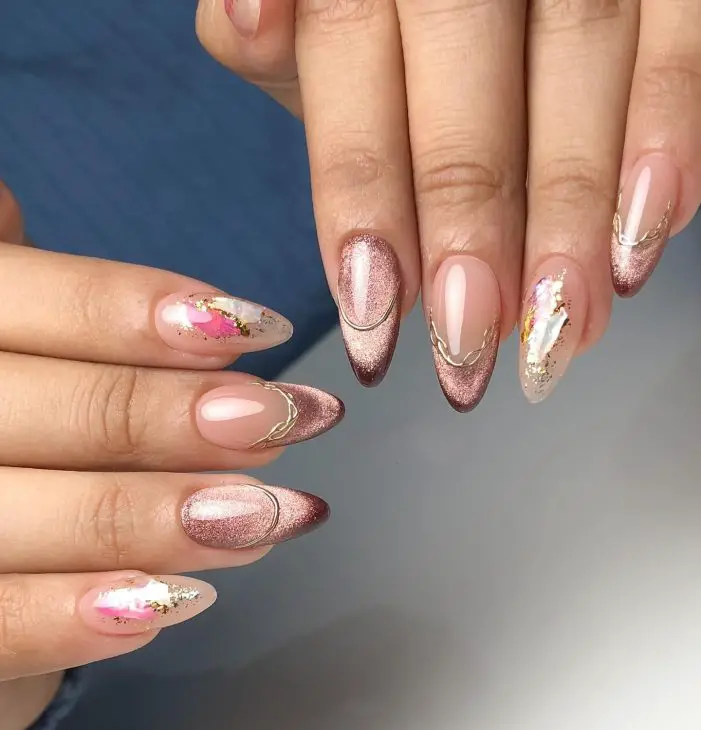
Consumables:
- Burgundy polish: OPI “Lincoln Park After Dark”
- Gold glitter: OPI “Gold Key to the Kingdom”
- Gold chain nail art: Amazon Nail Art Chains
- Matte top coat: Essie Matte About You
DIY Instructions:
- Start with a base coat to protect your nails.
- Apply two coats of burgundy polish. Use the gold glitter on accent nails for added sparkle.
- Carefully place the gold chains on your nails, pressing them into the wet polish.
- Finish with a matte top coat on all nails except the glittered ones to enhance the contrast.
Delicate Lace and Glitter
This design combines a delicate lace pattern with glitter, making it ideal for brides looking for a classic yet modern look. The soft beige and gray tones are perfect for fall, adding a sophisticated touch to the nails.

Consumables:
- Beige polish: OPI “Dulce de Leche”
- Gray polish: Essie “Chinchilly”
- White lace stickers: Born Pretty Store Lace Nail Stickers
- Silver glitter: CND Vinylux “Jingle Juice”
- Top coat: Essie Gel Couture Top Coat
DIY Instructions:
- Apply a base coat, followed by the beige polish on half of the nails and gray on the other half.
- Once dry, apply the white lace stickers to the beige nails and silver glitter to the gray ones.
- Seal the design with a top coat to ensure longevity and shine.
Minimalist Nude with Gold Accents
For those who love a minimalist style, this nude nail design with subtle gold accents is perfect. The combination of nude and gold creates a chic and understated look, suitable for both the bride and guests.
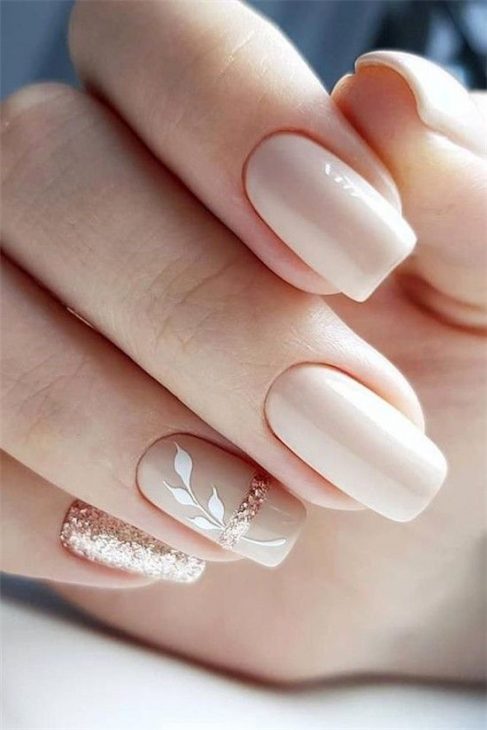
Consumables:
- Nude polish: Zoya “Chantal”
- Gold striping tape: Amazon Gold Nail Art Striping Tape
- Gold glitter polish: OPI “All That Glitters”
- Top coat: Sally Hansen Miracle Gel Top Coat
DIY Instructions:
- Begin with a base coat to protect your natural nails.
- Apply two coats of nude polish, letting each coat dry thoroughly.
- Use the gold striping tape to create a minimalist design, and add a touch of gold glitter polish for a bit of sparkle.
- Finish with a top coat to secure the tape and add a glossy finish.
Playful Polka Dots and Florals
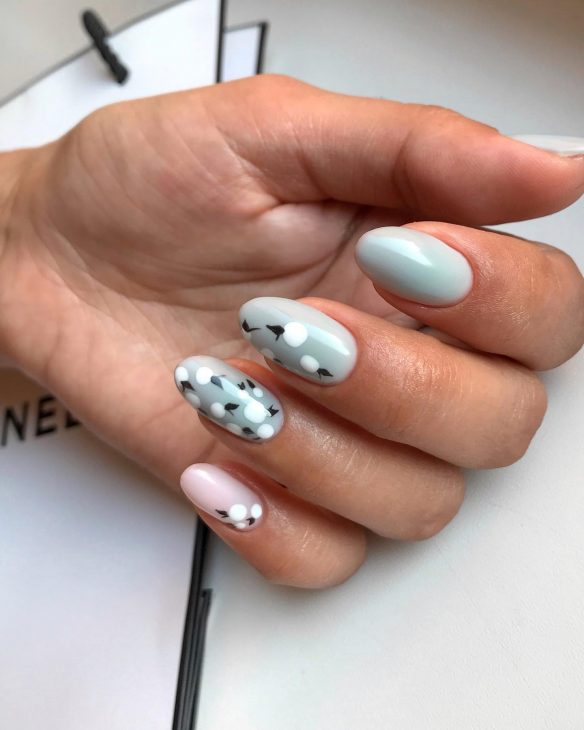
This fun and playful design features a mix of polka dots and floral patterns, perfect for guests who want to add a bit of whimsy to their look. The soft mint and white colors are fresh and lively, making this design stand out.
Consumables:
- Mint polish: OPI “This Cost Me a Mint”
- White polish: Essie “Blanc”
- Black nail art pen: Sally Hansen Nail Art Pen in “Black”
- Dotting tool: Amazon Dotting Tools Set
- Top coat: Seche Vite Fast Dry Top Coat
DIY Instructions:
- Start with a base coat to ensure your polish lasts.
- Paint your nails with the mint polish, leaving one nail on each hand for the white polish.
- Use the dotting tool to create polka dots on the mint nails, and the black nail art pen to draw simple floral patterns on the white nails.
- Seal your design with a top coat to keep everything in place and add a shiny finish.
Whispering White Feathers
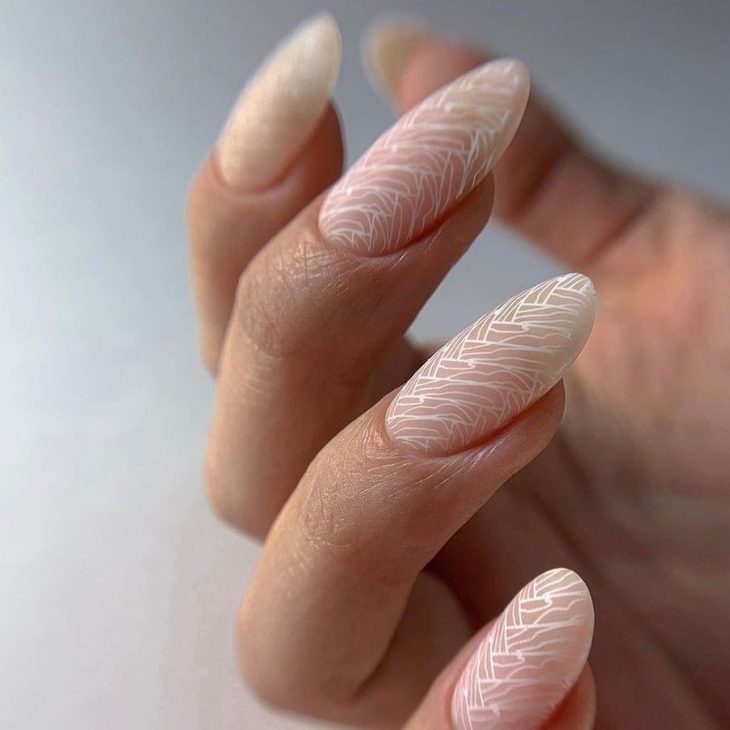
This ethereal design features a soft, matte white base with intricate feather-like patterns, perfect for brides who want a subtle yet sophisticated look. The detailed lines add a delicate texture, reminiscent of feathers gently blowing in the autumn breeze.
Consumables:
- Matte white polish: OPI “Alpine Snow”
- White nail art pen: Sally Hansen Nail Art Pen in “White”
- Matte top coat: Essie Matte About You
- Nail art brush
DIY Instructions:
- Begin with a base coat to protect your nails.
- Apply two coats of matte white polish, ensuring each layer is completely dry.
- Use the white nail art pen to draw delicate feather patterns on each nail. Practice on a piece of paper beforehand to perfect your technique.
- Finish with a matte top coat to seal and protect your design.
Pearl Elegance with Silver Accents
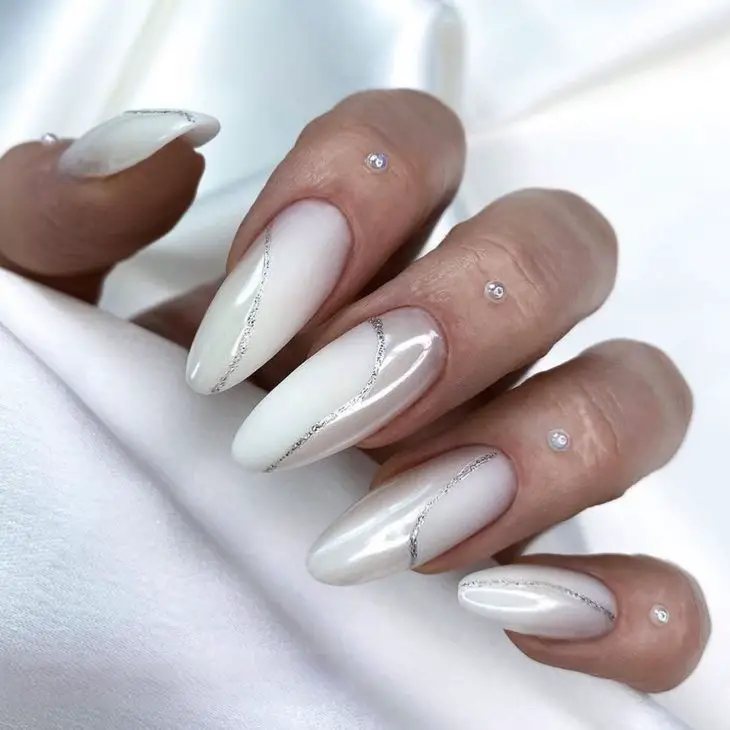
This design is a beautiful blend of pearly whites and subtle silver accents, making it ideal for brides who love a touch of elegance. The nails feature a soft ombre effect with silver foil detailing, creating a luxurious and refined look.
Consumables:
- Pearl white polish: Zoya “Adina”
- Silver foil: Amazon Silver Nail Foil
- Ombre sponge: Beauty Secrets Cosmetic Wedge Sponge
- Top coat: Seche Vite Fast Dry Top Coat
DIY Instructions:
- Apply a base coat to start.
- Use the ombre sponge to apply the pearl white polish, creating a gradient effect.
- Add silver foil accents on the tips or along the sides of the nails for a touch of sparkle.
- Seal the look with a top coat to ensure the foil stays in place.
Soft Pink French Twist
This modern twist on the classic French manicure features a soft pink base with delicate white lines, perfect for bridesmaids or guests. The lines are strategically placed to create a unique and sophisticated look, adding a contemporary touch to a timeless design.

Consumables:
- Soft pink polish: Essie “Ballet Slippers”
- White nail art pen: Sally Hansen Nail Art Pen in “White”
- Top coat: Sally Hansen Miracle Gel Top Coat
- Fine nail art brush
DIY Instructions:
- Apply a base coat to protect your nails.
- Paint your nails with two coats of soft pink polish.
- Use the white nail art pen and a fine brush to draw delicate lines along the edges and tips of the nails.
- Finish with a top coat to seal and protect the design.
Marble and Gold Chains
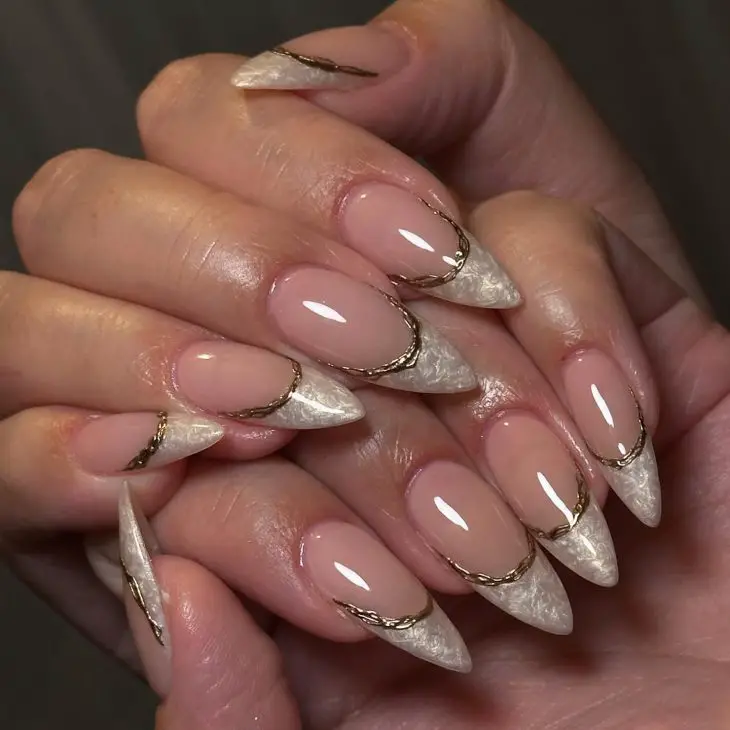
This luxurious design combines marble textures with gold chains, perfect for bridesmaids who want to make a bold statement. The nails feature a blend of nude and white marble, accented with delicate gold chains, adding a touch of opulence.
Consumables:
- Nude base polish: OPI “Samoan Sand”
- White marble polish: Essie “Marble-ous”
- Gold chain nail art: Born Pretty Store Gold Nail Chains
- Top coat: Seche Vite Fast Dry Top Coat
- Tweezers for applying chains
DIY Instructions:
- Start with a base coat to protect your nails.
- Apply the nude polish, followed by the white marble polish, creating a marbled effect.
- While the polish is still tacky, use tweezers to place the gold chains along the edges of the nails.
- Seal the design with a top coat to secure the chains and add a glossy finish.
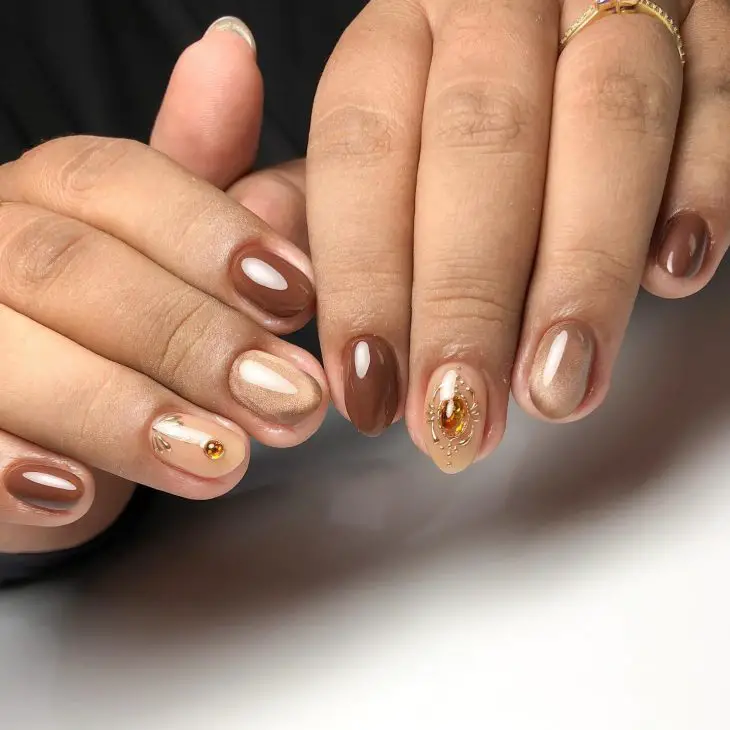
Rich Brown Elegance
This design showcases a rich brown palette, perfect for fall weddings. The nails are adorned with subtle gold accents and a glossy finish, making them ideal for both bridesmaids and guests. The warm tones complement the autumn season beautifully.
Consumables:
- Rich brown polish: OPI “Espresso Your Style”
- Gold nail art pen: Sally Hansen Nail Art Pen in “Gold”
- Top coat: Essie Gel Couture Top Coat
- Nail art brush
DIY Instructions:
- Begin with a base coat to prevent staining.
- Apply two coats of rich brown polish, allowing each coat to dry thoroughly.
- Use the gold nail art pen to add subtle accents, such as lines or dots, for a touch of elegance.
- Finish with a top coat to protect your design and add a glossy shine.
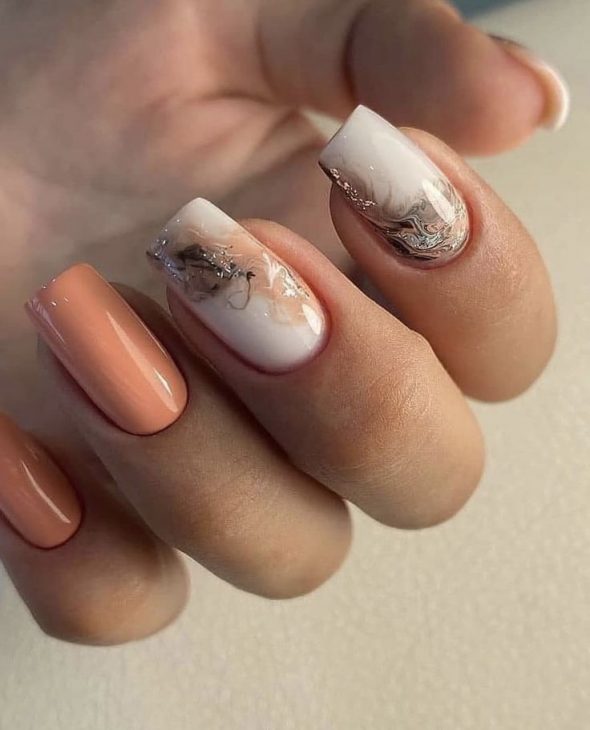
Peach and Marble Elegance
This design combines a soft peach base with a sophisticated marble accent, perfect for bridesmaids or guests looking for a refined yet trendy style. The mix of peach and marble creates a harmonious balance that is both subtle and striking.
Consumables:
- Peach polish: Essie “Peach Side Babe”
- White marble polish: OPI “Marble-ous”
- Nail art brush and dotting tool
- Top coat: Sally Hansen Miracle Gel Top Coat
DIY Instructions:
- Begin with a base coat to protect your nails.
- Apply two coats of peach polish to all nails except for the accent nail.
- For the marble accent, use the white marble polish and a nail art brush to create delicate marble patterns. Use a dotting tool to add subtle veins in contrasting colors.
- Seal the design with a top coat to ensure durability and shine.
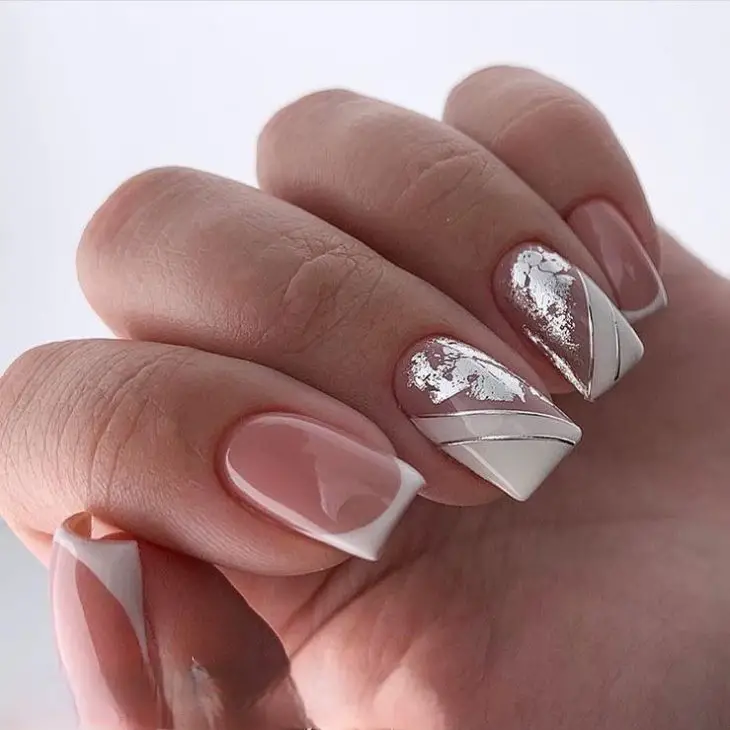
Modern French with Metallic Accents
This modern twist on the classic French manicure features nude and white tones, accented with metallic silver foil. This design is perfect for brides who want a chic and contemporary look, with a touch of elegance.
Consumables:
- Nude polish: OPI “Dulce de Leche”
- White polish: Essie “Blanc”
- Silver foil: Amazon Silver Nail Foil
- Top coat: Seche Vite Fast Dry Top Coat
DIY Instructions:
- Start with a base coat to protect your nails.
- Apply the nude polish to the entire nail, allowing it to dry thoroughly.
- Create a French tip with the white polish, then add the silver foil accents to the tip or along the base.
- Finish with a top coat to protect the design and add a glossy finish.
Textured Glitter Waves
This unique design features textured glitter waves on a soft lavender base, making it ideal for bridesmaids who want a touch of sparkle. The textured effect adds depth and dimension, creating a mesmerizing look.

Consumables:
- Lavender polish: Essie “Lilacism”
- Glitter polish: China Glaze “Fairy Dust”
- Nail art brush
- Top coat: Sally Hansen Miracle Gel Top Coat
DIY Instructions:
- Apply a base coat to protect your nails.
- Paint your nails with two coats of lavender polish.
- Use a nail art brush to apply glitter polish in wave patterns across each nail.
- Seal with a top coat to ensure the glitter stays in place and to give a smooth finish.
Matte Nude with Delicate Jewels
This sophisticated design features a matte nude base adorned with delicate jewel accents. It’s perfect for brides looking for an understated yet luxurious look. The matte finish gives a modern twist to the classic nude manicure.

Consumables:
- Nude polish: Zoya “Taylor”
- Matte top coat: OPI Matte Top Coat
- Jewel accents: Swarovski Crystals
- Nail glue and tweezers
DIY Instructions:
- Start with a base coat to protect your nails.
- Apply two coats of nude polish, allowing each coat to dry completely.
- Apply the matte top coat for a smooth, matte finish.
- Use nail glue to attach the jewel accents delicately, positioning them as desired.
- Secure the jewels with an additional layer of matte top coat, focusing on the surrounding areas.
Classic Beige Simplicity
This classic beige nail design is perfect for brides, bridesmaids, or guests who prefer a simple and elegant look. The glossy finish adds a touch of sophistication, making it suitable for any wedding setting.

Consumables:
- Beige polish: OPI “Samoan Sand”
- Top coat: Seche Vite Fast Dry Top Coat
- Nail file and buffer
DIY Instructions:
- Begin with a base coat to protect your nails.
- Apply two coats of beige polish, ensuring an even and smooth application.
- Finish with a top coat to give your nails a glossy, polished look.
- Use a nail file and buffer to shape the nails to your desired length and style.
