Olive Green Fall Nails 2024: A Sophisticated Seasonal Statement
As we step into the cooler months, it’s time to embrace a color that embodies the earthy richness of fall—olive green. This season, olive green nails are making a bold statement, offering a versatile canvas for everything from minimalist designs to intricate art. Whether you’re looking for short square nails or almond acrylics, the olive green trend can be tailored to your personal style. In this article, we’ll dive deep into a variety of olive green fall nail designs, showcasing how this color can be both chic and seasonally appropriate. Keep reading for a breakdown of each look, complete with professional insights, materials, and step-by-step DIY instructions.
Olive Green with White Marble Accents
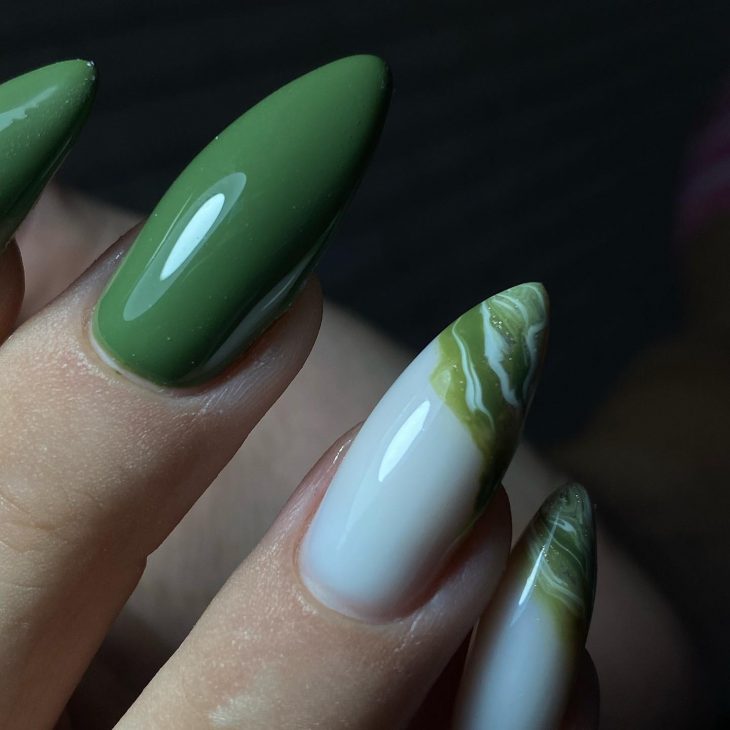
For those who love the idea of bringing nature’s elegance to their fingertips, this olive green and white marble design is a perfect choice. The deep olive green provides a strong contrast to the delicate white marble effect, creating a striking look that’s both sophisticated and earthy. This design is particularly stunning on almond-shaped nails, which elongate the fingers and add a touch of elegance.
Materials:
-
- Olive green gel polish (e.g., OPI’s “Olive For Green”)
- White marble effect polish or nail wraps
- Fine detail brush for creating marble veining
- Top coat with a glossy finish
- UV/LED lamp for curing
- DIY Steps:
- Apply a base coat to protect your natural nails.
- Paint the nails with two coats of olive green gel polish, curing each layer under a UV/LED lamp.
- On the accent nails, use the white polish to create a marble effect, applying the veining with a fine brush.
- Finish with a glossy top coat to seal the design and add shine.
Bold Olive Green with Black Accents
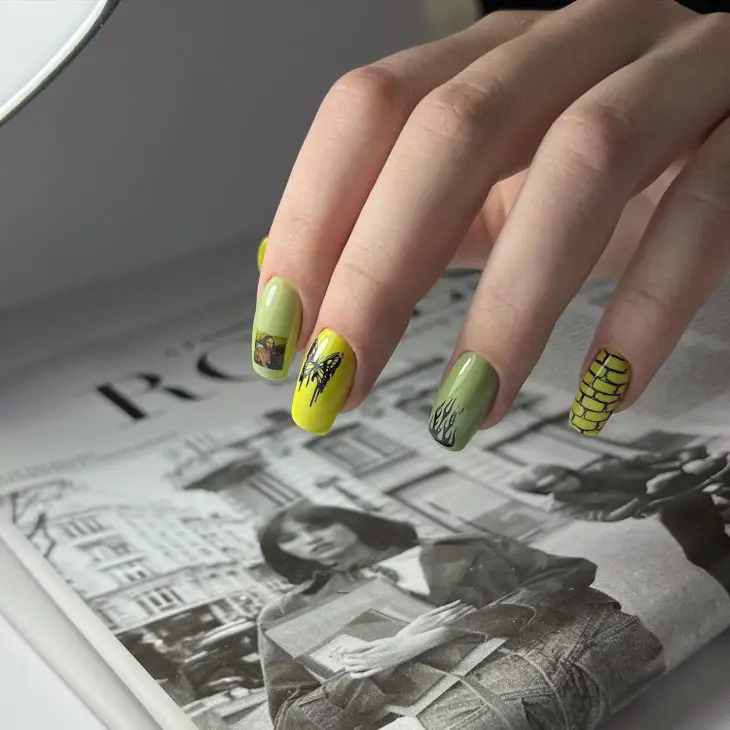
For a more daring look, these olive green fall nails feature bold black accents. This design is ideal for those who enjoy adding a touch of edge to their manicure. The use of black art against the olive green background makes for a bold contrast that is both eye-catching and stylish, perfect for the fall season.
Materials:
-
- Olive green polish (e.g., Essie’s “Fall For NYC”)
- Black nail art pen or polish for detailing
- Matte top coat for a muted finish
- Nail art stickers or stencils for precise designs
- DIY Steps:
- Begin with a base coat to protect your nails.
- Apply two layers of olive green polish, allowing each to dry thoroughly.
- Use the black nail art pen to create your desired patterns or apply nail art stickers.
- Seal your design with a matte top coat for a sleek finish.
Olive Green and Neon Lime French Tips
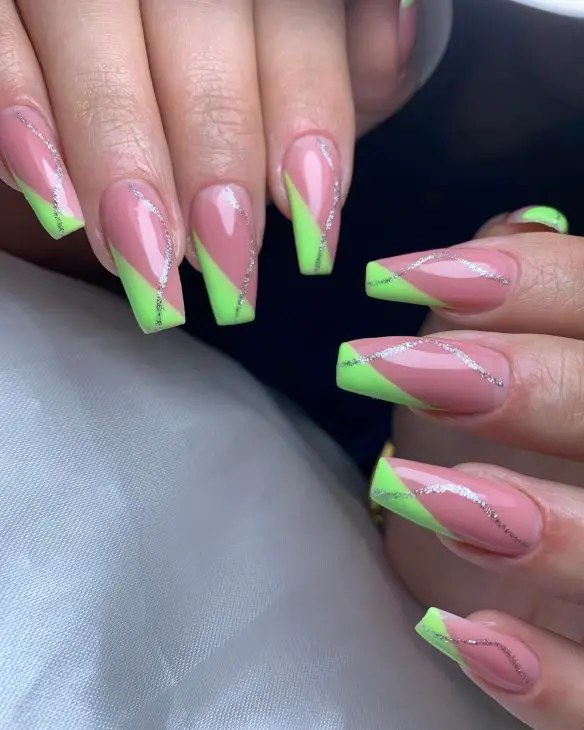
This playful take on the classic French manicure features a combination of olive green and neon lime, making it an exciting option for those who prefer a more vibrant look. The pop of neon against the muted green base offers a contemporary twist on the traditional French tip design.
Materials:
-
- Olive green base polish (e.g., China Glaze “Agro”)
- Neon lime polish for the tips
- Silver glitter for added sparkle
- Fine striping brush
- UV/LED lamp
- DIY Steps:
- Apply a base coat to all nails.
- Paint the entire nail with olive green polish and cure under a UV/LED lamp.
- Using the striping brush, carefully apply the neon lime polish to the tips.
- Add a touch of silver glitter along the smile line for extra glam, then cure.
- Finish with a top coat to ensure your design lasts.
Olive Green and Silver Glitter
For those who love a bit of sparkle, this design combines olive green nails with silver glitter accents. The simplicity of the olive green paired with the glam of the glitter makes this design perfect for any occasion, whether you’re dressing up or keeping it casual.

Materials:
-
- Olive green polish (e.g., Zoya “Gemma”)
- Silver glitter polish or loose glitter
- Clear top coat
- Glitter applicator brush
- DIY Steps:
- Start with a base coat to protect your nails.
- Apply two coats of olive green polish, allowing each coat to dry.
- On the accent nails, apply a layer of clear polish and use the applicator brush to dab on the silver glitter.
- Seal everything with a clear top coat to lock in the glitter and add shine.
Neon Green and Olive Abstract Art
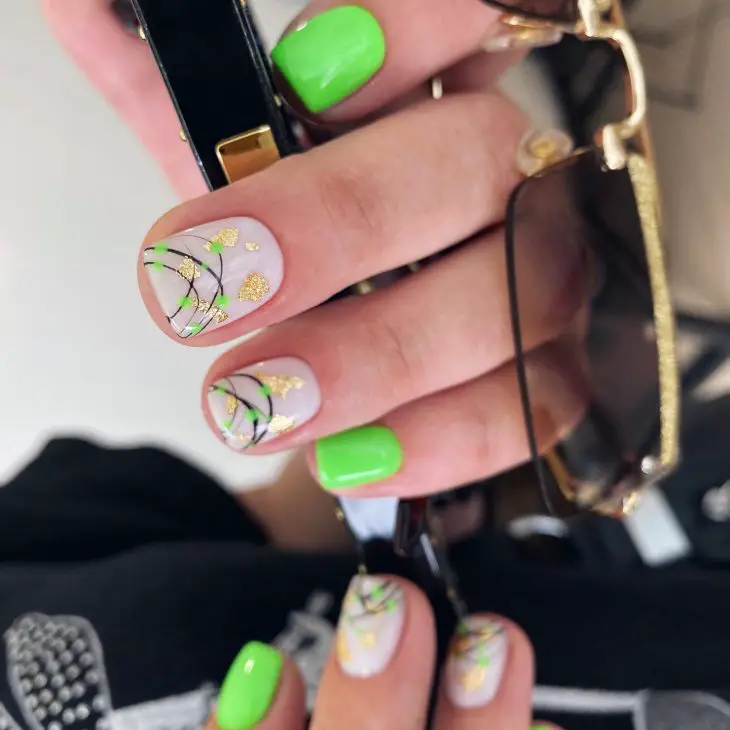
This abstract design combines the richness of olive green with the boldness of neon green, creating a unique and modern look. Ideal for those who love short square nails, this design is versatile enough to work for both everyday wear and special occasions.
Materials:
-
- Olive green polish (e.g., OPI’s “Suzi-The First Lady of Nails”)
- Neon green polish for accent
- Gold foil for added texture
- Fine detail brush
- Clear top coat
- DIY Steps:
- Apply a base coat to all nails.
- Paint each nail with olive green polish and let it dry completely.
- Use the detail brush to add abstract designs with the neon green polish.
- Apply gold foil in small patches to create texture.
- Seal the design with a clear top coat for longevity.
Olive Green with Chevron Accent
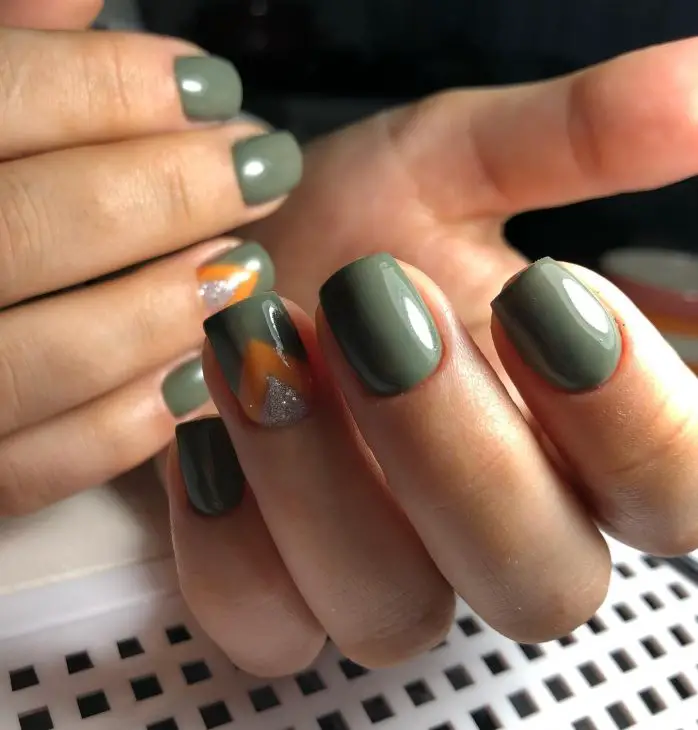
This olive green fall nail design features a bold chevron accent in a contrasting orange and silver glitter. The combination of the deep olive green with the bright orange makes for a striking and modern look, perfect for those who want to add a pop of color to their nails. The short square shape of the nails keeps the design chic and easy to maintain, ideal for anyone who prefers a short and practical length.
Materials:
-
- Olive green polish (e.g., OPI “Suzi – The First Lady of Nails”)
- Orange polish for the chevron accent
- Silver glitter polish or loose glitter
- Chevron nail tape for precision
- Clear top coat for a glossy finish
- DIY Steps:
- Start with a base coat to protect your natural nails.
- Apply two coats of olive green polish, allowing each coat to dry fully.
- Use chevron nail tape to create the desired pattern on the accent nail, then paint over it with the orange polish.
- Add a touch of silver glitter to the tip of the chevron for extra sparkle.
- Remove the tape and finish with a clear top coat to seal the design.
Olive Green and Blush Pink with Floral Art
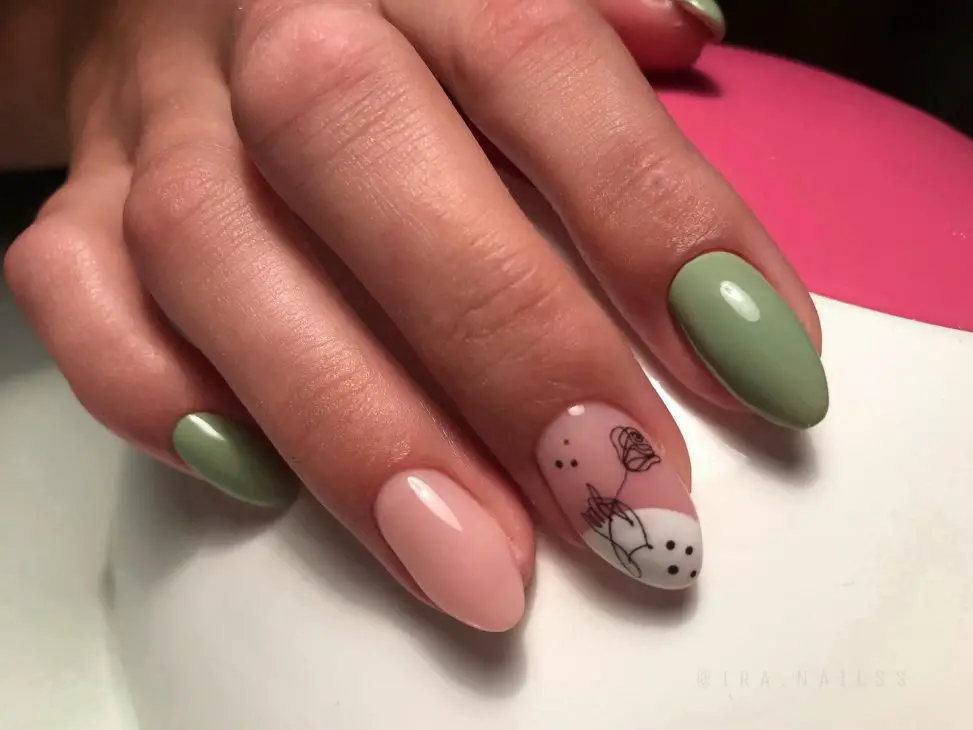
In this elegant design, the combination of olive green and blush pink creates a soft, feminine look, while the delicate black floral art adds a touch of sophistication. The almond shape enhances the overall elegance of the design, making these nails a perfect choice for those who prefer a refined and understated style.
Materials:
-
- Olive green polish (e.g., Essie “Power Clutch”)
- Blush pink polish for the accent nails
- Black nail art pen or polish for the floral design
- Fine detail brush
- Clear top coat
- DIY Steps:
- Begin with a base coat to protect your nails.
- Apply olive green polish to most of the nails, leaving one or two for the blush pink accent.
- Once dry, use a fine detail brush or nail art pen to create a delicate floral design on the accent nails.
- Finish with a clear top coat to seal and protect the design.
Olive Green with Marble Accents
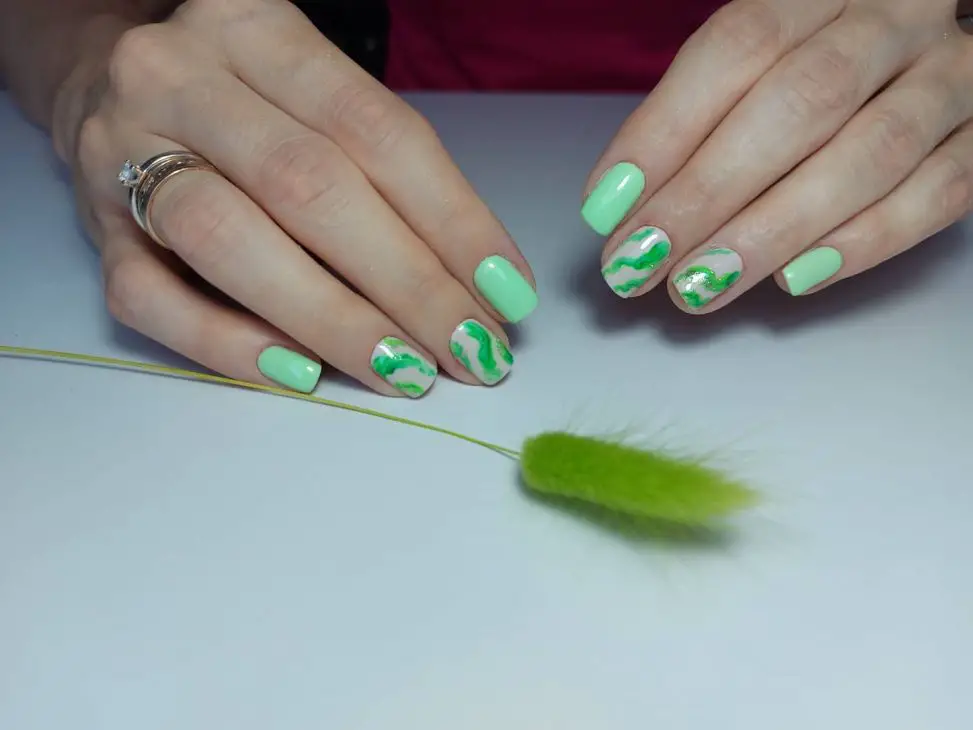
This nail design blends the rich tones of olive green with eye-catching marble accents, creating a chic and modern look. The short square shape is perfect for those who prefer a more understated nail length while still wanting to experiment with artistic designs.
Materials:
-
- Olive green polish (e.g., China Glaze “Westside Warrior”)
- White polish for the marble effect
- Green and gold polish for the veining in the marble
- Fine detail brush for marble art
- Clear top coat
- DIY Steps:
- Apply a base coat to all nails.
- Paint your nails with olive green polish, leaving a few for the marble accent.
- Create a marble effect on the accent nails using white polish, and add veining with green and gold using a fine detail brush.
- Seal the design with a clear top coat to add shine and durability.
Neon and Olive Green with Accent Art
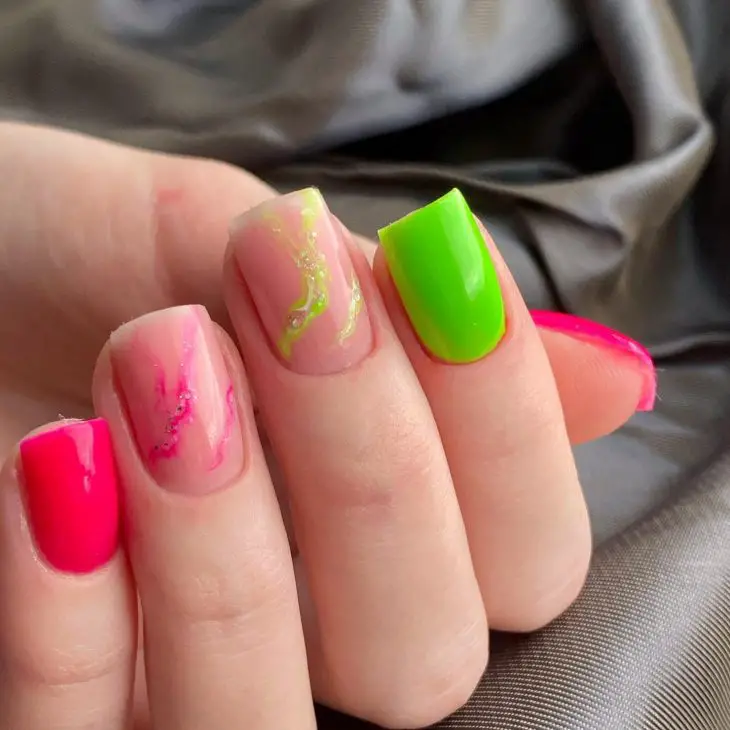
This vibrant design combines the earthy tone of olive green with a bright neon accent, making it a bold and playful choice for fall. The use of neon on one nail with abstract art on the others creates a dynamic contrast that is sure to turn heads. This design is perfect for those who love acrylic short nails with a bit of flair.
Materials:
-
- Olive green polish (e.g., Sally Hansen “Leaf Me Be”)
- Neon green polish for the accent
- Pink and yellow polish for the abstract art
- Fine detail brush for precision
- Clear top coat
- DIY Steps:
- Begin with a base coat to protect your nails.
- Paint most of your nails with olive green polish, leaving one or two for the neon green accent.
- Use a fine detail brush to create abstract designs with pink and yellow polish on the remaining nails.
- Seal your work with a clear top coat for added longevity.
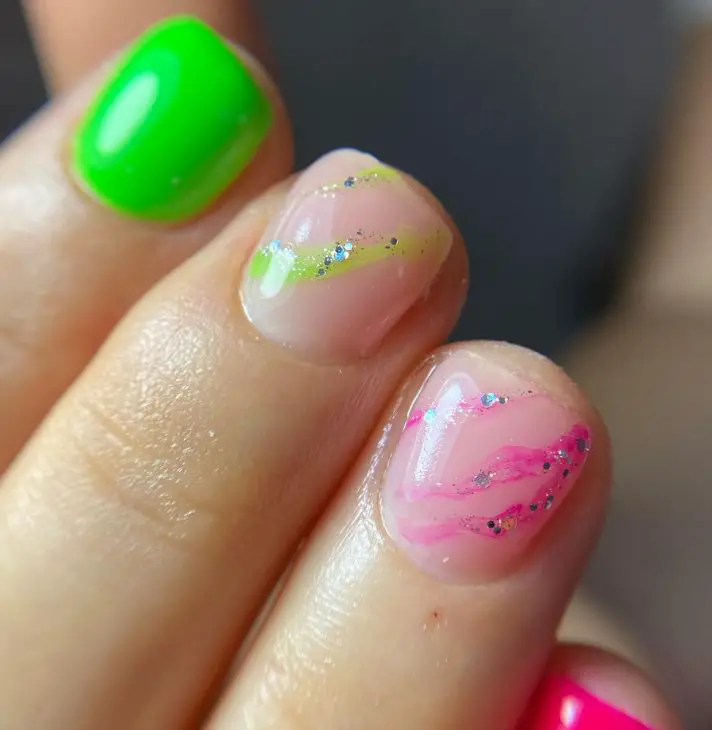
Olive Green with Neon and Glitter Accents
For those who can’t resist a bit of sparkle, this design incorporates neon green and glitter into the olive green base, creating a lively and festive look. The short square nails are practical, yet the design is anything but simple, making it perfect for a standout fall manicure.
Materials:
-
- Olive green polish (e.g., Zoya “Gemma”)
- Neon green polish for accent nails
- Pink polish for additional accents
- Silver glitter for added sparkle
- Clear top coat
- DIY Steps:
- Start with a base coat to protect your nails.
- Apply olive green polish to most nails, using neon green on an accent nail.
- Use pink polish to add abstract lines and dots to the design.
- Add silver glitter to one or two nails for extra sparkle.
- Finish with a clear top coat to seal the design and add shine.
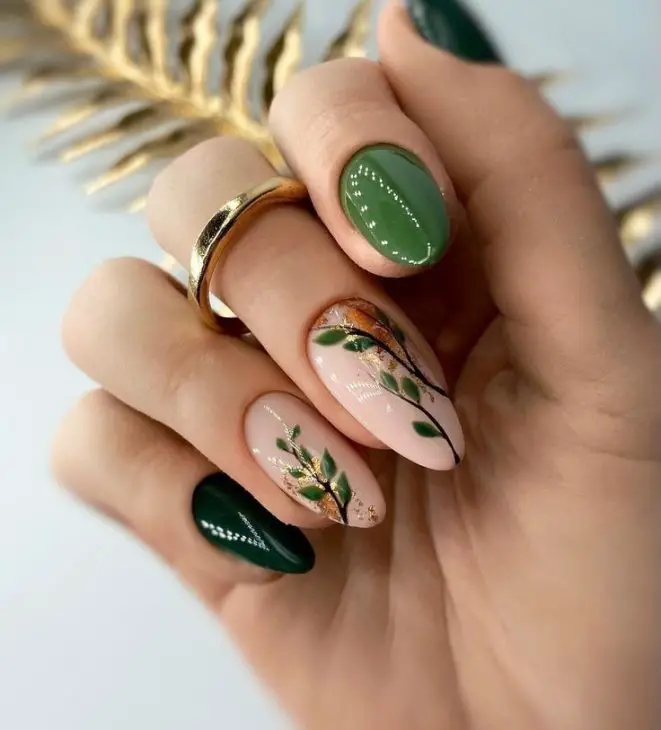
Elegant Olive Green with Floral Accents
This olive green fall nails almond design exudes elegance with its subtle floral accents. The soft olive green base is complemented by delicate flowers in black and gold, creating a sophisticated look that’s perfect for any occasion. The almond shape adds a touch of femininity, making this design ideal for those who prefer a classic yet stylish manicure.
Materials:
-
- Olive green polish (e.g., Essie’s “Sage You Love Me”)
- Nude base polish for accent nails
- Black and gold foil for floral details
- Fine detail brush for precise art
- Clear top coat
- DIY Steps:
- Begin with a base coat to protect your nails.
- Apply olive green polish to the majority of your nails, leaving a couple for the nude accent.
- Use a fine detail brush to draw delicate floral designs on the accent nails, then apply gold foil for added shimmer.
- Finish with a clear top coat to seal in the design and add a glossy finish.
Olive Green with Autumn Leaf Art
This design beautifully combines the rich tones of olive green with intricate leaf art, making it a standout choice for fall. The deep green contrasts with the soft pink base, while the leafy designs in green and gold bring the essence of autumn to your nails. This look is perfect for those who love olive green fall nails with leaves and want a manicure that reflects the beauty of the season.
Materials:
-
- Olive green polish (e.g., OPI “Olive For Green”)
- Blush pink polish for accent nails
- Green and gold polish for leaf detailing
- Fine detail brush
- Clear top coat
- DIY Steps:
- Apply a base coat to all nails.
- Paint the olive green polish on most nails, reserving a couple for the blush pink accent.
- Use the fine detail brush to paint leaves in green and gold on the accent nails.
- Apply a clear top coat to protect the design and add shine.
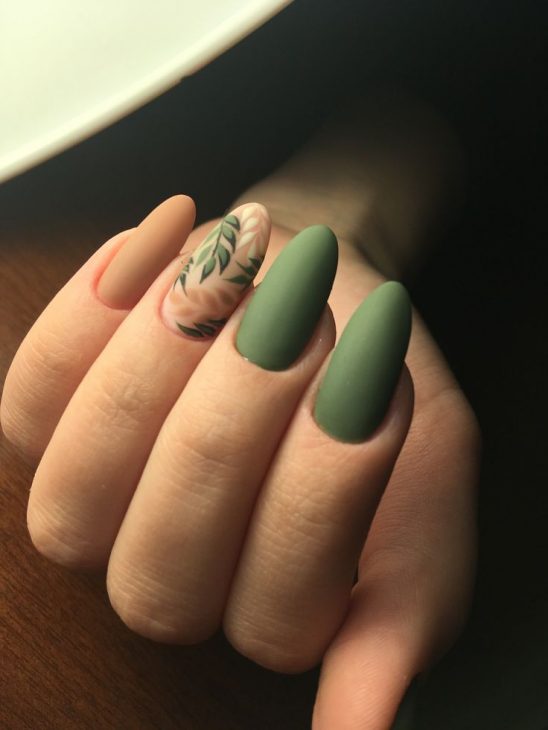
Matte Olive Green with Leafy Details
For those who prefer a more muted finish, this olive green fall nails matte design is the perfect choice. The matte texture gives the nails a velvety look, while the leafy details on the accent nails add a touch of nature-inspired elegance. This design works beautifully on acrylic almond nails, enhancing the overall sophistication of the look.
Materials:
-
- Matte olive green polish (e.g., Sally Hansen “Olive U” Matte)
- Nude polish for accent nails
- Dark green polish for leaf art
- Fine detail brush
- Matte top coat
- DIY Steps:
- Start with a base coat to protect your natural nails.
- Apply matte olive green polish to most nails, leaving one or two for the nude accent.
- Create leafy details using a dark green polish and fine detail brush on the accent nails.
- Seal with a matte top coat to maintain the velvety texture.
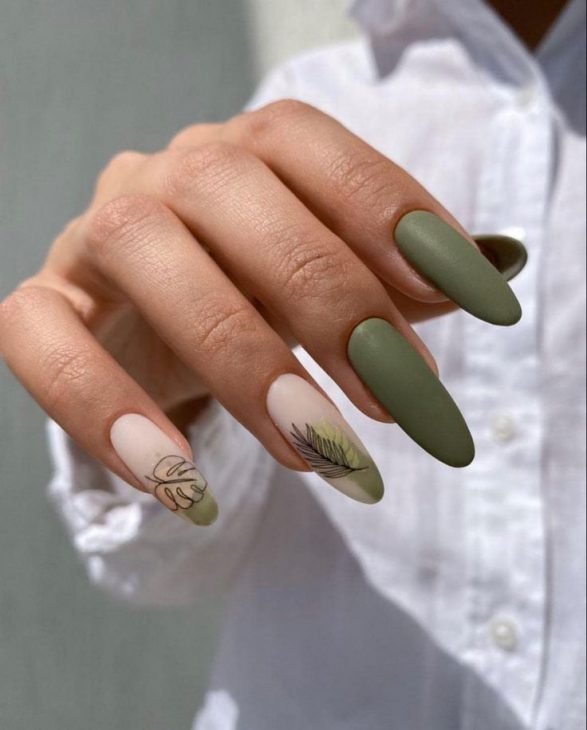
Olive Green and Nude with Bold Leaf Art
This bold design combines matte olive green with nude base polish, creating a striking contrast that’s both modern and elegant. The leaf art on the accent nails is detailed and dynamic, making it a perfect choice for those who want their olive green fall nails almond to stand out. The matte finish adds a sophisticated touch, while the detailed art brings in a natural element perfect for fall.
Materials:
-
- Matte olive green polish (e.g., OPI “Olive For Green” Matte)
- Nude polish for base
- Dark green and black polish for leaf art
- Fine detail brush
- Matte top coat
- DIY Steps:
- Begin with a base coat to ensure your nails are protected.
- Apply matte olive green polish to most nails, with a nude base for the accent nails.
- Use a fine detail brush to paint bold leaf designs on the accent nails, using dark green and black polish for depth.
- Finish with a matte top coat to seal the design and maintain the matte finish.
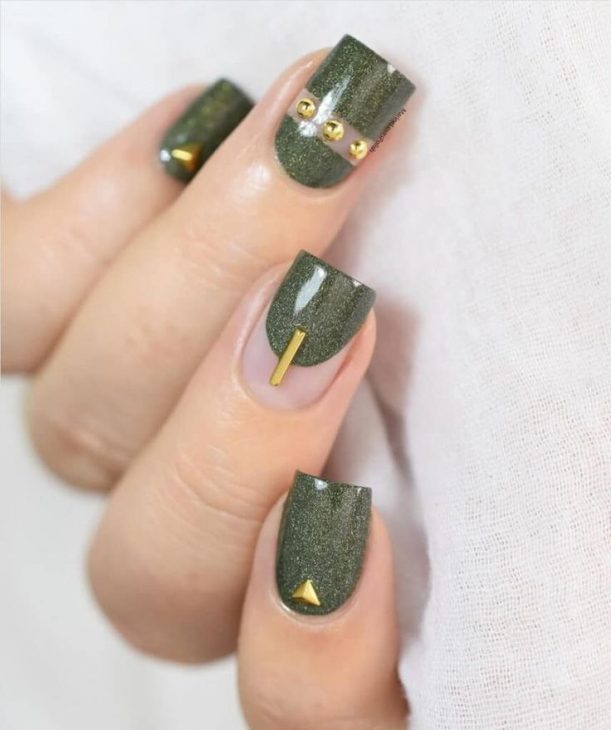
Shimmery Olive Green with Gold Studs
This olive green fall nails design is perfect for those who love a bit of shimmer and shine. The olive green polish is infused with a subtle shimmer, while the gold studs add a touch of glam. This design is ideal for short square nails, combining elegance with a modern twist. The gold elements create a luxurious feel, making this manicure perfect for both everyday wear and special occasions.
Materials:
-
- Shimmery olive green polish (e.g., Zoya “Gemma”)
- Gold studs for nail art
- Nail glue for attaching studs
- Clear top coat
- DIY Steps:
- Apply a base coat to protect your nails.
- Paint your nails with shimmery olive green polish, allowing each coat to dry fully.
- Use nail glue to attach gold studs to the nails, creating your desired pattern.
- Seal the design with a clear top coat to ensure the studs stay in place and to add extra shine.
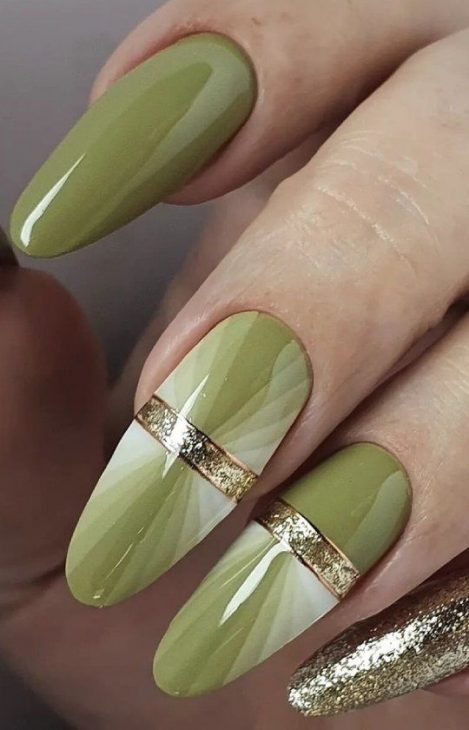
Olive Green and Gold Stripe Accent
This olive green fall nails design features a striking combination of olive green and gold accents. The gold stripe across the middle adds a touch of luxury, while the gradient pattern beneath it creates an eye-catching effect. The almond shape enhances the overall elegance of the design, making it perfect for those who love a chic and polished look.
Materials:
-
- Olive green polish (e.g., Essie “Sage You Love Me”)
- White and nude polish for gradient
- Gold nail tape or foil for the stripe
- Clear top coat for a glossy finish
- DIY Steps:
- Begin with a base coat to protect your nails.
- Apply olive green polish to most nails, and create a gradient effect on accent nails using white and nude polish.
- Apply a gold nail tape across the middle of the accent nails.
- Seal with a clear top coat to lock in the design and add shine.
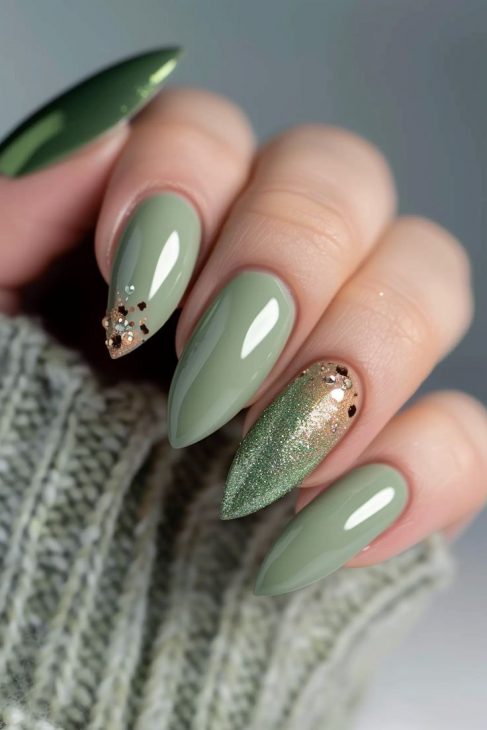
Olive Green with Glittery Glam
For those who love a bit of sparkle, this olive green fall nails acrylic almond design is the perfect choice. The glittery accent nail adds a touch of glam, while the olive green base keeps the look grounded and sophisticated. This design is ideal for special occasions or whenever you want to add some extra shine to your manicure.
Materials:
-
- Olive green polish (e.g., OPI “Suzi – The First Lady of Nails”)
- Gold glitter polish for the accent nail
- Fine glitter for additional sparkle
- Clear top coat
- DIY Steps:
- Apply a base coat to all nails.
- Paint your nails with olive green polish, leaving one nail for the gold glitter accent.
- Add fine glitter on top of the accent nail for extra sparkle.
- Finish with a clear top coat to seal the design and add a glossy finish.
Olive Green and Nude with Marble Accent
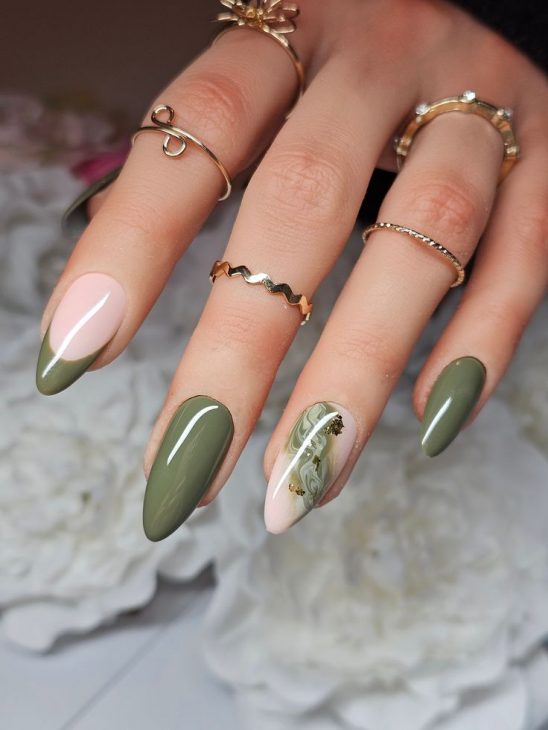
This design pairs olive green with a soft nude base, featuring a stunning marble accent on one nail. The combination of colors creates a balanced look that is both modern and elegant. The marble effect adds an artistic touch, perfect for those who enjoy detailed artistic designs.
Materials:
-
- Olive green polish (e.g., Zoya “Gemma”)
- Nude polish for the base
- White, green, and gold polish for marble effect
- Fine detail brush
- Clear top coat
- DIY Steps:
- Begin with a base coat to protect your nails.
- Apply olive green polish to most nails, and nude polish to the accent nail.
- Use a fine detail brush to create a marble effect on the accent nail with white, green, and gold polish.
- Seal with a clear top coat to maintain the design and add shine.
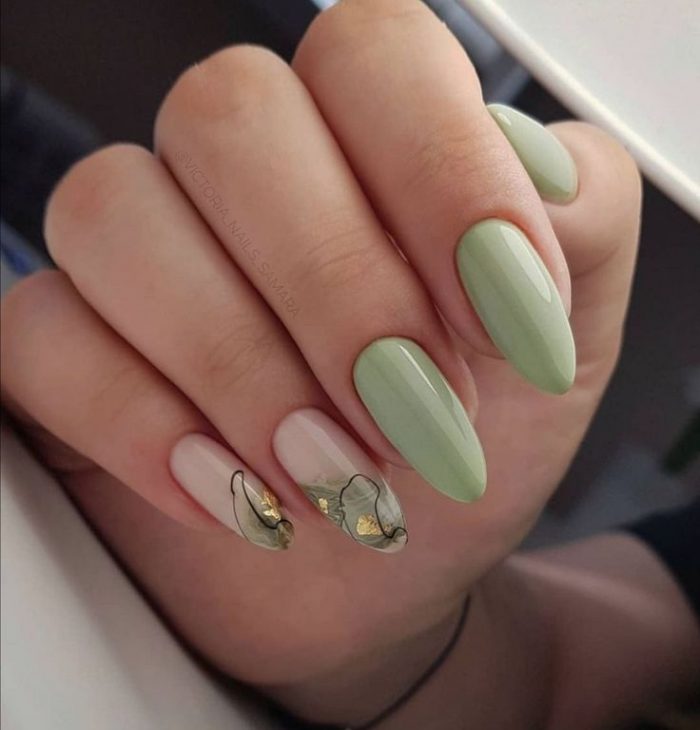
Mint Green and Olive with Leafy Accents
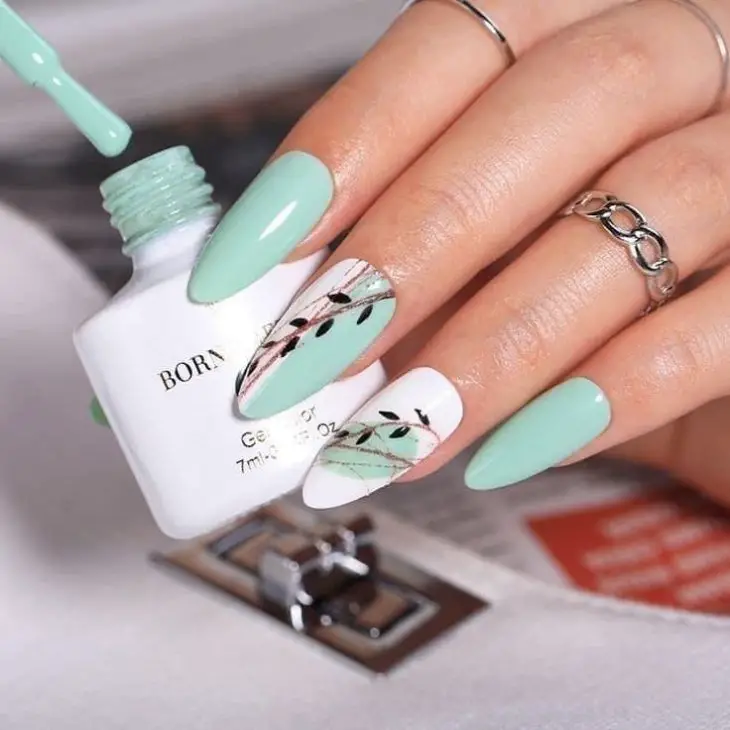
This fresh take on olive green fall nails combines mint green with olive accents and delicate leaf designs. The result is a light, airy look that’s perfect for fall, offering a softer alternative to darker autumn hues. This design is ideal for acrylic almond nails, allowing for more detailed art.
Materials:
-
- Mint green polish (e.g., Essie “Mint Candy Apple”)
- Olive green polish for accent nails
- Black and gold polish for leaf details
- Fine detail brush
- Clear top coat
- DIY Steps:
- Apply a base coat to all nails.
- Paint most nails with mint green polish, leaving one or two for olive green accents.
- Use a fine detail brush to paint leaf designs on the accent nails with black and gold polish.
- Seal with a clear top coat to protect the design and add a glossy finish.
Olive Green and Nude with Artistic Leaf Art
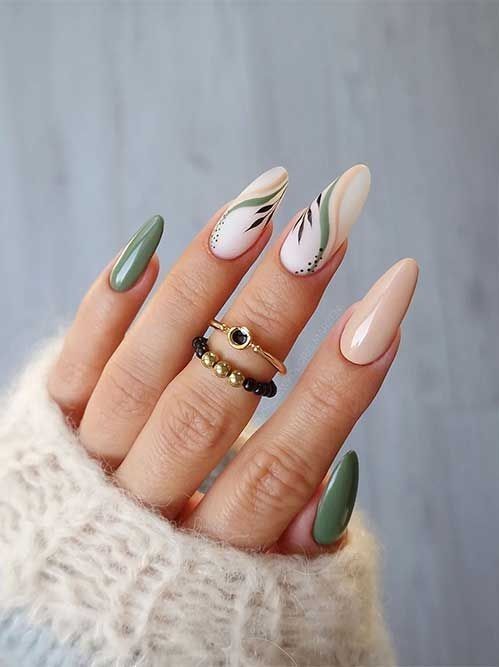
This elegant design features a combination of olive green and nude, accented with detailed leaf art. The leaves are drawn with precision, making this design perfect for those who appreciate the finer details. The almond shape of the nails further enhances the artistic look, making this a stylish choice for fall.
Materials:
-
- Olive green polish (e.g., China Glaze “Westside Warrior”)
- Nude polish for the base
- Black and green polish for leaf art
- Fine detail brush
- Clear top coat
- DIY Steps:
- Begin with a base coat to ensure your nails are protected.
- Apply olive green polish to most nails, and nude polish to the accent nails.
- Create detailed leaf art on the accent nails using a fine detail brush with black and green polish.
- Finish with a clear top coat to seal the design and add shine.
Matte Olive Green with Bold Leaf Art
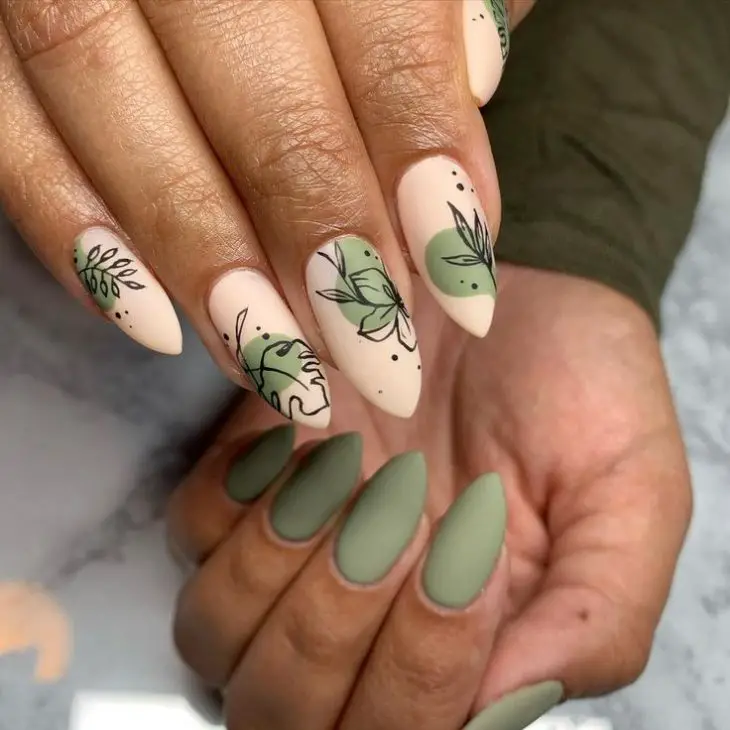
For a bold and artistic look, this olive green fall nails matte design is a standout choice. The matte finish adds a velvety texture, while the bold leaf art in green and black brings a touch of nature-inspired elegance. This design is perfect for acrylic almond nails, offering a modern twist on a classic fall color.
Materials:
-
- Matte olive green polish (e.g., Sally Hansen “Olive U” Matte)
- Nude polish for accent nails
- Green and black polish for leaf art
- Fine detail brush
- Matte top coat
- DIY Steps:
- Start with a base coat to protect your natural nails.
- Apply matte olive green polish to most nails, with nude polish for the accent nails.
- Use a fine detail brush to paint bold leaf designs on the accent nails with green and black polish.
- Seal with a matte top coat to maintain the velvety texture.
Save Pin
