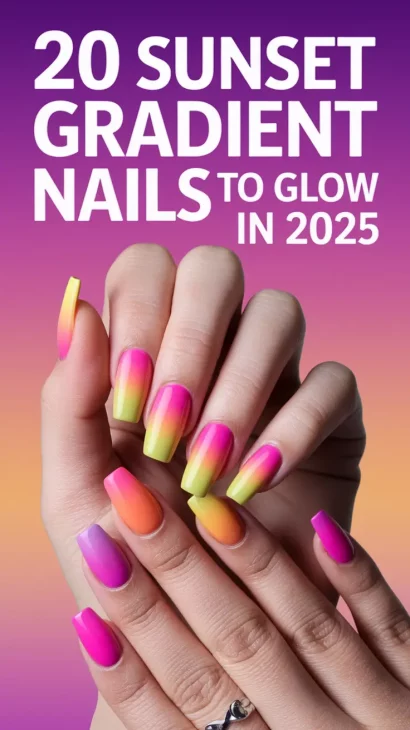
It’s no surprise that summer sunsets are special and now they’re brightening up your manicures. Sunset gradient nails are quickly becoming one of the most talked-about trends of 2025, and it’s easy to see why. Thanks to warm pink and orange tones, chrome additions and nails that resemble a golden-hour sky, this look gives a sense of vacation at all times of year.
In this article, we’ll discuss some amazing ways to paint sunset nails, including bold gradients, feminine ombres, short gel styles, standout acrylic looks and nails with a French tip twist. Whether you’re into neon hues, chrome details, or love to keep it cute and simple, these glowing looks are full of inspo you’ll want to screenshot immediately.
Let’s look for a great sunset gradient design to make your next manicure special. I promise, by the time you finish this, you’ll find yourself wanting to book a trip and update your swimwear.
Vibrant Coral & Confetti Sunset Sparkle
A bright coral section at the bottom of the almond nails turns up into rosy pink glitter in this fun summer-inspired design. The translucency of the jelly finish brightens the nails and gives your nails that glowing sunset look. This design screams cute and feels like something you’d wear for cocktails by the pool after 6 p.m.—the kind where the sky starts to drip orange and pink like it’s showing off.
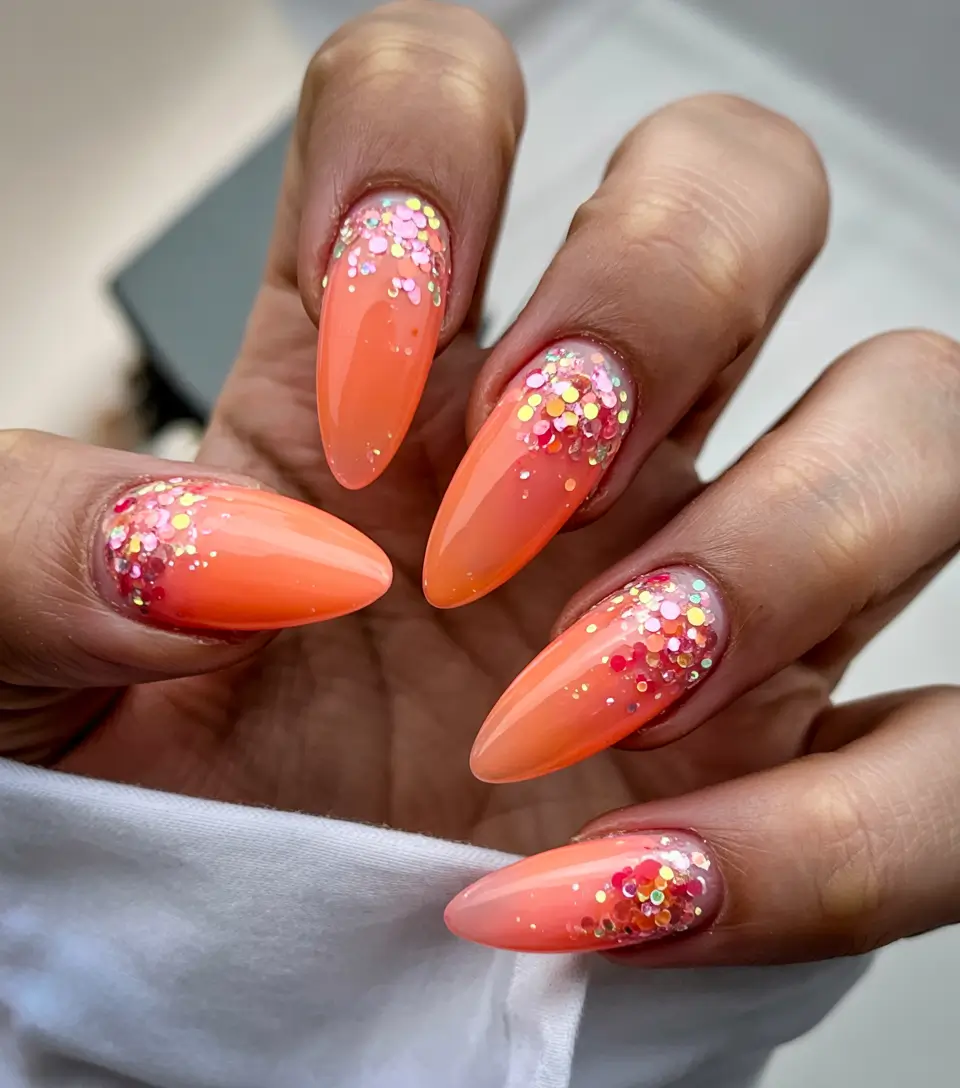
The easiest way to achieve this look is with OPI’s “Hotter Than You Pink” gel under a coat of Seche Vite which adds shine and shape to the nails. The confetti glitter can be added by patting on Lemonhead.LA’s Spacepaste in ‘Rosé’ right before curing under an LED lamp.
The secret to a jelly look without making it see-through is to put on several light layers. My method is to use a sponge, starting below the nails and building the line to connect it to the top of the fade. For best results, cure each layer separately. A glitter sealant can help reduce texture.
I personally love this design for July vacations. It feels like sunshine you can wear. It’s a sunset nail idea that makes any outfit instantly happy—and honestly, isn’t that the whole point?
Lemon Neon Sunrise Tips
A neon sunset yellow look with an ombre from pink to lemon nails is truly unique. With the holographic bits in two sizes, the overlay elevates the design without covering up the clear area. It yields the look of both a sunset and a tequila that really shines, thanks to the unique color change this style creates.
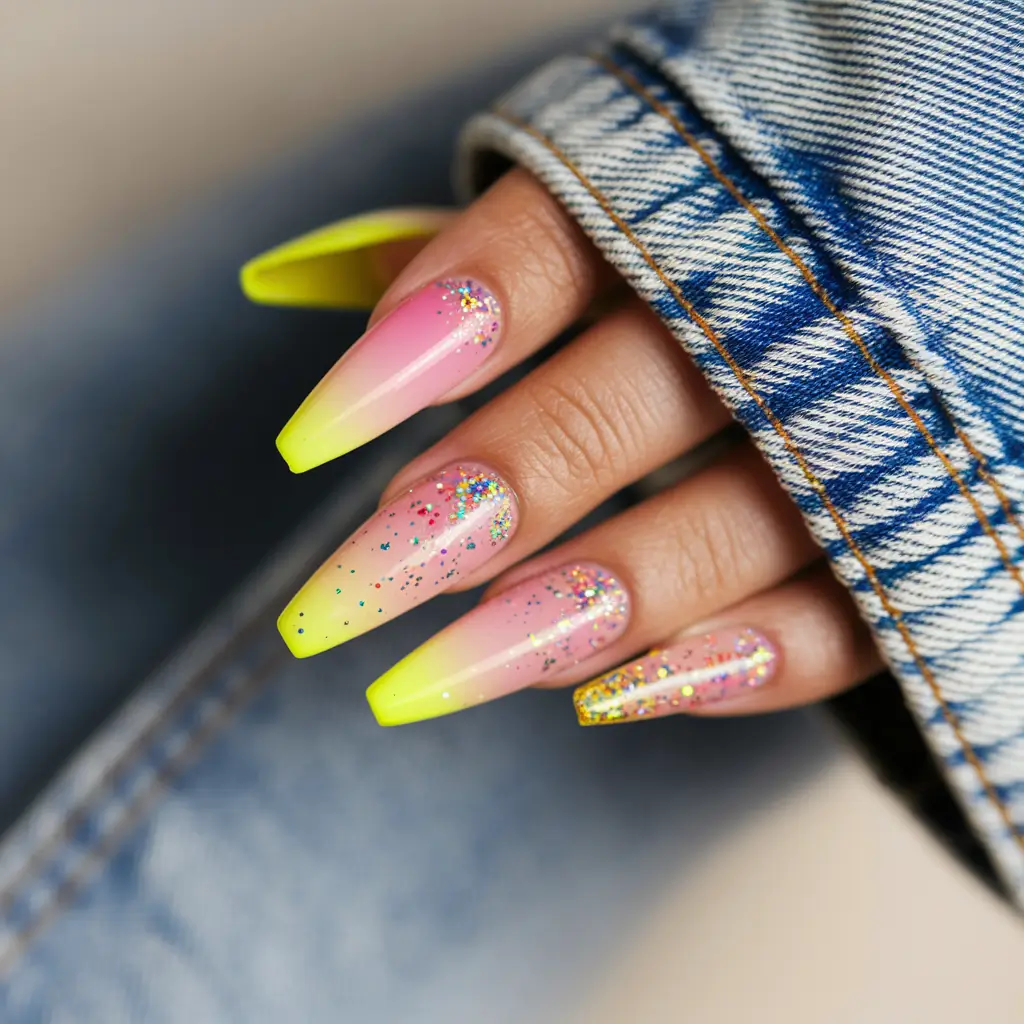
I’d do the base with Kiara Sky’s “Flashing Lights” Dip Powder and put “Solar Glow” neon powder on the tips which I’d gently blend with a clear builder gel. This coffin’s shape works to highlight the changes in the gradient.
Trim your crease from the center nail, then use a damp sponge to blend the purple colour out softly. A soft glitter topcoat seals the deal. If you’re DIYing, a peel-off barrier around the nail helps prevent glitter fallout during cleanup.
When I want a bold-looking nail that’s still not hard to manage, this is the acrylic style I choose. Bright but not costume-y. It feels fresh, bold, and fun—like something you’d wear with white sunglasses and zero regrets.
Pastel Sunrise Melt with Chrome Gloss
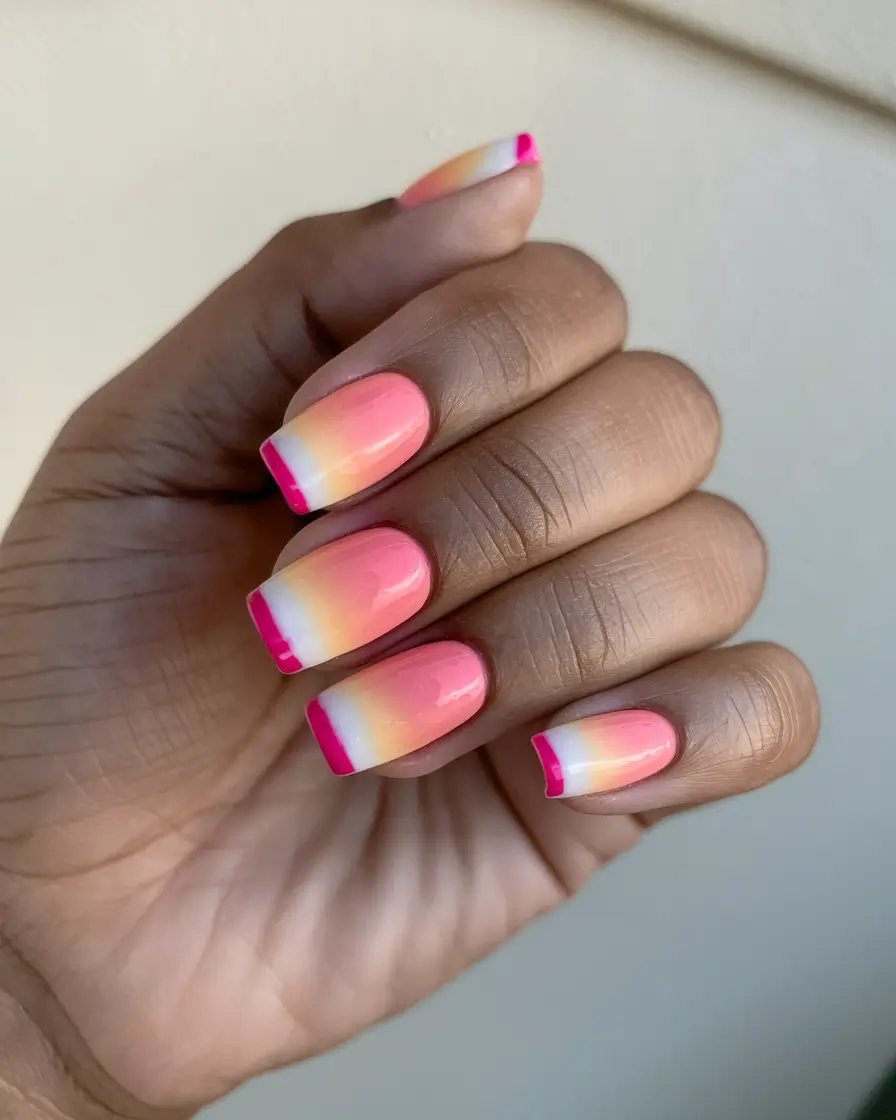
If you want something softer, try a pink-to-yellow sunset along with peach on top of a short square nail base. The polished coating makes the chocolate look and feel like a gel coating—so soft it’s hard to resist staring at it. Because the color fade is so precise, ladies who want modern sunset nails chrome will go for the colored fades.
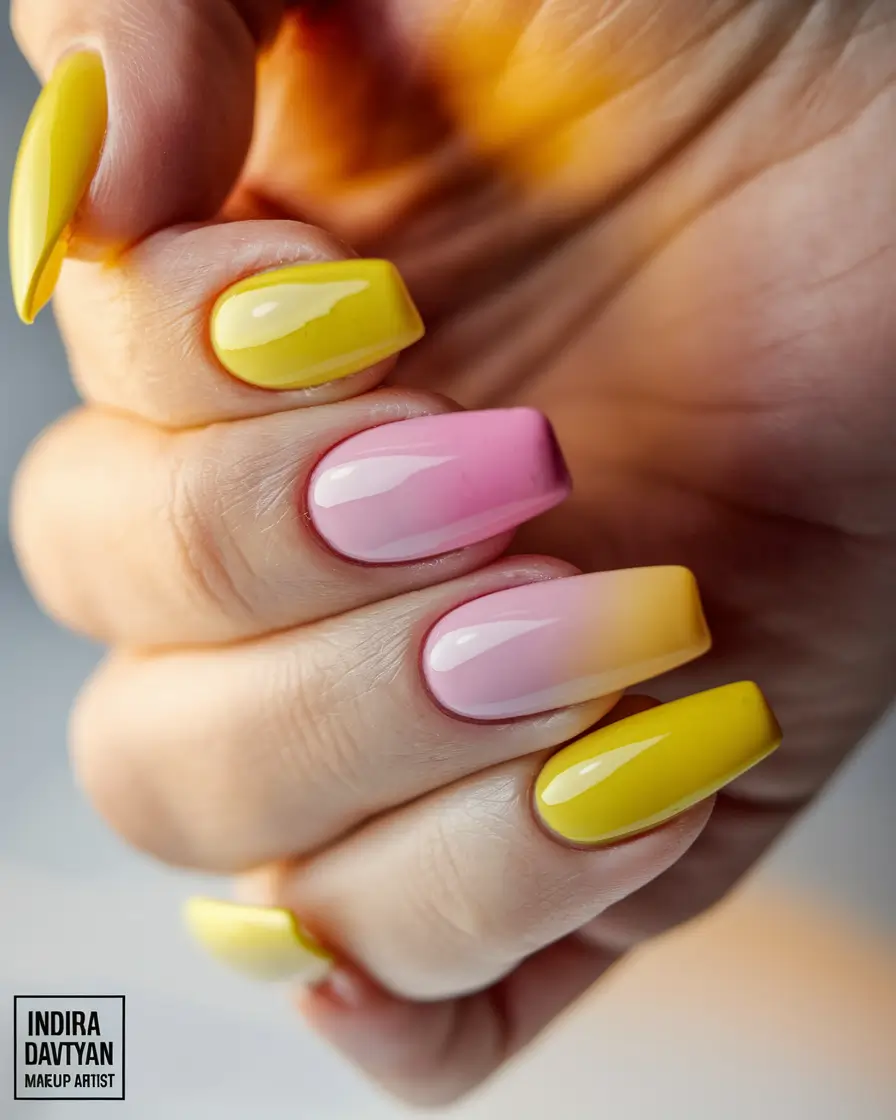
The best way to get this result is by using sheer builder gels. Try The GelBottle’s “Dolly” pink and “Banana Split” yellow for the right look. Instead of a normal finish, a powder chrome finish can be applied to achieve a milky-glass look.
Build your manicure by smoothing the nail bed and following up with a flat brush for even blending. The key is to mix slightly overlapping colors on the top of a cured base so that your final layer includes melts without becoming muddy.
This technique is perfect for me when I desire a minimal color scheme that is still in keeping with the party. Instead of your nails shouting about sunset, they seem to whisper it and I think that’s wonderful.
Ocean Sky Meets Tangerine Glow
Here’s a whimsical blend of sky blue and warm tangerine that melts into one another so seamlessly you’d think it was airbrushed. It truly reflects how night starts and a cool sky meets a colorful sky at sunset. It’s shaped like an oval to make it comfortable for your daily lifestyle, yet the designs mix wonderful and adventurous colors.
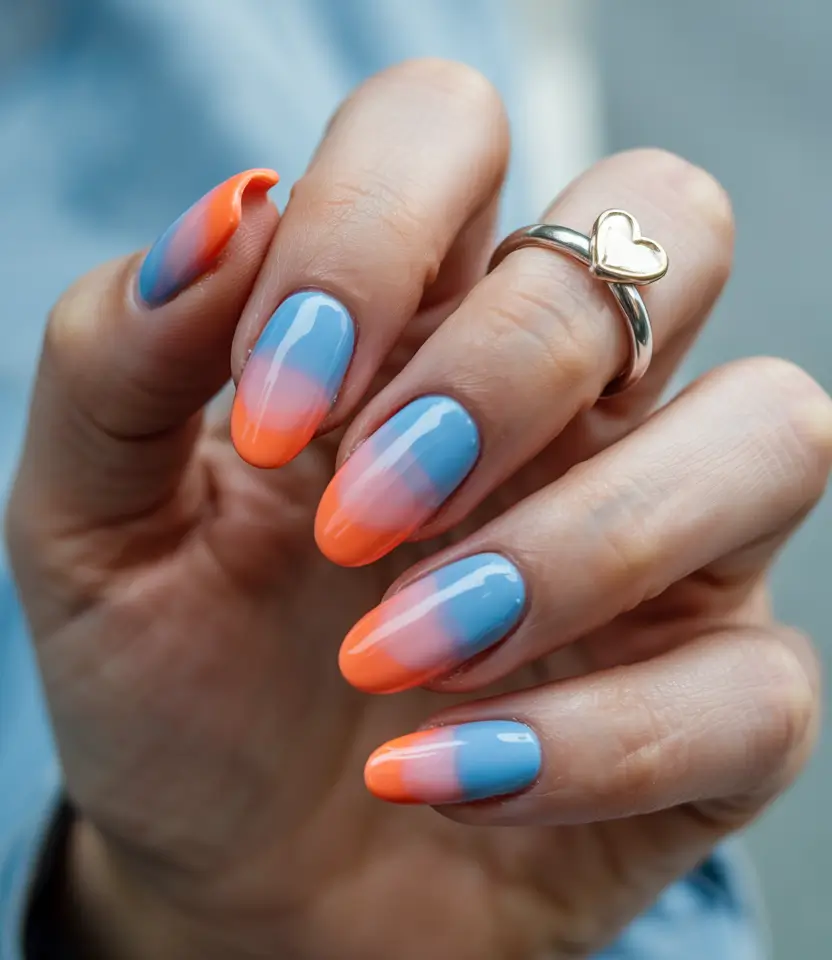
You can mix Lights Lacquer “Blue Moon” and “Sunburst” by painting each on using a nail sponge. A topcoat of glossy gel is needed to ensure your nails are both shiny and well-painted.
I normally treat the color pieces individually and gently dab front and back at the corner of the seam to give a gradual change. After that, I cover the transition in several light layers. Cure fully before top coating.
What I love about this nail art is that it’s fun, different and looks good during brunch or at the beach. Plus, the color combo screams cute without even trying.
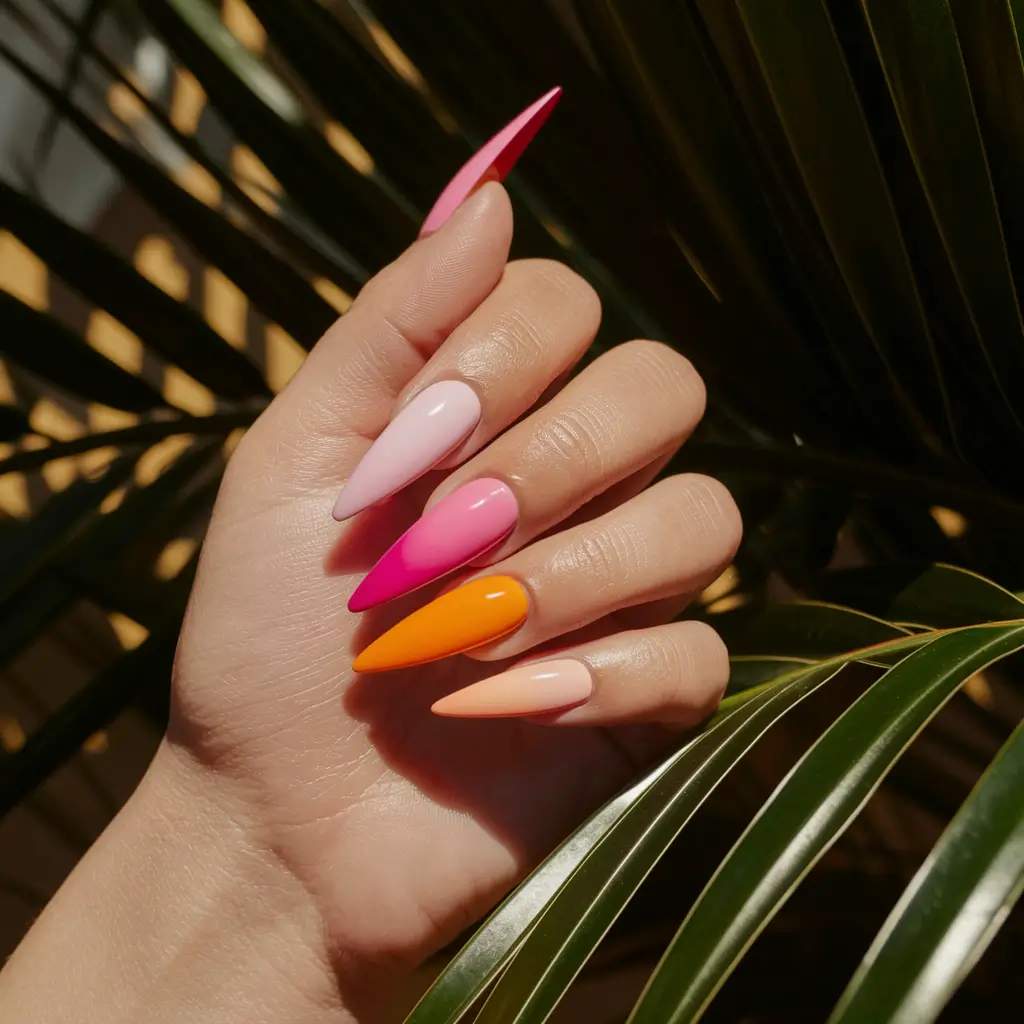
Tequila Sunset Stiletto Blush
Now we’re talking drama. It begins in a transparent base, moves into bright orange at the center and then ends in a hot pink on the heels. If sunset nails could flirt, this would be it. It’s elegant but rebellious. Soft-core neon with a purpose. A sunset nail design that I love is both interesting and subtle.
To find this look, I’ve learned that sheer jelly gels in coral and pink, like Candy Coat’s nail polishes, suit me best. You need a good nude base (like “Milky Dream”) to make the ends glow.
I usually start lightening at the very end and blend the color toward the cuticle on this one. I’ve observed Mei Kawajiri and other celebrity nail artists use this reverse fade technique on shoots to give an airbrushed effect.
Whenever I put this on, I imagine myself drinking something young and tasty amid strings of lights. Tequila, maybe? Or a virgin sunrise. Whichever way you look at it, this design gives off a ton of pure, hot energy.
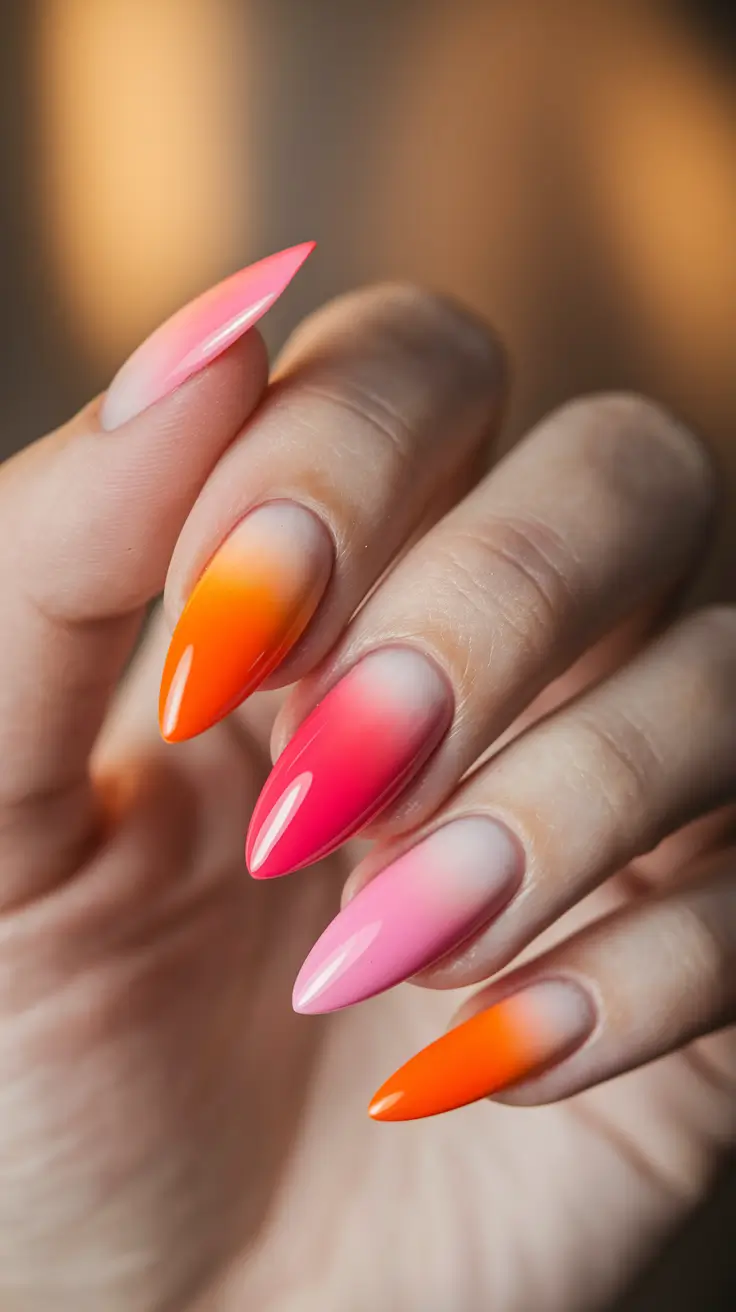
Flaming Ombre with a Citrus Twist
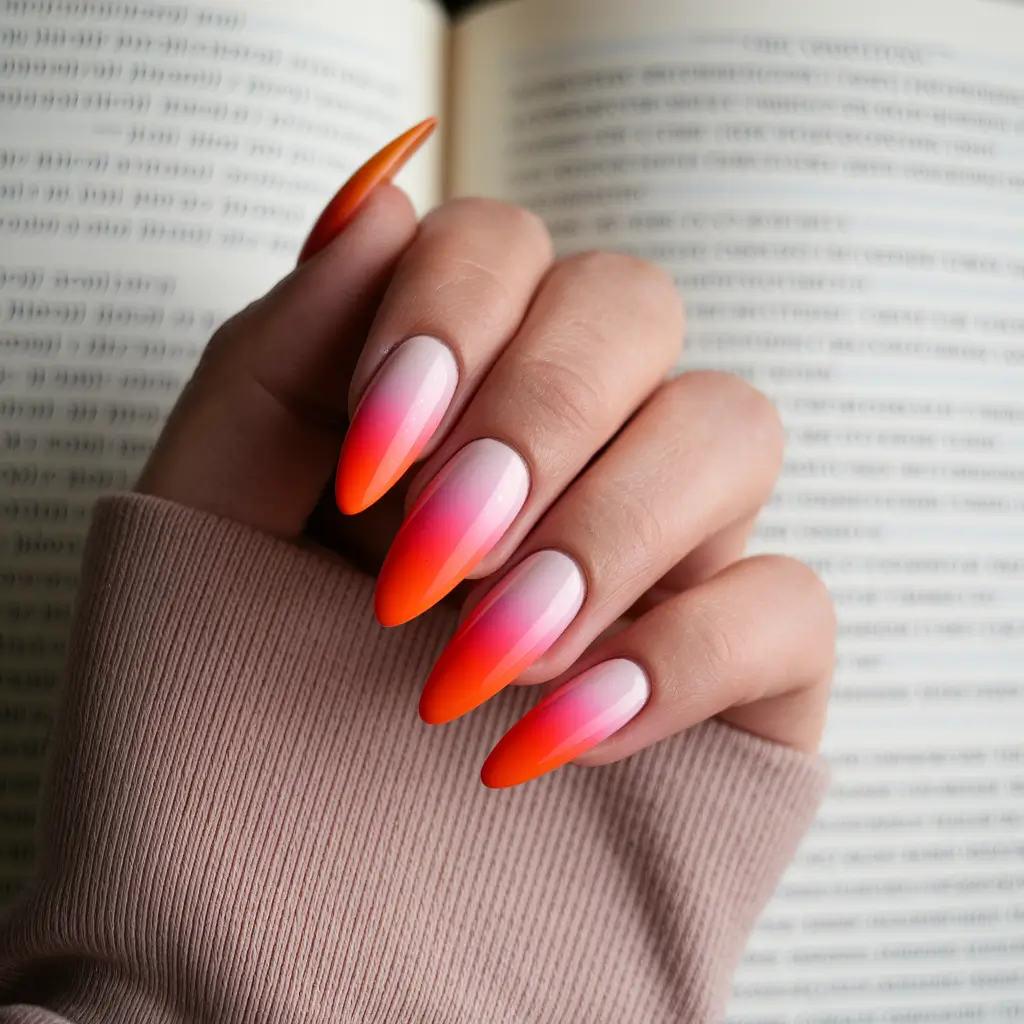
There’s something bold and hypnotic about a sunset gradient nail art that starts with a whisper of nude and finishes with a burst of fiery orange. With its stiletto shape, this style contrasts for a delightful gradient fading from peach, through fuchsia, to a vibrant orange point. The difference between each nail gives each design its own style. If you want a perfect sunset design for the beach or a summer dinner, this gives you strong color with little effort required.
To get this style, I applied “Got Myself into a Jam-balaya”, “Hot & Spicy” and “Pompeii Purple” from the OPI GelColor collection. It works best if you use a fine makeup sponge to apply the colors diagonally to each nail, while they are still wet before letting them cure. Finally, spraying on a high-gam no-wipe top coat gave the car its shiny look.
If you’re doing this at home, make sure your base is thin and even before blending. Work your nails one by one and use the sponge just enough to mix the colors. Nail pro Elle Gerstein often recommends curing each nail as soon as you’re done blending to lock in the softness.
Personally, this combo screams tequila sunset vibes. It’s tough but playful, so your nails make a statement while you’re out for a night or a day.
Lemonade Glow Over Rose Petals
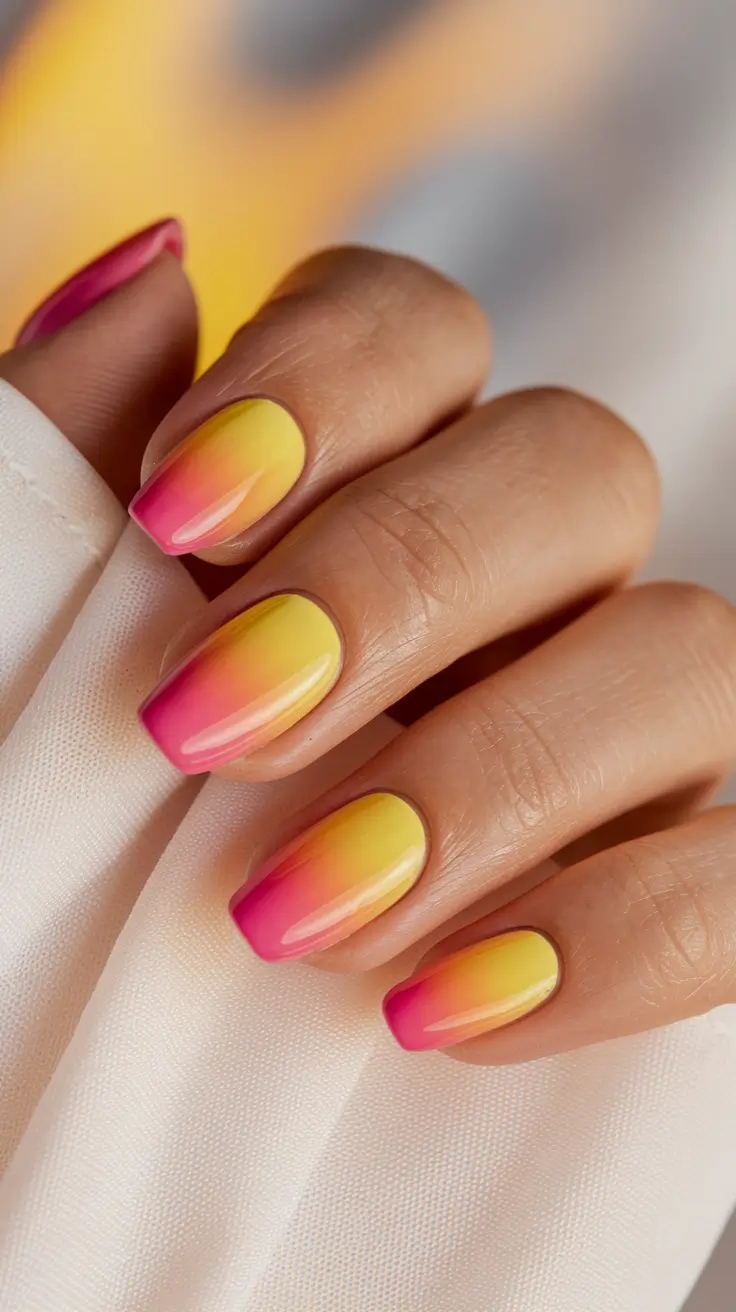
Ombre sunset nails give a stunning effect for people admiring soft pastel colors. The makeup fades from pink to a bright lemon yellow which looks as bright as a sunset with a sorbet color. It’s clean, elegant, and quietly dramatic. With an almond shape, the color transition looks stretched out nicely, resulting in a soft summer feature for your nails.
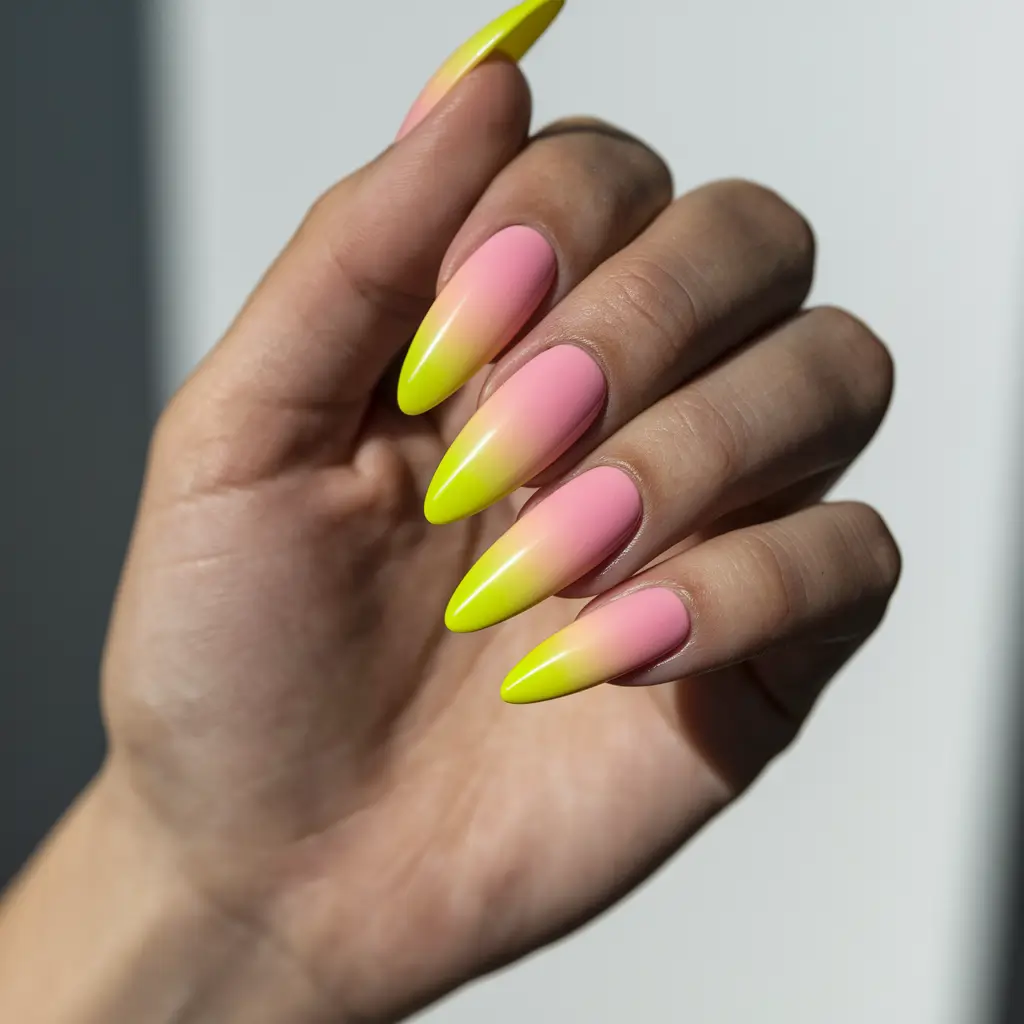
The polishes I chose for this were Beetles Gel Polish in the shades Peachy Petal and Lemon Squeeze. Using a sponge, the powders melt together and are easy to apply if you are a beginner. I used a nail art brush close to the cuticle to blur the color line.
A clear-colored nude will let the ombre look more dramatic. Brush the sponge up and down horizontally and blend upward after each stroke. After you cure it, you’ll be able to see the true shine and brightness of your pastel.
This color is just like the pink lemonade you see in a popsicle commercial—it’s perfect for a sunny day. This is just right for me when I’m on vacation or even any time I could use a boost from citrus.
Candy Coral Soft Square Fade
This is the easiest way to create color gradient nails sunset. Squares are bold but youthful and the rose color blend works because it’s not too noticeable. You can try this for both formal and informal looks since it’s well suited to all seasons.
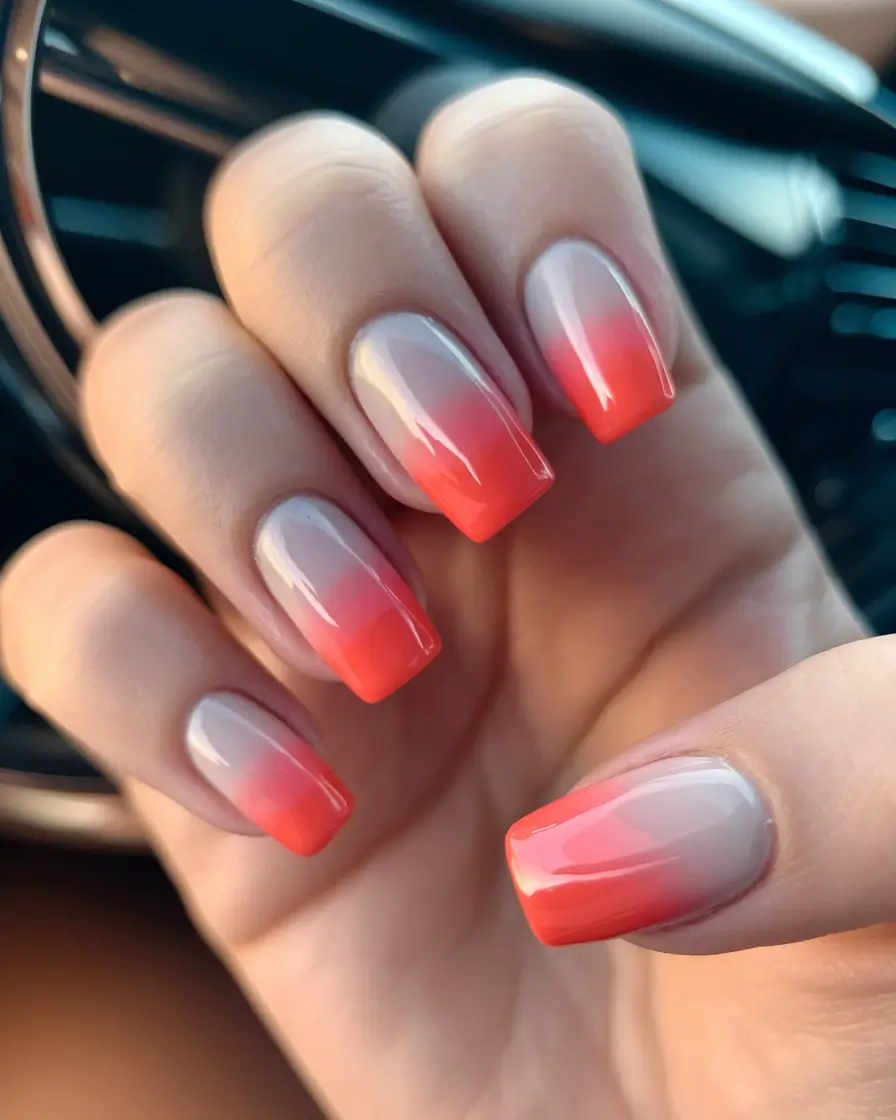
I chose Essie Gel Couture colors “Matter of Fiction” and “Sizzling Hot” for this fade. I used a soft fan brush to blend the eyeshadows vertically, after first applying makeup that was still sticky, then setting it with LED light. It’s minimal effort but maximum reward.
Start by covering your nails with a soft nude shade and finish by adding coral only to the tips and blending it downwards. You can repeat in layers to intensify the gradient. Many of Allure’s videos on nail art focus on this process, especially in their spring-to-summer gradient guides.
I love how wearable this is. It’s much like the nail version of a coral lip balm in that it’s friendly, glow-y and looks right at home this season. For a relaxed and pretty nail look, I love doing this as a sunset inspiration.
Sunset Swirls in a Neon Fantasy
If you like to add movement and color to your nails, this manicure uses sunset shades such as fuchsia, orange, yellow and soft white, all organized in fun wave patterns. These sunset nail designs are full of personality. The eyes’ almond shape gives the design classy sophistication and the chaotic lines give it a sense of energy.
I started by painting the base clear, then painted pink and then freehand swirled bright colors from Nail Addict LA using a striping brush. I topped the swirl layer with a matte manicure and then sealed the rest with a high-gloss top coat.
This design takes patience. Slowly apply each swirl using a dotting tool or liner brush and cure the nails immediately after so they don’t smudge. For photo sessions, Sarah Bland uses this approach all the time.
I had a lot of fun wearing this one. You could describe it as bright, energetic and ideal for that time of day when you need extra flair to your festive or festive outfits.
Neon French Fade at Sunset
The current trend for French tips uses a simple approach with lots of impact. A nude foundation sets the stage for a hot yellow gradient toward the ends—exactly like the sun at its peak just before it vanishes. Because the cuticle is smooth and the point is sharp, you can create a trendy ombre effect with sunset nail art.
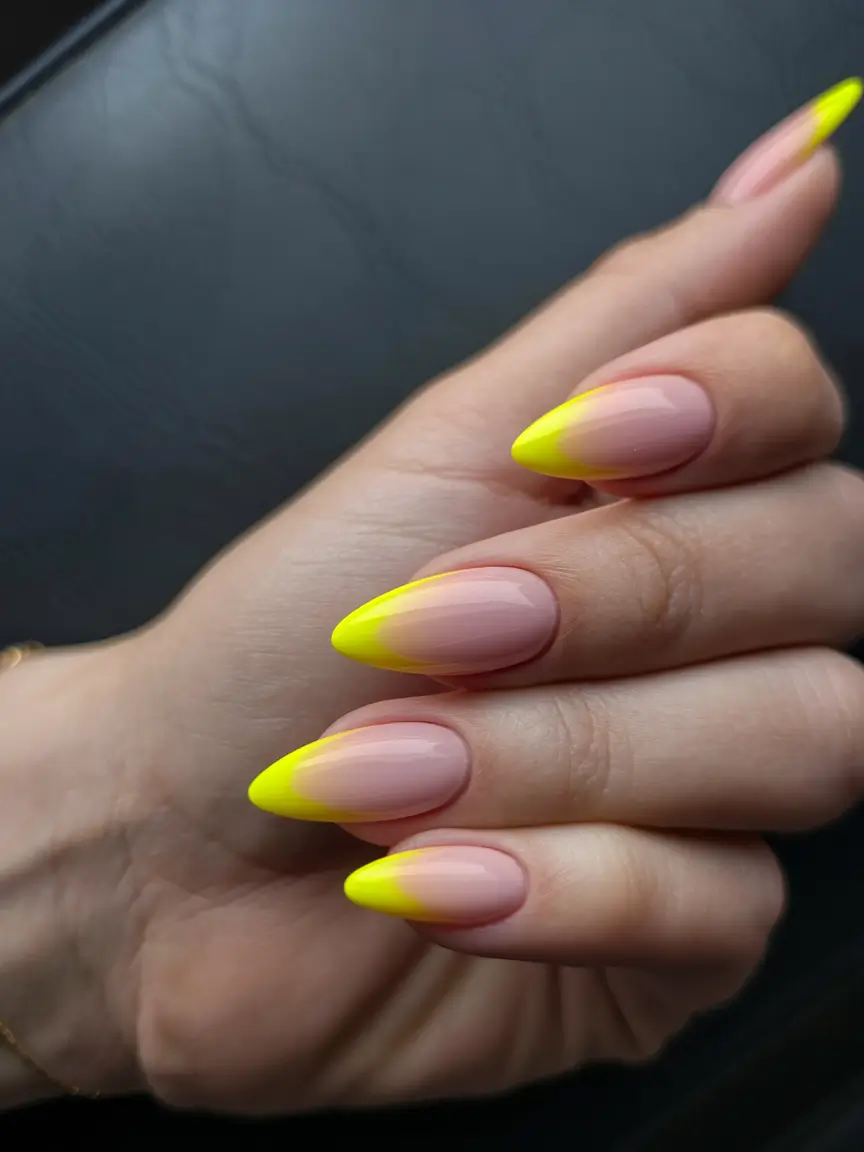
My model tried the Lemon Drop DND Daisy Gel, layered over a milky, nude base gel nail polish. Working the glitter into my skin with a sponge made for the best result and finishing with a builder gel removed excess glitter and gave it a luminous finish.
Following the base colored, cure it and place a small amount of the neon color on the sponge, then dab it up onto your nail from the base. Finish with a sealing top coat for durability. This style is common in Korean nail salons because they like subtle or natural looking fades the most.
Wearing casual summer clothes makes me think of those dreamy sunset cocktails and sunny dinner dates. It’s stylish, new and stands out beautifully in the hours surrounding sunset.
Dreamy Glittered Tequila Sunset Nails
When I see this design, I immediately picture a sunset open bar full of tequilas. The special ombre base in these nails features orange at the cuticle, lavender at the top, leaving each nail with a subtle glow and clear glitter that looks like the sparkling water at dusk. It’s the type of sunset gradient nail art that looks like it was brushed on by nature itself.
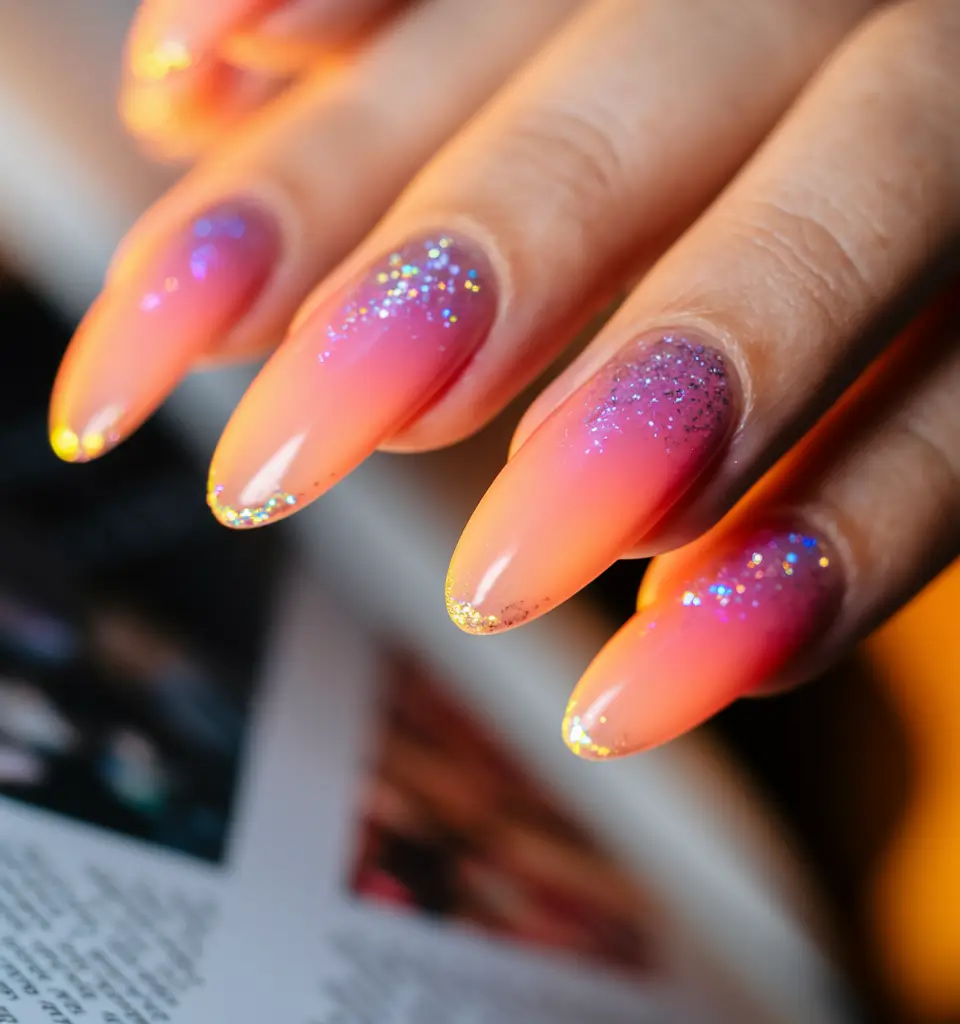
To copy this manicure, I mix OPI’s “Tangerine Scene” with “Lavendairy” by Cirque Colors and then blend them both while wet with a sponge. The cat is splendidly shining because I applied “Nebula” glitter polish by Mooncat. The addition of big and small glitter creates a depth to the nail design.
Putting together this look at home requires you to be patient and gentle. I think three sponging layers with the gradient are necessary to achieve the best fade. I pick up the glitter polish on a small brush and place it carefully one spot at a time. Seche Vite is a quality top coat that keeps your nails from getting dull but still maintains their shine.
When I want a suit that’s soft yet impressive, I pick this style. It’s perfect for those who enjoy subtle, sunset nails ombre; the relaxed vacation atmosphere is just what shines through.
Neon Sunset French Tips with a Twist
Why not try this sunset nails french tip version that brightens up the usual with a strong, new twist? There’s a light but tasty color transition from melon pink to golden yellow, yet the bright fuchsia on the tips gives this haircut a crisp look. You can wear these sunset gradient nails because they’re both cute and elegant.
I use “Tart Deco” by Essie at the base, blend into “Sunny Business,” and give the tips an extra color called “Mod Square.” Using a clear line of tape makes it easier to avoid paint bleeding when doing an edge. These tones look great on medium and deeper skin.
Since gradient French tips aren’t easy, I first apply a normal base and then gently sponge or airbrush on the sunset blend after the base has cured. Use a detail brush or a stencil to paint the tip of your letter after finishing the rest.
This is one of the cutest and simplest toy designs you’ll find here. It’s comfortable at both brunches and beach events and shows you’re fully into the summer spirit.
Reverse Ombre Sunrise Glow
The bright heat of the beginning day is re-created by using a reverse ombre from light beige at the base to neon orange and coral pink nails at the top. Gradient is definitely daring, but its softer side makes it sophisticated. I created these—which are sunset designs—with a touch of the sunrise.
For color, I blend Madam Glam’s “Spiced Orange” and “Rosy Nude” in a gel format. Using a soft buffer brush makes the transitions effortless. With an almond shape, these gradient nail patterns are more contemporary.
A reverse ombre takes time but is worth it. I start with three gradients, then cover the whole nail in a sheer jelly shade for consistency. Finish with a glossy topcoat for that just-polished look.
It feels like getting up before dawn to go to the beach, when the sky is amazingly beautiful. It’s unique in style, but doesn’t stand out too much which is great if you appreciate sunset nails or gradient acrylics with a good amount of attitude.
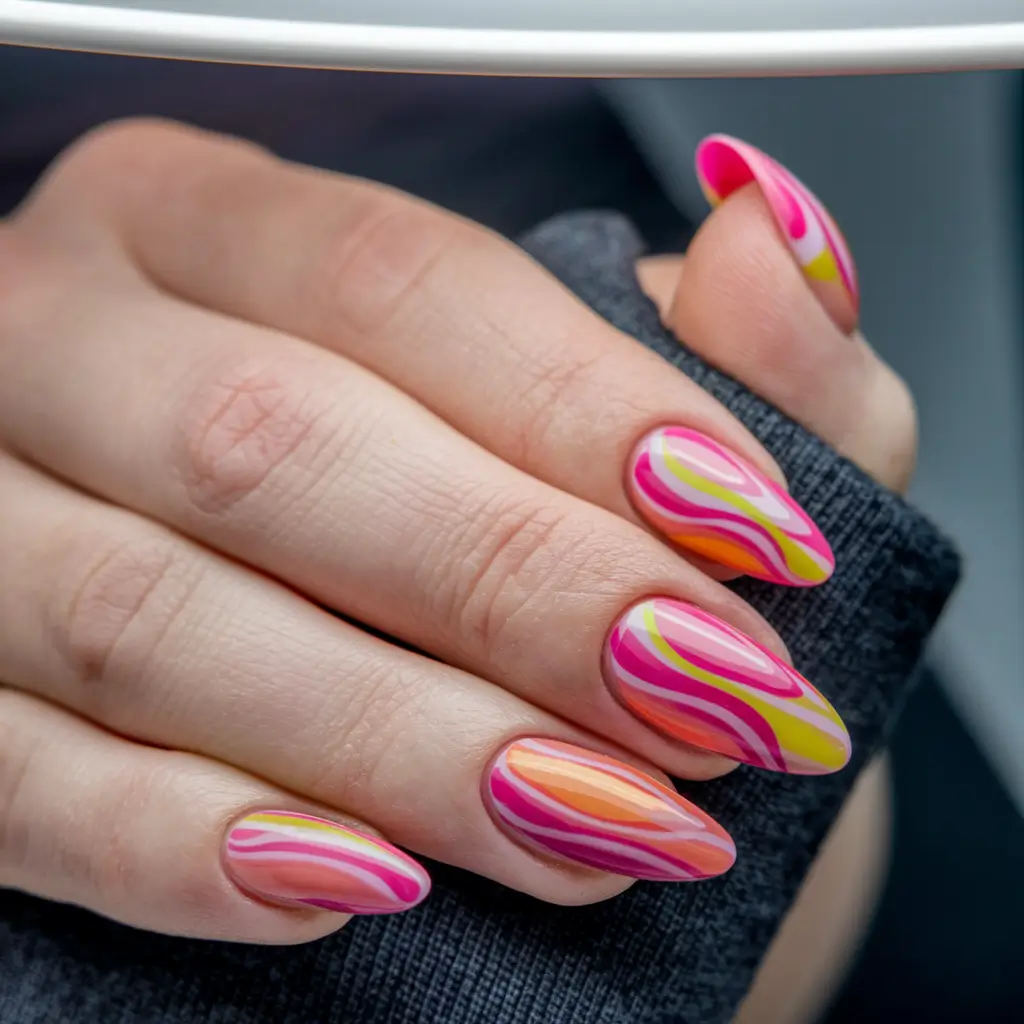
Wavy Sunset Stripes with Retro Vibes
The light and dark pink, white, tangerine and coral lines look like wind-blown clouds dotting a summer sky. Even though it’s not the regular ombre style, these sunset nail designs are a fun way to represent both retro and ‘70s inspiration.
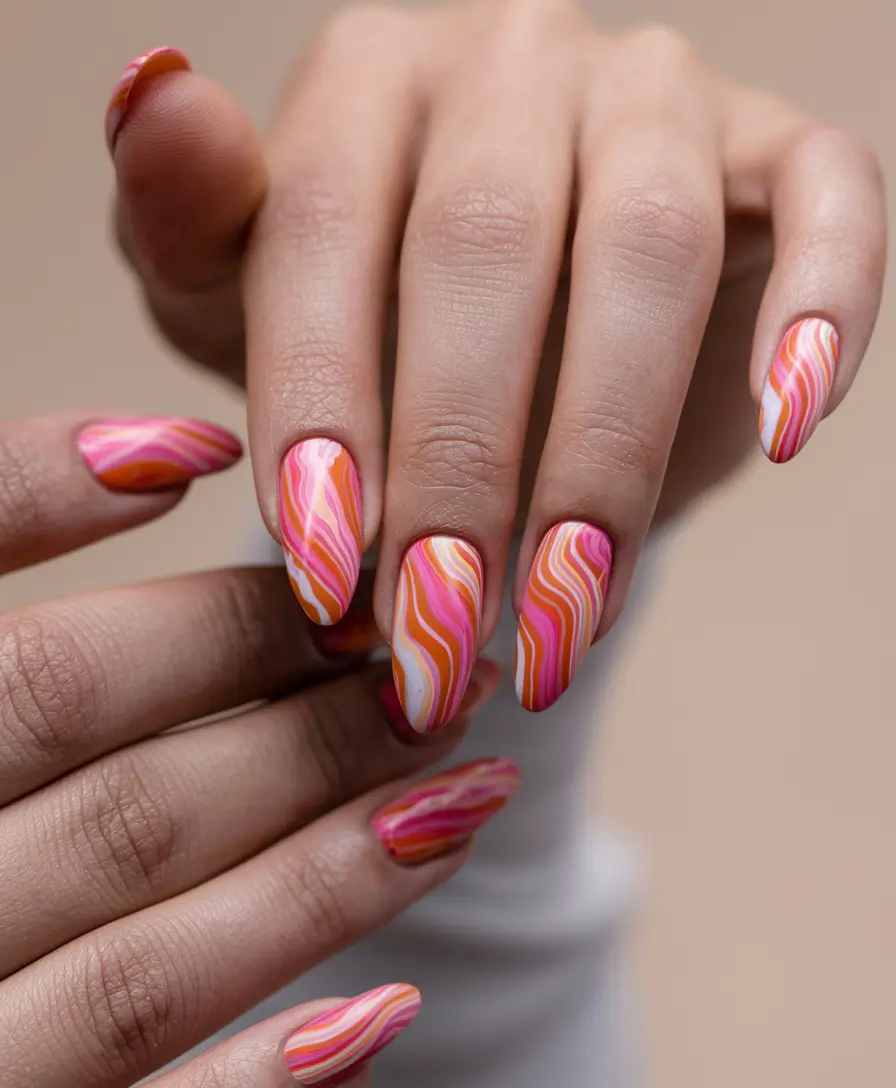
I first used a white matte base, then mindfully painted stripes with colorful gel liners from the Cherry, Peach Daiquiri and Sunburst collections. It helps to work with a liner brush that has a little bit of give and moves your hand smoothly.
For the best shape, start in the middle and spin outward, shading it with lines that are wider or narrower depending on how close you want them. If you prefer more contrast, finish with matte spray paint. If extra shine is what you want, top it off with a glossy sealant.
As soon as I put on this design, people keep wondering if they’re press-ons—that’s how detailed it is. Definitely aimed at people who are outgoing and love nail art inspired by the sunset.
Golden Hour Chrome Fade
You can see how the golden hour light looks on your nails with this blue, white and gold gradient. The reason this is special is that every nail has a fine layer of chrome, making them appear soft and glowy—exactly what sunset nails chrome fans are after.
I mixed “Lemon Drop” with “Fuchsia-istic” from Kiara Sky and added a chrome powder on top while the top coat was just tacky. The result? Reflective, radiant nails that look polished in every light.
Just three things are needed for this look: sponge for blending, chrome powder applicator and sticky base. Applying builder gel to the end of the fiber will ensure it lasts longer.
This color selection makes sunset nail ideas perfectly easy—and you can choose how bold you go. I like to put it on with my most important pieces that need little explanation. Bold pink with orange is all about energy—might as well add pictures of this combination to your manicure mood board.
Bold Speckled Sunset Fade
Here, a bold approach to sunset gradient nails matches white, electric pink and ocean blue together in one smooth ombre. Its unique touch is caused by scattered fine flecks which mimic the lights from cities rising as the light of day gives way to darkness. Here, you’ll find a cool contrast between the summer light and starry sky, perfect for anyone looking for something new but stand-out.
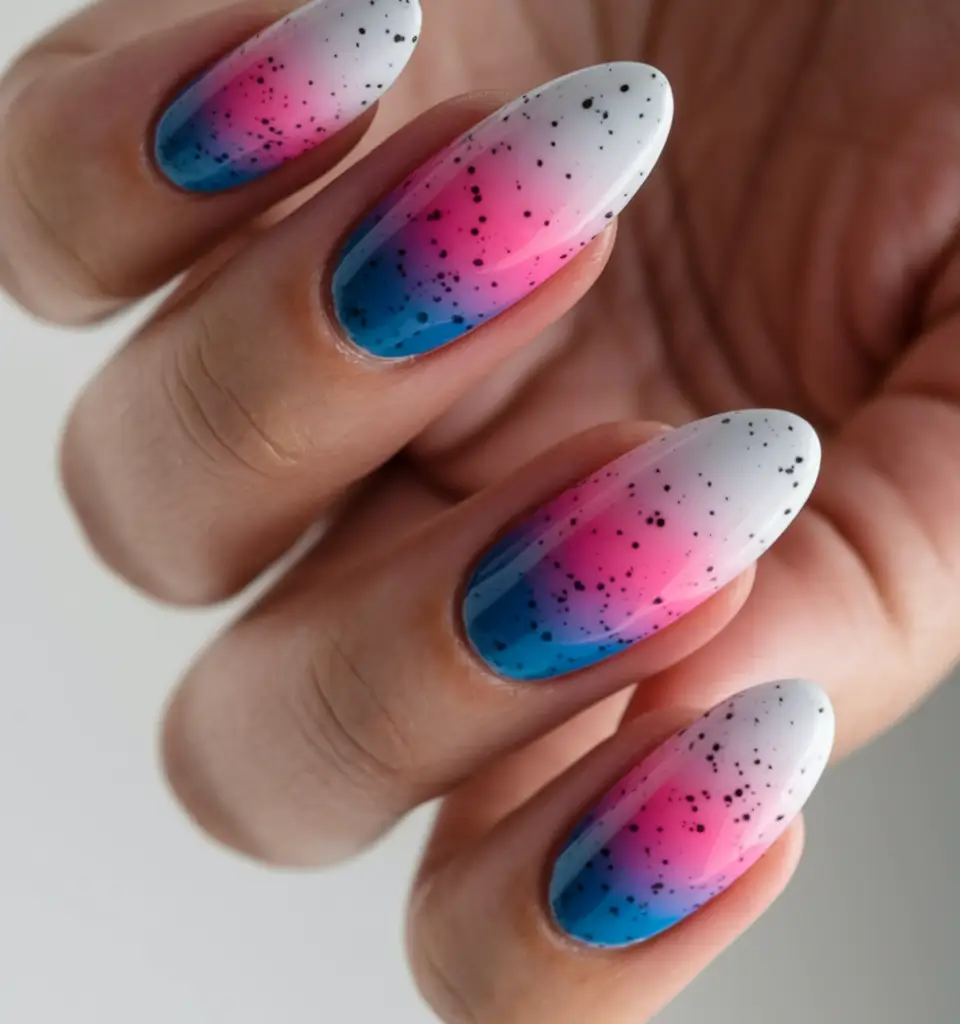
The polish choices matter here. You’ll want a bright white base (try OPI’s “Alpine Snow”), followed by sunset nail art blends like Cirque Colors’ “Chelsea Girl” (hot pink) and “High Line” (cerulean). The speckles? A dotting tool and some dark polish can create that look you’re after.
According to nail techs, using a makeup sponge helps with a perfect blended look. Paint both pink and blue over the white base and blend them upwards as you roll. Top everything with a shiny coat, then carefully dot it with a nail art brush filled with black nail polish. That finishing touch adds serious edge.
This has to be one of my top sunset nail picks this year—it’s just like those intense sunset colors that follow days in the sun and at the beach. Chic, artistic, and low-key rebellious.
Spotted Citrus Sky
If you combined a tequila sunrise and dragon fruit, you’d get this drink. These nails are a blast of sunset design—the yellow blends into orange and black speckles completes the tropical fruit look. Fun, colorful and a little wild, the bright colors of this season are sure to brighten any summer day in 2025.
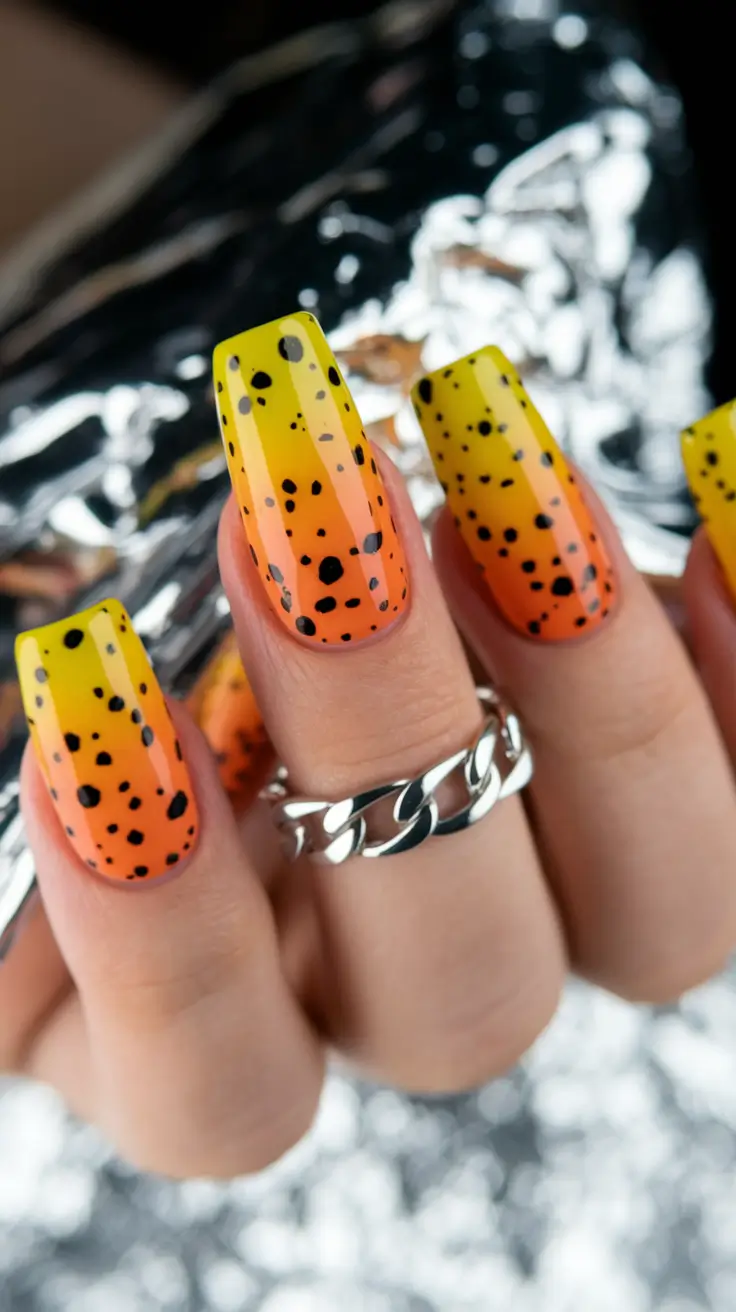
I use “Hi-Fi” by ILNP for the electric yellow and Essie “Peachy Keen” for the contrasting orange base. Black speckle gel top coat seals the deal. To get the best impression of this bold fade, choose long acrylics or press-ons.
A good tip is to put a thin layer of latex around your nails before you sponge to make clean-up simpler. Blend yellow toward the cuticle and move more toward orange at the tip of the nail. Let each layer dry before adding more intensity.
It’s a unique nail trend this season that goes well with cocktails by the sea—it’s playful and has a fruity look you need.
Glossy Orange Pulse
There’s no color that fits the sizzling sunset nails style quite like glossy orange. This manicure uses a vivid shade and just a bit of marble on its smallest nail. The result is extremely smooth and shiny—sunset nails bring acrylic finishing touches with a tasty extra.
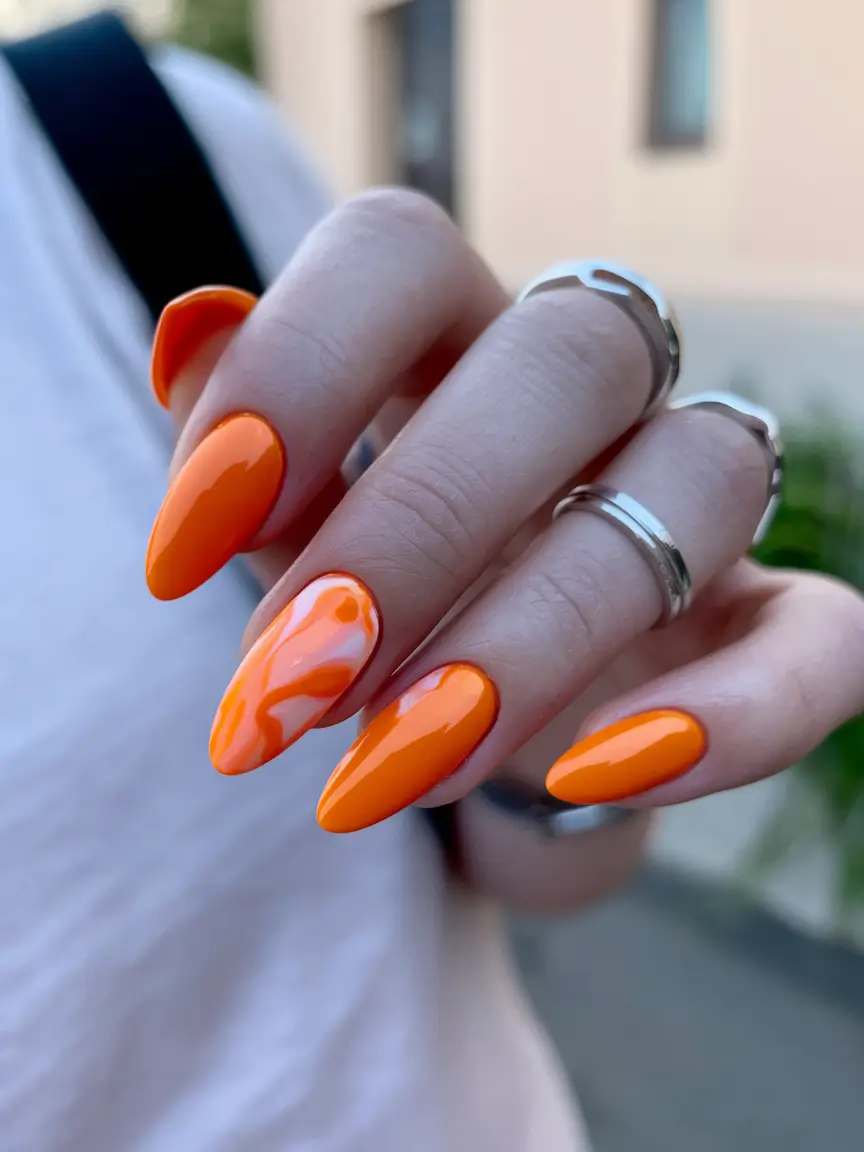
I usually use food color from The GelBottle Inc. or Bio Seaweed Gel to give the base a powerful kick. An easy way to add the swirl pattern is by using a toothpick or ultra-fine nail brush to move white paint into the orange before it is set.
You won’t have to look hard to notice this type of furniture—it stands out on its own. I wore the same outfit last July and it got people talking to me all day, everywhere I went. Pure sunset nail inspo.
Traffic Sunset Stripes
This nail color is inspired by sunset gradient nails, but uses stripes in orange, bright yellow and bold black lines. There’s a throwback sportswear style, but it is presented with a modern finish. This reminds me of traffic lights sitting behind busy windows at dusk.
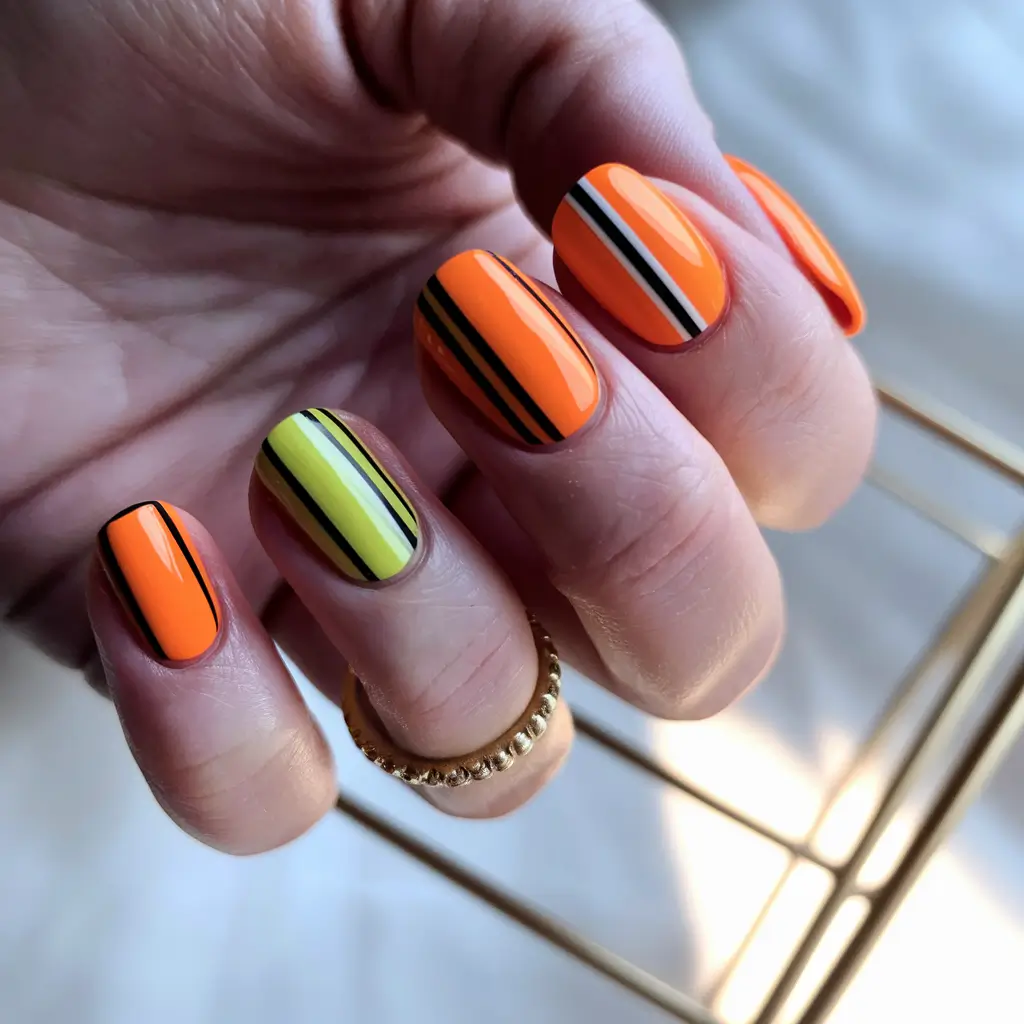
Use a liner brush and some tape when you want crisp lines. Start with a base of vivid orange (try Beetles “Mandarin Pop”) and a neon lime (Lights Lacquer’s “Send Noods”) on alternating nails. Then outline stripes with black polish or striping tape.
This is a perfect choice for sunset nails short—it’s bright and can be worn every day without much trouble. Plus, it’s great for gel fans—just make sure your stripes are totally dry before you top coat to prevent bleeding.
Desert Mirage Waves
Besides the blush pink, the flowing orange details in this design add soft, dreamy energy. The tallest and sliciest design styles it up, while the soft, wavy pattern softens everything else. Think desert sands and mirages under a peachy sky.
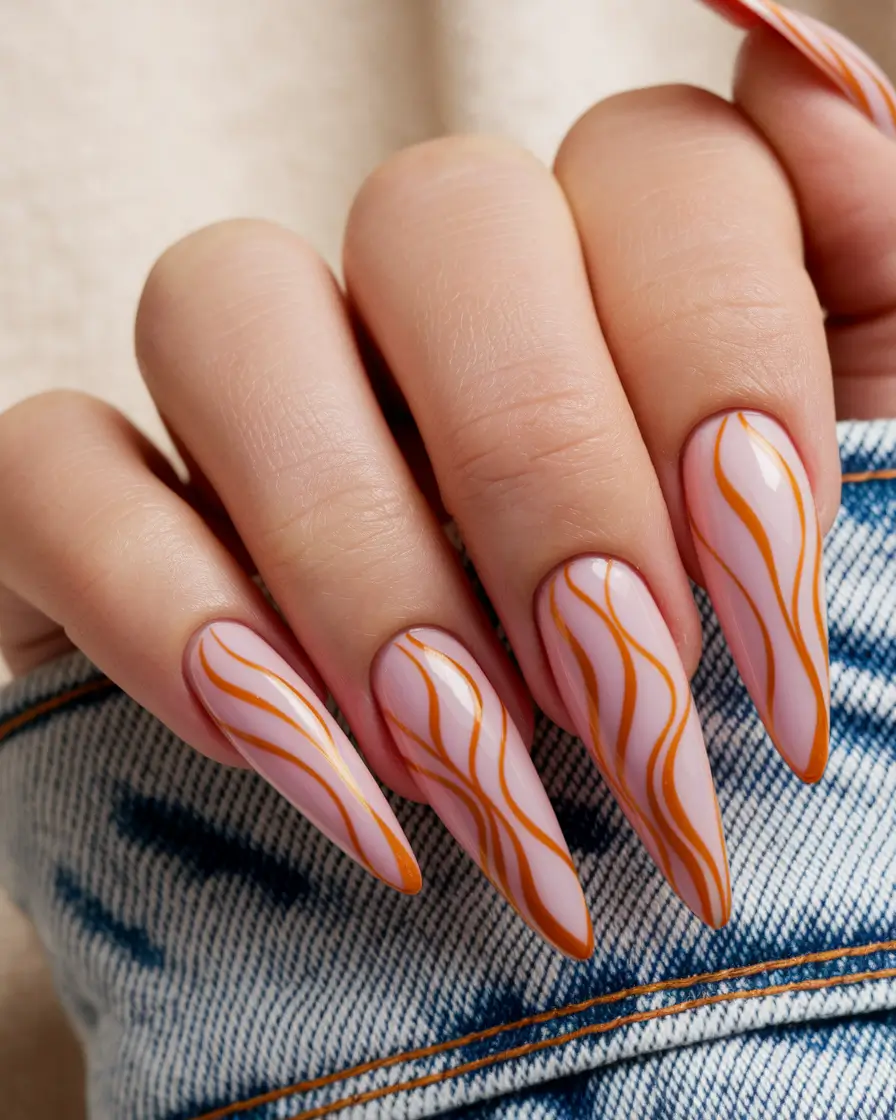
I think “Ballet Slippers” from Essie makes a great base for this design and you can use a nail art brush to draw on the orange ribbons. A jelly finish orange will add a transparent, flickery look to your vaping.
Reminds me of a trip I made through Arizona at the height of summer. It is simple to shoot yet always looks truly professional. If pastel sunset nails aren’t your thing, you might like this simpler version which uses fewer colors.
Save Pin